How to make Fairy House Jars with air drying clay: Easy DIY tutorial
Something fun to make... these little fairy houses are actually jars in which you can store tiny treasures. Bring out the air drying clay, and the acrylic paints, and let's begin. This is a long craft activity and will take a few hours. You can use store-bought clay or home-made one. Here is our tried and tested recipe for air drying clay:
1 cup corn flour
1/2 cup fevicol / white craft glue
2-3 spoons white vinegar
2-3 spoons of Vaseline or oil
Mix the corn flour, fevicol and vinegar. If too sticky, put loads of oil or Vaseline on your hands while kneading. Once the consistency is like clay, keep it in an airtight container and use it fast! Takes about a day to become fully dry. Then paint with acrylic colours.
Hope you guys have fun making these. If you do, do share and tag us on instagram as @skygoodiesco. We can't wait to see what you make!
------------------------
THANK YOU FOR THE MUSIC BY
Kai Engel - Holiday Gift
https://freemusicarchive.org
______________________________________________________
Detailed step-by-step instructions below:
This tutorial uses materials that you can find at home or can get easily.
You will need:
Air drying clay, home-made or from a store
Small glass jars with screw top lids
Aluminium foil
Toothpicks
Acrylic paints
Paint brushes
Start by thinking of the kind of fairy jar you want to make.
For example, the top could be flowers or leaves, or mushroom heads.
For the fairy house with a flower-shaped top, crumple and mould some aluminium foil to the top of the lid.
Cover it with air drying clay.
Mould the clay with your hands to make petals for the lid.
Mould and attach sepals and a base stem.
On the bottom half of the jar, add details of doors, windows, plants and grass with air drying clay.
Use toothpicks to make grooves and shape the clay.
Set the jar aside to dry for 3-5 hours.
For the mushroom-shaped fairy house, you will need more clay on the lid.
Make a large mushroom shape and let it dry for half an hour.
Then add some details, like a chimney and a window.
On the bottom half of the jar, add details of doors, windows and grass with the clay.
Add a mushroom or two if you like. Set the jar aside to dry for 3-5 hours.
With acrylic paints, add colour to your house, starting with a base coat.
You may need to put 2-3 coats of paint on the glass part of the jar.
Use your imagination to add colour to your little fairy houses, painting in the details with a fine brush.
Let the paint dry for 3-5 hours.
Voila! Your fairy house jars are ready to be filled with small treasures.
Видео How to make Fairy House Jars with air drying clay: Easy DIY tutorial канала Sky Goodies
Показать
Комментарии отсутствуют
Информация о видео
Другие видео канала
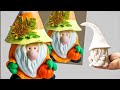 Gnome with Face Using Jar & Air Dry Paper Clay, Easy DIY Thanksgiving Craft Idea
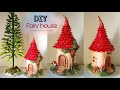 Fairy house diy/Fairy house bottle art/Honey bottle craft/best out of waste/Glass bottle craft idea
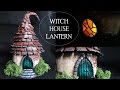 Polymer Clay Witch House Lantern/Jar // Maive Ferrando
 DIY Fairy House from Bottles | How to make a fairy house from jar with your own hands
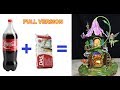 DIY Lily Flower Roof Fairy Using Plastic Bottle - FULL DETAIL
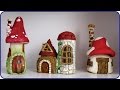 ❣DIY Faux Stones & Wood - Fairy House Jars❣
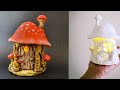 Easy Toadstool Mushroom Fairy House Jar DIY Lantern Craft Idea, Air Dry Clay Tutorial #1
 Polymer Clay Fairy House with Arteza Clay
 DIY Flowering vine Fairy House Lamp Using Plastic Bottles and Das clay
 Air Dry Clay Slip - How I Make Mine - The Glue
 How to make a blossom fairy house from polymer clay
 Clay compilation 🌴🌕💐💫🪐|Tube tok
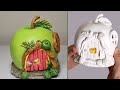 DIY Apple Fairy House Using Jar, Cardboard, Paper, and Homemade Clay Craft Idea
 DIY Fairy Garden Lamp using Nutella Jar ✔️ FULL Version ✔️ Creative D2H #25
 Clay Hand Building a Gnome
 Polymer Clay Fairy House Jar Lantern || Maive Ferrando
 ❣10 DIY Fairy House Lamps Using Plastic Bottles❣
 The Best Paper Clay Recipe without water | How to make paper clay for modeling
 ❣DIY Fairy House Using Cardboard❣
 5 Craft Ideas to Make and Sell | Air Dry Clay