Professional Baker Teaches You How To Make CHECKERBOARD COOKIES!
Checkerboard Cookies are on the menu in Chef Anna Olson's amazing kitchen, and she is going to teach you how to make this delicious recipe from scratch! Follow along with the recipes below!
Subscribe for more video recipes: http://goo.gl/MJV4af
Recipe
Yield: 4-5 dozen
Prep Time: 45 minutes
Bake Time: 12 minutes
Ingredients
Vanilla dough
1 cup (225 g) unsalted butter, at room temperature
1 cup (130 g) icing sugar, sifted
½ cup (100 g) granulated sugar (caster sugar)
1 large egg
1 large egg yolk
1 tsp (5 mL) vanilla bean paste or extract
2 ½ cups (375 g) all-purpose flour (plaon flour)
½ tsp (2 g) salt
Chocolate dough
1 cup (225 g) unsalted butter, at room temperature
1 cup (130 g) icing sugar, sifted
½ cup (100 g) granulated sugar (caster sugar)
1 large egg
1 large egg yolk
1 tsp (5 mL) vanilla extract
2 cups (300 g) all-purpose flour (plain flour)
½ cup (60 g) cocoa powder (Dutch process or natural)
½ tsp (2 g) salt
Directions
1. For the vanilla dough, beat the butter, icing sugar and granulated sugar well, using electric beaters or a stand mixer fitted with the paddle attachment, until smooth and fluffy. Add the egg, egg yolk and vanilla and beat in well. Add the flour and salt and mix until the dough comes together (it will be soft.) Shape the dough into 2 discs, wrap in plastic wrap and chill until firm, about 2 hours. Alternatively the dough can be made ahead and frozen, then thawed in the fridge before baking.
2. For the chocolate dough, beat the butter, icing sugar and granulated sugar well, using electric beaters or a stand mixer fitted with the paddle attachment, until smooth and fluffy. Add the egg, egg yolk and vanilla and beat in well. Add the flour, cocoa powder and salt and mix until the dough comes together (it will be soft.) Shape the dough into 2 discs, wrap in plastic wrap and chill until firm, about 2 hours. Alternatively the dough can be made ahead and frozen, then thawed in the fridge before baking.
3. On a lightly floured surface, divide the first disc of vanilla dough in half, knead each piece lightly to soften and roll out each to a rectangle that is about 8-x-5-inches (20-x-12-cm) and ½-inch (12 mm) thick. Set aside and do the same with the chocolate dough.
4. Brush the surface of one of the chocolate dough pieces with a little water and place a vanilla piece on top. Brush this with water and top with a chocolate piece, brush again and finish with the vanilla dough. Trim away the edges of all 4 sides. Cut strips lengthwise that are ½-inch (12 mm) thick. If the dough starts to get soft as you work with it, pop it in the fridge to chill 10-15 minutes.
5. To create the checkerboard, lay a strip of this striped dough flat and brush it with a little water. Lay a second strip on top, but inverted so that the chocolate stripes lay on top of the vanilla and vice versa. Repeat with 2 more strips of dough, inverting each time. You will now have a block of dough that has a checkerboard pattern of 4-x-4 squares. Repeat this with any remaining strips of dough (you will likely get 2 logs.)
6. Take the second disc of chilled chocolate dough, divide it in half and roll out into a rectangle that is ¼-inch (6 mm) thick but the width of the checkerboard piece and at least 8-inches (20 cm) long. Brush the checkerboard lightly with water and place it close to one short end of the dough. Roll up the checkerboard in the chocolate dough, brushing each side with water as you go. Trim the dough so the seam is not visible (it works best to make the seam on a flat side, not a corner of the dough) and trim the ends. Now your checkerboard is framed with chocolate cookie dough. Wrap and chill the dough to set it, about an hour. You can repeat this process with vanilla dough for the other checkerboard log. Any excess dough can be rolled, measured and shaped again, or simply roughly stacked for a marble effect when sliced.
7. Preheat the oven to 350 F (180 C) and line 2 baking trays with parchment paper. Slice the checkerboard dough into cookies that are ¼-inch (6 mm) thick and lay them out on the baking trays, leaving an inch (25 mm) in between them. Bake the cookies for about 12 minutes, until the cookies lift easily from the tray and are lightly golden on the bottom. Cool the cookies on the baking tray before removing.
The cookies will keep in an airtight container for up to 5 days.
Shop Anna Olson Cookbooks:
http://lickst.at/shopannaolson
Follow Anna on social media:
Pinterest: https://pinterest.com/chefannaolson
Twitter: https://twitter.com/olson_anna
Facebook: https://www.facebook.com/chefannaolson
Instagram: https://instagram.com/chefannaolson
Anna's Official Website: http://annaolson.ca
Follow Oh Yum on...
Facebook: https://facebook.com/ohyumfood
Instagram: https://instagram.com/ohyumfood
Pinterest: https://pinterest.com/ohyumfood
Twitter: https://twitter.com/ohyum_food
Official Oh Yum Website: https://ohyum.tv
#OhYum #CookieRecipe #Cookies
Видео Professional Baker Teaches You How To Make CHECKERBOARD COOKIES! канала Oh Yum with Anna Olson
Показать
Комментарии отсутствуют
Информация о видео
Другие видео канала
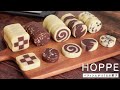 バレンタイン アイスボックスクッキー 作り方 Icebox Cookies HOPPE
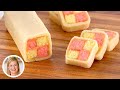 Professional Baker Teaches You How To Make CHECKERBOARD CAKE!
 10 Cookie Shaping Hacks to Impress All the Cookie Lovers!! So Yummy
 How To Shape Checkerboard Cookies | ATCO Blue Flame Kitchen
 Checkerboard cookies/ Christmas fun cookies
 Professional Baker Teaches You How To Make GELATO!
 Professional Baker Teaches You How To Make CHICKEN POT PIE!
 Professional Baker Teaches You How To Make ICE BOX COOKIES!
 Professional Baker Teaches You How To Make APPLE TARTE TATIN!
 Professional Baker Teaches You How To Make VANILLA COOKIES!
 Checkerboard Cookies Recipe Demonstration - Joyofbaking.com
 Professional Baker Teaches You How To Make JELLY DONUTS!
 My Favourite Butter Cookie Recipe
 Professional Baker Teaches You How To Make PETITS FOURS!
 Professional Baker Teaches You How To Make MERINGUE TARTS!
 Professional Baker Teaches You How To Make ICEBOX COOKIES!
 Professional Baker Makes TWIX Chocolate Bars!
 Professional Baker Teaches You How To Make CHOCOLATE CAKE!
 Professional Baker Teaches You How To Make CHOCOLATE MOUSSE CAKE!