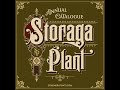
Reverse Glass Gilding Part 03 - Finishing
After the gold leaf attached perfectly to the glass, now we can go to the next step: back up paint to the Gold Leaf surface, then removing the gold excess, giving the "Poorman Etched" texture as a filler inside the design. And then painting the shadow and background as the finishing touch to the whole design.
.
Thank you for joining the process with us. Please let us know if you have any questions regarding this simple glass gilding technique and process.
Видео Reverse Glass Gilding Part 03 - Finishing канала Ephemera Fonts
.
Thank you for joining the process with us. Please let us know if you have any questions regarding this simple glass gilding technique and process.
Видео Reverse Glass Gilding Part 03 - Finishing канала Ephemera Fonts
Показать
Комментарии отсутствуют
Информация о видео
Другие видео канала
 Timelapse - Vintage Labels Design.
 Glass gilding process
 Tutorial - Ink Bleed Effect in Photoshop
 Header Ephemera
 Create Block Shadow in Illustrator - Adobe Illustrator Tutorial
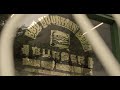 Sign Painting and Glass Gilding at BBQ Mountain Boys Burger
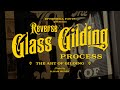 Gold Leaf Letters - Reverse Glass Gilding Process
 Reverse Glass Gilding Part 01 - Pre Production
 Remove excess gold leaf
 Reverse Glass Gilding Part 02 - Water Gilding