Sequator Milky Way Stack Tutorial - 2021 Edition
In this video I'll explain my Milky Way workflow using Sequator, Camera RAW, and Photoshop.
In order to follow along, you'll want 10 - 20 images of the Milky Way. These should be taken one-after-the-other, so the stars don't move too much between your first and last shot.
First, we use Adobe Bridge to open our RAW images in Camera RAW. From there, we can apply some basic corrections and adjustments to the RAW images. Once the photos look good, we can save them as TIFF files. At that point, we're ready to stack the photos in Sequator. After the images have been stacked together, you can bring the final TIFF into Photoshop and begin the processing.
You can download Sequator here:
https://sites.google.com/view/sequator/
To learn more about astrophotography, check out my Astro Post Processing Course:
https://www.peterzelinka.com/astrophotography-post-processing
00:00 - Intro
00:57 - Taking your Photos
1:58 - Basic Edits in Camera RAW
8:57 - Sequator Tutorial
14:20 - Before/After Stack Comparison
17:02 - Photoshop Workflow
22:44 - Outro
Видео Sequator Milky Way Stack Tutorial - 2021 Edition канала Peter Zelinka
Показать
Комментарии отсутствуют
Информация о видео
Другие видео канала
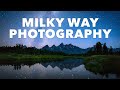 Milky Way Photography Tutorial - The COMPLETE Guide for Beginners
 SEQUATOR TUTORIAL - BEST Free STACKING Software for MILKY WAY Pictures in 2021?
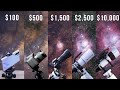 Astrophotography from $100 to $10,000
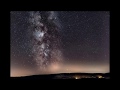 Sequator - darmowy i łatwy program do stackowania zdjęć...
 Stacking Tracked Milky Way Exposures & Compositing Them With A Foreground
 Milky Way Stacking Guide: START to FINISH
 Noise Free Milky Way Panoramas Using Starry Landscape Stacker (or sequator for pc)
 Milky Way timelapse compilation & relaxation - 4K
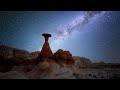 Take Better Milky Way Photos in 2020
 Noise-Free Milky Way Photos by Stacking Multiple Exposures (Sequator)
 Milky Way Editing & Blending
 How to Edit Milky Way Photos in Lightroom for Great Results
 Star Tracker Buying Guide | 2021 Edition
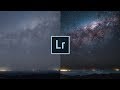 How to make your ASTROphotography POP - Fast!
 Sequator - FREE PC Milky Way Stacking software that reduces noise
 Astrophotography Made Easy - Part 4: Processing
 DSLR Astrophotography - Get the Best Results from your Camera!
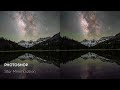 Basic Photoshop Milky Way Stacking & Blending Tutorial
 Edit Along - Milky Way Processing with Photoshop