Tips for Starting a Poultry farm and Business Before Quiting your job / Chicken rearing in Kenya
CHEAP MODERN CHICKEN HOUSE CONSTRUCTION PART 1 (How to to build a chicken House)- https://www.youtube.com/watch?v=Soz0J...
MILLIONAIRE 2019 Young Lady Chicken farmer Success Story (PART 1-https://www.youtube.com/watch?v=lmmil...
I STARTED WITH 600 CHICKEN NOW I HAVE 6000 CHICKEN- https://www.youtube.com/watch?v=0gikR...
Read through this guide for your insight and foresight benefit.
[25/10 20:07] Antonio Mudongi: Before Your Chicks Arrive: Setting the Stage
-- Brooder: a safe place to keep chicks warm, watered, and fed. You can buy or build elaborate brooders, but many chick growers go with a large plastic tote or large cardboard box. Be certain to have the right size (with high walls) for the number of chicks. You can also start small and move to a larger brooder as the chicks get older. Finally, you'll want a (ventilated) lid to keep brave chicks from escaping once they get bigger.
--Brooder location: You want to keep the brooder in a warm, dry place; many people set it up in a garage, others do it in their house, while yet others do it in the chicken coop (if there are no adult chickens in the coop).
-- Heat lamp: Fairly essential to keeping the chicks warm and their temperature regulated, as they can't do so initially. You can use a regular lamp and lightbulb, but products made for this purpose (with a guard) are a bit safer and more consistent. Attaching heat lamp to a 2x4 across top of brooder works well as does attaching it to a floor lamp's pole.
--Thermometer: While not absolutely crucial, a thermometer will help you more easily monitor the temperature in the brooder.
-- Bedding: Pine shavings in general are the best materials, but in the first week or so, we like newspapers with a layer of paper towels on top (because the chicks will try eating the pine shavings).
-- Waterer: Absolutely essential to have one or more waterers designed specifically for chicks; other systems will lead to sad results and death.
-- Feeder: You don't necessarily have to get chick feeders (though it's recommended). If you don't use a chick feeder, be more vigilant about keeping the feed clean (from poop) and dry. Some experts recommend simply placing the feed on a paper plate for the first few days.
-- Chick starter feed: It's essential to use a feed specifically designed as starter for chicks; your main choice will be deciding between regular and medicated. Feed this feed for the first 8 weeks or so.
- Administer Alermycine for 7 continuos days in water.
-- Coop: Unless you're keeping the brooder in the coop, you don't technically need to have it ready now, but it's best
-- as time will pass quickly. Every imaginable type of chicken coop exists
-- and your goal should be to find/build the one that best fits your needs/code/number of chickens.
-- Pen: The healthiest chickens are the ones who forage the yard for their food, thus you should have a plan for where you'll let your chickens roam, from one nicely fenced pen to a series of pens, to a moving pen, to your entire backyard. The pen should be fenced/enclosed to protect chickens from predators.
[25/10 20:18] Antonio Mudongi: Day 1: Acclimating Chicks
-- Temperature: Brooder temp should be 50 degrees.
-- Water: First thing to do when baby chicks arrive is to take one at a time and dip their beaks in the water and be certain they drink; this step is absolutely essential to survival. Refill waterer often.
-- Feed: Once the chicks have had a drink, repeat the process with their feed.
-- Location: Keep feed and water on outskirts of heat lamp, ideally on opposite sides (with heat lamp in the middle) to keep water from feed.
-- Sleep: Expect the chicks to sleep quite a lot during this first week.
Week 2: Baby (Chick) Steps
-- Temperature: Bring down brooder temperature 5 degrees to 45 degrees.
-- Water: Check and refill waterer(s) at least twice a day. Clean regularly with diluted vinegor.
-- Feed: Keep with the starter feed. Be vigilant about keeping feed free of moisture and chick poop. Using a piece of plywood or extra floor tile, raise waterer and feeder for less waste and mess.
-- Feathers: You'll begin to see small feathers replacing the fluff on your chicks' wings and tail.
-- Bedding: Switch to pine shavings
-- about 1-2 inches deep; clean brooder before doing so.
-- Grit: Introduce a small amount of fine "chick" grit to chicks' diet ; needed to assist in digestion (which they would normally get if raised naturally outside).
-- Perch: Consider adding a small, chick-sized perch in brooder for "roosting 101" -- made easily with three small branches in an H-shape.
-- Socializing: If your chicks are going to be more than simply production birds, now is the time to acclimate the chicks to you.
Week 3: Keeping a Lid On
-- Temperature: Bring down brooder temperature 5 degrees to 40 degrees by raising heat lamp about 3 inches.
-- Lid: Now's the time when you should start putting a lid on your brooder.
Видео Tips for Starting a Poultry farm and Business Before Quiting your job / Chicken rearing in Kenya канала AfriChic
Показать
Комментарии отсутствуют
Информация о видео
Другие видео канала
 MILLIONAIRE CHICKEN FARMER
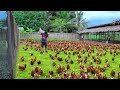 Free-range Chicken Farming ( Episode 59)│Harvesting hundreds of eggs & Feeding 800 native chickens
 SEEDS OF GOLD: How to earn millions from poultry farming
 Poultry Farming | Open House Battery Cage System | Egg Production in India
 BOI Weekly | 08/10/2020
 CHEAP MODERN CHICKEN HOUSE CONSTRUCTION PART 1 (How to to build a chicken House)
 How Poultry Farm Make Million Eggs and Meat - Inside Modern Chickens Farm - Poultry Farm Technology
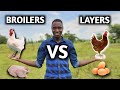 Layers vs Broilers | Which is More Profitable?
 Harvesting chicken eggs│Building low-cost chicken barn & Adding newly hatched chicks ( Feeding time)
 How to manage a large poultry farm
 Secrets to Raising Baby Chicks With NO DEATHS / How to BROOD CHICKS
 From employment to a thriving chicken farm, working on bridging the protein nutrition gap. #Kamsa
 Harvesting hundreds of eggs & Breeding pen is finally done│Feeding & Preparing chickens for breeding
 Tips on How much Money/Budget You Need To Start a Layers Farm
 HOW TO BUILD CHEAP MORDERN BROILER CHICKEN HOUSE PART 1
 AYEKOO: POULTRY FARMING
 PIGGERY FARMING In UGANDA!| I earn Millions From Piggery!
 Profeeds Small Scale Egg Production MasterClass
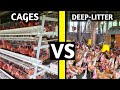 Battery Cage VS Deep Litter System | WHICH IS BETTER?
 26 YEAR OLD GIRL WHO STARTED WITH 5 CHICKEN AND NOW HAS 2000 CHICKEN in Uganda