$500 Pyramid Cabin: Start To Finish
Eden's Return Farm DIY Log Cabin Pyramid Project
We started our log cabin pyramid project because we needed a strong, low-cost, and multi-purpose building for different uses throughout each season. During the Spring we needed a small wood heated greenhouse for starting our seedlings, during the Summer we needed a guest mini-cabin, during the Fall we needed an area for air drying our vegetables, and during the Winter we needed a garden equipment storage area.
Step 1
The frame of the building is made from four pine trees we fell from the back of our woodlot (6 inch diameter at the base and about 30 foot tall each). We then cut each tree into two 12 foot sections (for a total of eight 12 foot sections).
Required Materials:
4 free 30 foot pine trees (or eight 12 foot 4x4's purchased from a local lumber supply store)
Required Tools:
Axe
Handsaw
Tape measure
Step 2
The frame of the building is made from four pine trees we fell from the back of our woodlot (6 inch diameter at the base and about 30 foot tall each). We then cut each tree into two 12 foot sections (for a total of eight 12 foot sections).
We took four of the 12 foot base sections of each tree, marked them at a 45 degree angles using a speed square and black marker, then using a hand saw cut out the angle on each end. We then set them up on four cinder blocks (one cinder block for each corner), and screwed them together using 3 inch deck screws.
We then took the four 12 foot top sections of each tree, marked them at a 45 degree angles using a speed square and black marker, then using a hand saw cut out the angle on each end, and then cut a point on the top ends.
We then used a 8 foot ladder to rest the top 12 foot sections on while screwing them in at the base frame cinder block corners. After screwing the strut arms to the base frame, we climbed the 8 foot ladder, and screwed all the top pointed ends together to finish the main pyramid frame.
We then famed in our 5 windows and 1 door (from Habitat For Humanity) using the rest of the four pine trees we fell from our woodlot. We then used 8 free pallets (from a local livestock feed store) to create the base for our floor.
We then used 50 eight foot 1x8 pine boards for the siding and 12 eight foot 1x6 cedar boards for the corners (purchased from a friend who mills homemade lumber). To make our angles for the siding, we screwed in a screw at the top and bottom of the strut arms after screwing on our siding boards, then we attached a piece of string to each screw at the top and bottom, using the string as a guide we then traced out our angle marks following the angle of the strut arms. We then unscrewed the boards from the building, to cut out our angles, and then reattached the siding back to the building one side at a time. We then used 40 eight foot 1x10 pine boards to finish our raised pallet floor. We left a 2 foot by 3 foot opening in the middle of the floor plan allowing us to add a firebrick base for our wood stove.
Required Materials:
4 free 30 foot pine trees (or eight 12 foot 4x4's purchased from a local lumber supply store)
5 windows and 1 door (purchased from Habitat For Humanity for $30)
8 pallets (free from local livestock feed store)
50 eight foot 1x8 pine boards (purchased from a friend who mills homemade lumber $160)
12 eight foot 1x6 cedar boards (free for helping a friend install a garden)
40 eight foot 1x10 pine boards (purchased from a friend who mills homemade lumber $160)
5 lb box of 3 inch deck screws (purchased from a local hardware store $25)
12 free repurposed firebricks (for wood stove base)
4 free repurposed cinder blocks (for raising the base logs up off the ground)
Total $375
Required Tools:
Handsaw
Tape measure
Speed square
Marker
Drill
String
Step 3
We used free metal roofing (waste from a construction company installing new metal roof) to create our metal roof. We cut out 4 three foot sided triangles to make our metal roof and we cut 4 three foot sections of metal drip edge to close the seams on the corners. We used 1 gallon of outdoor deck stain to weatherize our wood siding. We used 10 tubes of outdoor clear sealant to weatherize all the seams between siding, windows, door, and metal roof. We cut out a opening at the top of our metal roof for our stove pipe. Lastly we installed our wood stove, stove pipe, and rain cap (termination).
Required Materials:
4 three foot by three foot metal roofing sheets (free waste from a new roof)
4 three foot sections of metal drip edge (free waste from a new roof)
1 gallon outdoor deck stain (purchased from a local hardware store $25)
10 tubes clear outdoor sealant (purchased from a local hardware store $25)
Wood stove, stove pipe, and rain cap (purchased from Habitat For Humanity $75)
Total $125
Required Tools:
Metal hand snips
Tape measure
Square
Marker
Drill
Paint brush
Cualking gun
Like Our Facebook Page
EdensReturn
https://www.facebook.com/EdensReturnFarms
Видео $500 Pyramid Cabin: Start To Finish канала EdensReturn
Показать
Комментарии отсутствуют
Информация о видео
Другие видео канала
 EdensReturn Farm update 6/12/23
 EdensReturn Farm Update 6/1/23
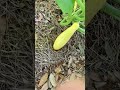 EdensReturn Farm update 5/3/23, Navarre Florida
 EdensReturn Farm (Navarre, Florida)
 EdensReturn Farm Update 4/13/23
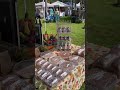 EdensReturn South (Navarre, Florida) Farm Update Mardi Gras event @Ye Olde Brother’s Brewery 2/25/23
 EdensReturn South (Navarre, Florida) Farm Update 2/4/23
 EdensReturn South (Navarre, Florida) Farm Update Navarre Beach Sunset
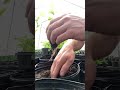 EdensReturn South (Navarre, Florida) Farm Update: Transplanting Kale
 EdensReturn South (Navarre, Florida) Farm Update 12/7 Harvesting organic romaine and Swiss chard
 EdensReturn South (Navarre, Florida) Farm Update 12/6/23
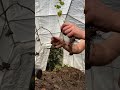 EdensReturn South (Navarre, Florida) Farm Update 12/12/22
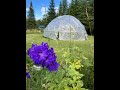 EdensReturn North (Curtis, Michigan) Farm Update 8/28/22
 EdensReturn North (Curtis, Michigan) Farm Update 7/30/22
 EdensReturn North (Curtis, Michigan) Harvest Right Update 7/30/22
 EdensReturn North (Curtis, Michigan) Farm Update 7/23/22
 EdensReturn North (Curtis, Michigan) Farm Update 7/10/22
 EdensReturn North (Curtis, Michigan) Farm Update 7/4/22
 EdensReturn North (Curtis, Michigan) Garden Love!
 EdensReturn North (Curtis, Michigan) Free Mulch For Our Food Forest!
 EdensReturn South (Navarre, Florida) Farm Update 6/26/22