Uncovering the Surprising Secret to Gluing Napkins on Bottles
Full Video https://youtu.be/1ZjyxNqlyd8
Last Week's Video;
Back To Basics Ep. 4 How To Decoupage No More Wrinkles
https://youtu.be/btKtZBiuTtQ
Traditional decoupage is a decorative art form that involves applying paper or fabric cutouts to a surface and then sealing them with a clear finish. The word "decoupage" comes from the French word "decouper," which means "to cut out."
To create a decoupage project, you will need a few basic supplies, including:
1. A surface to decorate, such as a wooden box, picture frame, tray, or bottle
2. Paper or fabric cutouts, such as magazine clippings, scrapbook paper, or tissue paper
3. Mod Podge or another type of decoupage medium
4. Paintbrushes
5. Scissors or a craft knife
6. Sandpaper (optional)
Here are the basic steps for creating a decoupage project:
1. Prepare your surface: If you are using a wooden surface, sand it lightly to smooth out any rough spots or imperfections. Wipe away any dust or debris with a clean cloth.
2. Choose your cutouts: Select paper or fabric cutouts that match your desired design. You can use one type of cutout or mix and match different patterns and textures.
3. Apply the decoupage medium: Using a paintbrush, apply a thin layer of decoupage medium to the surface where you want to place your cutouts. Place your cutouts onto the surface, overlapping them as desired.
4. Seal the cutouts: Once your cutouts are in place, apply another layer of decoupage medium over the top of them. Smooth out any wrinkles or bubbles with your fingers or a clean cloth. Repeat this process until all of your cutouts are covered.
5. Finish the project: Once the decoupage medium is dry, you can add any final touches, such as a coat of clear sealer or additional embellishments.
Decoupage is a versatile and fun craft that can be used to create a wide range of decorative items, from home decor to personalized gifts. With a little bit of practice, you can master the art of decoupage and create beautiful, one-of-a-kind projects!
Combining paper napkins and fabric decoupage can create a unique and interesting texture for your project. To get started, you will need the following supplies:
1. A surface to decorate, such as a wooden box or picture frame
2. Paper napkins and fabric pieces
3. Mod Podge or another type of decoupage medium
4. Spray adhesive
5. Paintbrushes
6. Scissors or a craft knife
7. Sandpaper (optional)
Here are the basic steps for combining paper napkin and fabric decoupage with spray glue:
1. Prepare your surface: If you are using a wooden surface, sand it lightly to smooth out any rough spots or imperfections. Wipe away any dust or debris with a clean cloth.
2. Cut out your designs: Cut out your paper napkins and fabric pieces into the desired shapes and sizes.
3. Apply the spray adhesive: Hold your paper napkin or fabric piece over a piece of scrap paper or newspaper, and lightly spray it with the spray adhesive. Make sure to hold the can at least 6 inches away from the material to avoid over-saturating it. Allow the adhesive to dry for a few seconds until it becomes tacky.
4. Place the material: Once the adhesive is tacky, carefully place the material onto your surface, smoothing out any wrinkles or bubbles as you go. Repeat this process with each piece of material until your design is complete.
5. Apply decoupage medium: Once your design is complete, use a paintbrush to apply a layer of decoupage medium over the entire surface, making sure to cover all of the edges of the paper napkins and fabric pieces. This will seal them to the surface and create a protective layer.
6. Finish the project: Allow the decoupage medium to dry completely before adding any final touches, such as additional embellishments or a coat of clear sealer.
Using spray adhesive for paper napkins and fabric pieces can make the process faster and easier, but be sure to use it in a well-ventilated area and follow the manufacturer's instructions carefully. With a little bit of practice, you can create beautiful and unique decoupage projects using this technique!
Видео Uncovering the Surprising Secret to Gluing Napkins on Bottles канала DIYNoNeedToCry
Показать
Комментарии отсутствуют
Информация о видео
Другие видео канала
 FLAMES Acrylic Paint Pouring
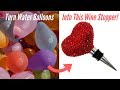 DIY Heart Wine Stopper Made Out of Balloons!
 Back To Basics Ep. 4 How To Decoupage No More Wrinkles
 DIY Caboodle Handle Part 2 (HD)
 Second Drawing New York Yankee Bottle Giveaway Winner! 🎉🎊
 Glitter Paint Palette | Glam -N- Jam Ep.1 #DripArt
 DIY Easy Bottle Design
 Practicing One Stroke Painting Relaxing Binaural Sounds
 His And Hers Camo Design | Bottle Art | Bottle Craft
 DIY Decorative Books That Serve A Purpose
 Unedited Version: How To Make Giant Clay Rose Wine Bottle Topper
 Decoupage | Back To Basics Ep. 1
 Decoupage: Why a White Base is KEY! #Decoupage
 Easy 4th Of July DIY Ideas/Upcycle
 Testing Another Faux Stained Glass Method. #FauxStainedGlass
 How To Decorate Wooden Box | Decoupage | Keepsake
 DIY 4th of July Hydro Dip | Bottle Craft | Bottle Art
 DIY Art Supply Organizers Ep 2 | Glass Jar Art | DIY No Need To Cry
 Hi crafty fam! Lets Chat | Updates | Winners | DIY No Need To Cry
 DIY Wine Bottle Idea Wine Bottle Decoration Wine Bottle Art Wine Bottle Craft