How do you build a stud wall??? - Bathroom Rebuild | P1V7 | ShortWorx
I’m a first-time home buyer with no experience of renovations and I have no idea what I’m doing…how hard can it be? Watch my vlog of the Bathroom rebuilding stage…
To Do List: Build a Stud Wall | Install Floor Boards | Batten Walls | Drywall Ceilings | Drywall Walls | Soundproof Insulation | Install Door Frame
Subscribe to catch the next video: https://goo.gl/gwp6Zu
Watch the Demolition stage here: https://youtu.be/tzLjYvsD_g4
The Bathroom rebuild started with the new partition wall in the same location as the original although it now extended across the hallway to incorporate a new door way. Like with the Kitchen wall this also sat between two of the ceiling joists so I first added bracing in between the joists to provide a secure fixing point for the top plate. I projected a line from the floor up to the new bracing. Next I cut the top plate to the correct length and screwed it in position. The new doorway needed to be as close to the adjacent wall as possible so I cut and fixed a king stud to the top plate and directly to the floor into the joist, paying attention to the crown in the wood. The crown is the natural curve in the wood, if they’re not all facing the same way I found it could cause the wall to be wavy. I followed up with the bottom plate which sat directly below the top plate, between the king stud and the brick work on the opposite side, screwed through the floorboards into a joist below.
I marked out for the rough opening of the doorway, 830mm from the King stud which allowed for a 762mm, 25mm door frame and the necessary clearance. With Jack and King position on the opposite side of the door marked on the bottom plate, I cut the King stud to length and moved it into position. The height of rough opening needed to be 2030mm to allow for a 1981mm door height, 25mm frame and the necessary clearance.
The intermediate studs were next, 400mm apart, using the Dewalt laser distance measure to find the required length. Cutting them slightly longer ensures a tight fit so they don’t need to be supported whilst I fix them with 100mm screws. Before attaching the Jack stud, I cut away the bottom plate within the doorway. I then fixed a header plate on top of the Jack stud ensuring it was level. There was no Jack stud on the other side to allow the door frame to sit closer to the adjacent wall so I fixed the header directly to the king stud. Lastly adding small studs above the header plate and bracing along the centre line of the wall.
To cover gaps in the ceiling I reinstated all the old insulation and added new insulation where necessary, then filled with new drywall to create a relatively flat surface ready to over board the entire ceiling. Using a panel lift made this reasonably easy and meant I could safely do it on my own. I secured 25mm x 50mm battens to the brickwork using 6mm wall plugs/anchors and 60mm screws, shimming them level and true where required. 5 fixings per batten roughly 600mm apart but aiming for the centre of a brick to prevent them cracking. As this is a bathroom where there’s likely to be a lot of moisture I used moisture resistant drywall. It’s slightly heavier than normal so I scored and snapped the boards down the centre but leaving the front paper intact. This allowed me to fold the boards in half, making them easier to carry up the stairs. After I’d moved them into position I could open them up like a book and fix them as normal to the battens using drywall screws at 200mm centres, butting them up to the ceiling as tightly as I could. For the new partition wall I used standard drywall as it wouldn’t be coming into contact with moisture, attached in the same way. With one side now covered I could added in the sound insulation, required by building regulations, cutting it as snug as possible. The other side of the wall was covered using more standard drywall.
Finally I moved the door frame and door into place as described in a previous video.
Thanks for watching! Please Like and Subscribe. Add a comment below if you think I could’ve done something differently or if you have any questions!
Tools (Affiliate Links) (https://goo.gl/g8W7Ai)
Makita MLS100 240V 255mm Mitre Saw (Dewalt DE7023 Universal Mitre Saw Stand)
Earlex CombiVac WD1000
Bosch GDR 10.8-LI 10.8v Impact Driver
DeWalt DC825 18v Impact Driver
Bosch GLL 3-80P Laser Level
DeWalt DC390 18v Circular Saw
DeWalt D25323K-GB 3.4kg 240V SDS Plus Hammer Drill
DeWalt D26204K 240v Plunge and Fixed Base 2 in 1 1/4" Router
Bosch GSR 10.8-LI 10.8v Hex Drill/Driver
Filming Equipment
Samsung Galaxy Note 4
Rode SmartLav+ (http://amzn.to/2w8r3OP)
Blue Yeti (http://amzn.to/2vqkxVT)
MAGIX Vegas Movie Platinum 13
Note: I’m not a professional contractor, this is not a how to video and all the tools used are my own.
Видео How do you build a stud wall??? - Bathroom Rebuild | P1V7 | ShortWorx канала ShortWorx
Показать
Комментарии отсутствуют
Информация о видео
Другие видео канала
 New Bathroom Suite Install - Bathroom Finish | P1V9 | ShortWorx
 Building a Partition Wall | The Carpenter's Daughter
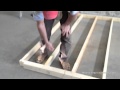 Wood Stud Wall Framing
 Bathroom Renovation #4 - Stud Pre-wall
 Repairing ROTTED Framing in a Disaster Shower
 Tommy's Trade Secrets - How To Build A Stud Wall
 HOW TO - Board a bathroom or wetroom
 How To Build A Stud Wall - (Build An Internal Wall For Plastering)
 How to Waterproof a Shower (3 Awesome Methods!!)
 SO READY FOR HOT SHOWERS! (Finishing Bathroom Framing)
 How to build a stud wall
 Building a Knee Wall for a Shower | Bathroom Remodel | PLAN LEARN BUILD
 How to Install a Complete Bathroom Step-by-Step
 How To: Frame a 16" O.C. Wall! (Most Common Wood Framing Method)
 Building a Bathroom From Scratch: Timelapse
 How To Frame An Unfinished Basement Bathroom
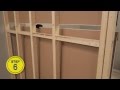 How to Build an Interior Wall | RONA
 G-man Reciprocating Saw Blade
 DIY Basement Bathroom Part 1 - Shower Stall Frame & Drain
 How to Build a Stud Wall Like a Pro ~ Extension Build #14