Using the Arduino Pro Mini & FTDI
Today we will work with the Arduino Pro Mini, a small yet powerful Arduino board. We will also build a simple battery-powered robot arm controller.
Article with code - https://dbot.ws/promini
More articles and tutorials: https://dronebotworkshop.com
Join the conversation on the forum: https://forum.dronebotworkshop.com
Subscribe to the newsletter and stay in touch: https://dbot.ws/dbnews
The Arduino Pro Mini is proof that good things do indeed come in small packages. It uses the ATMega328 processor chip, giving it all of the power of the Arduino Uno in a tiny package. It even has a couple of extra analog to digital converters and is available in both 3.3-volt and 5-volt models.
Although it has been discontinued from the official Arduino store it is an open source design (originally built by SparkFun) and is readily available.
One thing that the Pro Mini is lacking, however, is a USB port for programming and debugging.
To resolve this you will need to use an FTDI adapter, a small board that allows you to connect a USB port to your Arduino Pro Mini. It’s a simple board to use but be careful of the hookup, as some Pro Minis (and some FTDI boards as well) have their connections reversed.
I’ll show you how to hook up the FTDI board to both a 3.3-volt and 5-volt Pro Mini and how to program it using the Arduino IDE.
We will also build a battery-powered robot arm controller for the MeArm, it can be extended to work with any servo motor based robotic arm. While I will be the first to admit that the design lacks a lot of features it does a good job of illustrating how to work with the 3.3-volt Pro Mini.
Here are the contents of today's video:
00:00 - Introduction
02:35 - Pro Mini Intro
07:26 - Using the FTDI Adapter
11:16 - Programming the Pro Mini
18:48 - Robot Arm Controller
Hopefully, the video and its associated article at https://dbot.ws/promini will inspire you to build your next project around an Arduino Pro Mini.
I also want to thank everyone who has subscribed to the YouTube channel, we are now over 80,000 strong! If you haven’t subscribed yet please do, I’d love to have you as a subscriber.
Now go and build something small and wonderful with the Arduino Pro Mini!
Видео Using the Arduino Pro Mini & FTDI канала DroneBot Workshop
Показать
Комментарии отсутствуют
Информация о видео
Другие видео канала
 Arduino Pro Mini Identification - 5V, 3.3V, 8MHz or 16MHz
 Arduino Basics 101: Hardware Overview, Fundamental Code Commands
 Using Inexpensive 433 MHz RF Modules with Arduino
 The Arduino Family - Uno - Mega - Nano - Pro Mini -ATtiny85
 ARDUINO PROMINI - HOW TO UPLOAD CODE
 ATX Bench Power Supply - Convert a Computer Power Supply
 Arduino USB-to-Serial Tutorial - Programming the Pro Mini
 MOSFETs and Transistors with Arduino
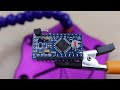 Making An Ultra Low Power Arduino Pro Mini
 Arduino Uno to ATmega328 - Shrinking your Arduino Projects
 From Idea to Schematic to PCB - How to do it easily!
 COMPARING ARDUINO (UNO, NANO & PRO MINI) - arduino-tutorials.net
 Using SD Cards with Arduino - Record Servo Motor Movements
 RCWL-0516 Microwave Proximity Sensor - With & Without Arduino
 Introduction to ESP32 - Getting Started
 How To - Cheap, DIY Arduino Irrigation Controller with MySensors
 Seeeduino XIAO - 32-bit Arduino-compatible Microcontroller
 How to program arduino pro mini without soldering on pins
 You can learn Arduino in 15 minutes.