DIY Macrame Tutorial - More Square Knot Patterns!
Square Knot Patterns
*Please note: This tutorial focuses on the pattern not the knots. If you’d like a slower, more in-depth tutorial on the square knot please click here: https://www.youtube.com/watch?v=MXvKWY7jjfk&t=5s
Pattern #1
The first pattern is a simple square knot pattern with picots. Tie your first square knot starting with the left strand in front.
Tie your second square knot starting with the right strand in front. Tie this knot about an inch down from your 1st square knot. Slide the second square knot up the middle cords (or the filler cords) to create two picots on the sides.
Continue alternating what strand you start to tie your square knot with. Tie your 3rd square knot about 2 inches down from the 2nd square knot and then slide it up the middle strands of rope.
Tie your 4th square knot about 3-4 inches down from your 3rd square knot. Slide the square knot up the centre cords.
You will now work the pattern backwards - tie your 5th square knot 2 inches down from the 4th square knot, and tie your 6th square knot 1 inch down from the 5th square knot.
Pattern #2
To create the second pattern tie all of your square knots starting with the left strand in front. All square knots will be tied to the two middle cords.
Using the four middle strands tie your first square knot. Continue tying square knots around the two filler cords in the middle. Pick up one new cord from each side to create your new square knot.
Tie 3 more square knots working the pattern in reverse. Leave a good amount of cord on both sides of your work when tying your square knots to create a circle shape.
Repeat this process until you’ve reached your desired length.
Thanks for watching! Please check out the description as I have listed a few extra resources for you there such as a link to a more in-depth tutorial on how to tie the knot used in this video.
If you like this video please hit the thumbs up below and if you have any feedback please feel free to leave a comment! Don’t forget to subscribe for more video tutorials!
2 mm and 3 mm twisted cotton string is available for purchase in my Etsy Shop (LotsofKnotsCa).
Видео DIY Macrame Tutorial - More Square Knot Patterns! канала Lots of Knots Canada
Показать
Комментарии отсутствуют
Информация о видео
Другие видео канала
 DIY Macrame Tutorial: Holiday/Winter Holly Berry Wreath!
 Fairy garden ornaments 🧚🍄❤️ #macrame #diy #christmas
 Macrame Star 🌟 Full tutorial on my YouTube channel 😊 #macrame #diy #macramedecor
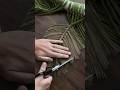 Falling leaves tutorial out now! 😊 Hope you guys enjoy this one! 🥳 #macrame #knotting #wallhanging
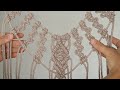 DIY Macrame Tutorial: Centre Design for your Macrame Wall Hanging!
 DIY Macrame Tutorial: Zig Zag Pattern Using Two Colours!
 DIY Macrame Tutorial: Semi-Circle Summer/Beach Wall Hanging!
 DIY Macrame Tutorial: Vertical Double Half Hitch Knot Geometric Wall Hanging Using Sari Silk Ribbon!
 DIY Macrame Tutorial: Spring Bud/Flower Inspired Wall Hanging!
 XL Macrame/Weaving Wall Hanging Update 😍
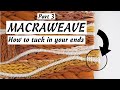 Macraweave - How to Tuck in Your Ends!/Macrame/Weaving Wall Hanging Part 3 of 3
 XL macraweave coming soon… 👀
 Final touches on this piece 😍
 Macraweave with me! Part 2 out now
 Macraweave with Me! Learn How to Fill in a Macrame/Weaving Wall Hanging! Part 2
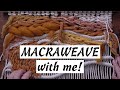 Macraweave with Me! Learn How to Fill in a Macrame/Weaving Wall Hanging!
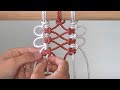 DIY Macrame Tutorial - Lark’s Head Knot Design!
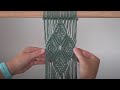 DIY Macrame Tutorial - Leaf Diamond Pattern!
 DIY Macrame Tutorial - Intermediate Butterfly Wall Hanging!
 DIY Macrame Beginner Tutorial - Berry Knot Wall Hanging!
 DIY Macrame Tutorial - Multi-Coloured Flower Pattern!