- Популярные видео
- Авто
- Видео-блоги
- ДТП, аварии
- Для маленьких
- Еда, напитки
- Животные
- Закон и право
- Знаменитости
- Игры
- Искусство
- Комедии
- Красота, мода
- Кулинария, рецепты
- Люди
- Мото
- Музыка
- Мультфильмы
- Наука, технологии
- Новости
- Образование
- Политика
- Праздники
- Приколы
- Природа
- Происшествия
- Путешествия
- Развлечения
- Ржач
- Семья
- Сериалы
- Спорт
- Стиль жизни
- ТВ передачи
- Танцы
- Технологии
- Товары
- Ужасы
- Фильмы
- Шоу-бизнес
- Юмор
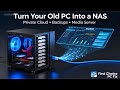
Turn your old PC into your own cloud storage
🧩 How to Turn an Old PC into a TrueNAS NAS (Step by Step)
1. Prepare your old PC
Make sure the PC powers on, has a working Ethernet port, and at least two drives (or room to add them). More drives = more storage and better protection.
2. Download TrueNAS
On a Windows PC, go to the official TrueNAS website and download the TrueNAS ISO file.
3. Create a bootable USB with Rufus
Install and open Rufus, plug in an empty USB drive, select the TrueNAS ISO, leave the default settings, and click START. This creates your TrueNAS installer USB.
4. Boot the old PC from the USB
Connect the USB to the old PC, power it on, and press the boot‑menu key (for many Lenovos this is F12). Choose the USB drive to start the TrueNAS installer.
5. Install TrueNAS
Follow the on‑screen steps to install TrueNAS to a small SSD or hard drive inside the PC. During the process, you’ll create a username and password for logging into the web interface later.
6. Get the NAS IP address
After installation and reboot, TrueNAS will show an IP address on the console screen. This is assigned automatically by your router using DHCP. Write it down.
7. Log into the TrueNAS web interface
On another PC or your phone (connected to the same network), open a browser and type in that IP address. Log in with the username and password you created.
8. Create a storage pool
In the TrueNAS web interface, create a storage pool by combining your drives. You can use mirrors for extra safety or RAID‑Z for a balanced setup of space and protection.
9. Create datasets for your data
Inside the pool, create datasets for different types of data, like “Backups,” “Media,” “Documents,” or “Projects” to keep things organized.
10. Enable SMB for Windows file sharing
Turn on the SMB service in TrueNAS so Windows can see your NAS on the network. Then create an SMB share that points to one of your datasets and make sure your user has permission to read and write.
11. Connect from your Windows PC
On your Windows computer, open File Explorer and go to . Log in with your TrueNAS username and password. Right‑click the share and choose “Map network drive” so it shows up like a normal drive letter.
12. Start using your NAS
Now you can drag and drop files, store backups, share photos, and build your own private cloud from hardware you already own.
Видео Turn your old PC into your own cloud storage канала First Choice PC Fix
Комментарии отсутствуют
Информация о видео
10 января 2026 г. 0:01:03
00:02:44
Другие видео канала