Affinity Photo: Displacement Effect FIXED - You need to see this
Learn how to actually use the Displacement Effect in Affinity Photo. Here are some awesome tricks to make it work and get great looking results.This quick fix for the broken Displacement Effect in Affinity Photo. With this solution you can get rid of the ugly outer edges.
If you know my channel, you know that i always add some extra insights. So we are going to use the Blend Ranges and an ambient Light Layer to make it look even better and really create the illusion of a Text painted onto the wall.
ORIGINAL VIDEO - Watch and Subscribe to Digitally Fearless:
https://www.youtube.com/watch?v=Zi6Or1fFQOw&feature=youtu.be
Support me on Patreon:
https://www.patreon.com/sarikas
Follow me on:
https://www.facebook.com/sarikastutorials
https://www.instagram.com/oliviotutorials/
Join Buy me a Coffee: https://gum.co/coffeeforolivio
My Facebook group:
https://www.facebook.com/groups/oliviotutorials.superfan/
Images Used:
https://unsplash.com/photos/RoqDml-KUn8
https://unsplash.com/photos/77kp2TbcPxo
Видео Affinity Photo: Displacement Effect FIXED - You need to see this канала Olivio Sarikas
Показать
Комментарии отсутствуют
Информация о видео
Другие видео канала
 How To Blend Your Logo On ANY Surface | Affinity Photo Tutorial
 Affinity Photo: Displacement Effect - Tutorial
 What are Blend modes good for? - Affinity Photo
 Displace Filter (Affinity Photo)
 Mask like a PRO - Affinity Photo Essentials
 Painted Effect with Affinity Photo
 Is this the new shape builder tool for Affinity Designer?
 Colour grading for dramatic portraiture in Affinity Photo with Ivan Weiss
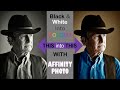 Affinity Photo - Colouring Black and White Images
 Affinity Photo: Epic Clouds Tutorial - Shape Clouds - Create God Rays
 Affinity Photo - 5 Super Tricks - That will save you Mind
 Combine two photos - the easy way! // Affinity Photo Tutorial
 AFFINITY DESIGNER for DESKTOP | Tutorial | PAPER CUT EFFECT | Heart Illustration
 Displacement Map Works in Affinity Photo
 How To Create Realistic Water Reflections In Affinity Photo
 Affinity Photo - Liquify Persona Explained
 Affinity Photo Full Composite Tutorial
 Fix Selection Brush Problems - Affinity Photo Tutorial
 Colour grading for dramatic portraiture in Affinity Photo with Ivan Weiss