► Bordered Chevron & Candy Stripe - Friendship Bracelet Tutorial
Click "Show more" to view Instructions:
◘ Beginner Basics & Knots: https://www.youtube.com/playlist?list=PL8hyTNyX1d39eMBAaIWSi_ef2-pcPYR2V
Material: Six Stranded Embroidery Floss
Note: Craft Thread or Yarn may be used instead of floss.
____________________________________________
Setup: 1 2 3 4 - 4 3 2 1
The 1's will always stay on the outside making a fk/bk on the left and a bk/fk on the right.
The middle strands 2-4 and 4-2 will make the chevron as you normall would.
Strings should be cut appx. 65" (inches) long. After cutting fold them in half and overhand knot in order to form a loop- the loop will be used when tying on the bracelet.
NOTE: Strands will become 32 inches long after the fold.
____________________________________________
■ Thumbnail bracelet setup:
1 22 33 1 - 1 33 22 1
1-Black 2-Pink 3-Blue
The thumbnail is just a bordered chevron- the second black string within the chevron base makes it appear more complex by adding some black between colors. You could easily add another black between your pinks and blues to divide them further so black encases all of the colors.
EXAMPLE:
1 22 1 33 1 - 1 33 1 22 1
1-Black 2-Pink 3-Blue
Experiment with color and placement, you may find something that you really like.
____________________________________________
Adding a border to your bracelet is pretty simple. You'll need mixed knots (Forward/Backward and Backward/Forward) and an extra strand dedicated to being the border strand.
Beginner Knot Types: www.beyondbracelets.net/beginnerbasics
The extra (border) strand should be a color that will stand out. If you make it one of the colors appearing in the bracelet then you will get a division look sort of like the thumbnail.
BASICS:
Left side border = FK/BK
Right side border = BK/FK
That's all there is to it.
I find it easiest to do the border knots first and set them aside to work on the bracelet. After each row I bring them back in and make another set of border knots. Just go back and forth between border and bracelet base and you'll soon find your own rhythm.
You can easily put two or more border strands beside one another and work with them to widen your border. Play around and see what you can come up with.
TUTORIALS:
Candystripe- http://www.youtube.com/watch?v=PLpf-zz-M9s
Chevron- http://www.youtube.com/watch?v=e0uX0kgWcO4
Double Chevron- http://www.youtube.com/watch?v=ENnQLm9rcqU
Thanks for watching!
☼ Don't forget to comment, rate and/or subscribe! ☼
Видео ► Bordered Chevron & Candy Stripe - Friendship Bracelet Tutorial канала BeyondBracelets
Показать
Комментарии отсутствуют
Информация о видео
Другие видео канала
 How to Make: Bordered Chevron Bracelets
 DIY Bordered Chevron Friendship Bracelet
 Ribbon Swirl Weave Macrame Friendship Bracelets | Easy Tutorial for Beginners
 DIY Chevron Friendship Bracelet
![[TUTO] Bracelet Bresilien facile modèle Tresse (débutant)](https://i.ytimg.com/vi/ZYqwziwOZFM/default.jpg) [TUTO] Bracelet Bresilien facile modèle Tresse (débutant)
[TUTO] Bracelet Bresilien facile modèle Tresse (débutant) DIY Diamonds & Dots Friendship Bracelets | Easy Tutorial for Beginners
 How To Make Friendship Bracelets ♥ Long Stripe
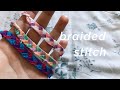 braided stitch bracelet tutorial! (beginner)
 DIY Diamond Friendship Bracelet (Advanced)
![[TUTO] Bracelet Brésilien Triangles (Intermédiaire)](https://i.ytimg.com/vi/qLpQMTmExWQ/default.jpg) [TUTO] Bracelet Brésilien Triangles (Intermédiaire)
[TUTO] Bracelet Brésilien Triangles (Intermédiaire) CHEVRON TUTORIAL || Friendship Bracelets
 》Tutorial pulsera Chevron con bordes │Macrame《
 DIY Heart Friendship Bracelets
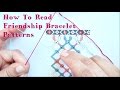 How To Read Friendship Bracelet Patterns ♥ Tutorial
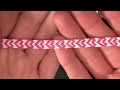 How To: Easy Two- Tone Hearts Bracelet
 DIY Easy beginning LOOP for friendship bracelets | handmade crafts | Creative Twins
 Simple Diamond Friendship Bracelet Tutorial
 How to Make a Thin (Thin Line) Solomon Bar Bracelet by TIAT
 COMO FAZER TEAR DE PAPEL E PULSEIRAS HIPPIES ➸ NIVEL FÁCIL
 TEARDROP LOOP || Friendship Bracelets