- Популярные видео
- Авто
- Видео-блоги
- ДТП, аварии
- Для маленьких
- Еда, напитки
- Животные
- Закон и право
- Знаменитости
- Игры
- Искусство
- Комедии
- Красота, мода
- Кулинария, рецепты
- Люди
- Мото
- Музыка
- Мультфильмы
- Наука, технологии
- Новости
- Образование
- Политика
- Праздники
- Приколы
- Природа
- Происшествия
- Путешествия
- Развлечения
- Ржач
- Семья
- Сериалы
- Спорт
- Стиль жизни
- ТВ передачи
- Танцы
- Технологии
- Товары
- Ужасы
- Фильмы
- Шоу-бизнес
- Юмор
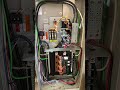
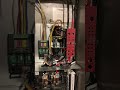
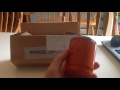
REPLACING C1 COIL AFTER A CATASTROPHIC FAILURE IN GENERAC RTS
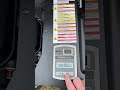
This is not an easy task even when you make yourself safe by removing power.
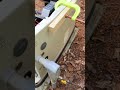
The flange on the backside of the coil must go in between the brass looking bracket and the Transfer Switch itself. The head of the screw, and the washers must drop on the left side of the brass looking bracket. The square nut must drop into the black plastic slot of the transfer switch. The screw is just long enough to perform the task. A test of patience at best.
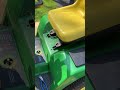
The front screw is much easier to work with. In sight and much more accessible.
Then the coil must drop over the top of the metal plunger and onto the nipple which passes through the backside of the coil.
Tightening the screw in the back is the second test of patience. You can barely see it through the right side of the coil and the fuse block interferes with the miniature screwdriver you need to get in there to tighten the screw.
You don't need loose metal parts inside an electrical enclosure.
It took me two hours to get the coil in and everything back in place and tested.
Generac needs a little better protection from brown outs.
Видео REPLACING C1 COIL AFTER A CATASTROPHIC FAILURE IN GENERAC RTS канала Snow Man
The flange on the backside of the coil must go in between the brass looking bracket and the Transfer Switch itself. The head of the screw, and the washers must drop on the left side of the brass looking bracket. The square nut must drop into the black plastic slot of the transfer switch. The screw is just long enough to perform the task. A test of patience at best.
The front screw is much easier to work with. In sight and much more accessible.
Then the coil must drop over the top of the metal plunger and onto the nipple which passes through the backside of the coil.
Tightening the screw in the back is the second test of patience. You can barely see it through the right side of the coil and the fuse block interferes with the miniature screwdriver you need to get in there to tighten the screw.
You don't need loose metal parts inside an electrical enclosure.
It took me two hours to get the coil in and everything back in place and tested.
Generac needs a little better protection from brown outs.
Видео REPLACING C1 COIL AFTER A CATASTROPHIC FAILURE IN GENERAC RTS канала Snow Man
Комментарии отсутствуют
Информация о видео
30 декабря 2022 г. 10:00:22
00:02:16
Другие видео канала