RASPBERRY Pi 4 - How To Build POWERFUL NAS | ULTIMATE Raspberry Pi 4 NAS Server Setup 2020
Do you have Raspberry Pi 4 ? Then, convert your Raspberry Pi 4 in to NAS Server (Mini Cloud ) To Share your data across your home network.
Raspberry PI 4 is one of the fastest computer architecture ever From raspberry foundation. Raspberry Pi 4 is a credit card sized computer that can be used for your personal computing. It has the fastest ARM Cortex A-72 Quad Core Processor, 4 GB of Ram, all new Giga Bit ethernet port, Type C USB port For power supply & more. Raspberry PI 4 can be used for different projects. You can build Robotic instruments, Media Server, Air Server & most importantly !!!!!!
#RaspberryPi #Nas #PiNas
Check our Website - https://xtremedroid.com/
Buy Raspberry Pi 4 With 2% Off - https://amzn.to/3puvkYc
Buy Raspberry Pi Pico - https://amzn.to/2MD2xSE
Did you know that your Raspberry Pi 4 can be used to build a powerful NAS aka Network Attached storage. You read it, Right. Build Your Own local cloud server aka NAS Server using your Raspberry Pi 4 that allows to share & access files across your home network from multiple devices. There are many guides out there on the internet & this guide helps to successfully build your own nas server with Raspberry Pi 4. So, by the end of this Video, You will Learn HOW TO Build Powerful & Fastest NAS Server using your Own Raspberry Pi 4 & YES , it is much better than OpenMedia Vault NAS.
Uses Of Raspberry Pi 4 NAS Server
- Connect Your External Hard Drive To The Pi & Access all of the content in it across multiple devices on your home network.
- If you have more than 5 devices in your home, then backup is made simple. Dump all your data using raspberry Pi 4 NAS & access it from other devices.
To Build NAS Server With Raspberry Pi You need the following things
- An Ethernet Cable required to connect internet to your Raspberry pi 4
- An External Hard Drive Or SSD to store Data
- USB Type C power Supply
- A Faster Class 10 16 GB or Higher Micro SD
Note - You Can Use this guide to build your own raspberry pi NAS server. Works On Both Raspberry Pi 3 Or Raspberry Pi 4 To build NAS Server with Raspberry. In this video, I will show you building a powerful NAS server with raspberry Pi 4, so you can follow the same process for Raspberry Pi 3
Download Links
Install Advanced IP Scanner To find the IP address Of your Raspberry Pi 4 - https://www.advanced-ip-scanner.com/
Download Raspbian Image - https://www.raspberrypi.org/downloads/raspbian/
Burn it using Etcher - https://www.balena.io/etcher/
SD Formatter - https://www.sdcard.org/downloads/formatter/
Lan Drive - http://bit.ly/32HnobF
Command List :
First Update all Of the Repositories By
typing this Command inside Terminal
sudo apt-get update
Then Try To Install These Packages TO Add An Support For NTFS &
EXFAT File Systems With in the Raspberry PI
NTFS Package :
sudo apt-get install ntfs-3g
Exfat Package:
sudo apt-get install exfat-utils exfat-fuse
Samba Server Installation:
sudo apt-get install samba samba-common-bin
Creating a Directory inside the root
sudo mkdir /PiServer (You can use Any Name)
Change the Permissions to that Directory
Sudo chmod 777 /PiServer
Type LSBLK to check the mounting point of the connected drives
sudo mount /dev/sda{number} /PiServer
Configuring samba
sudo nano /etc/samba/smb.conf
[Server Name]
comment = "anyname"
path = /PiServer
browseable = yes
read only = no
writeable= yes
create mask = 0777
directory mask = 0777
public = no
force user = root
Adding user To Access Raspberry Pi NAS Server
Sudo adduser KSKROYAL
Sudo smbpasswd - a KSKROYAL
Restating the Samba -
sudo /etc/init.d/smbd restart
sudo /etc/init.d/nmbd restart
To Auto mount Drives upon Rebooting
sudo nano /etc/fstab & add the below line
/dev/sda1 /PiServer auto defaults, user 0 2
To Set A Static IP address For Your Raspberry Pi which means it will never change upon rebooting
Sudo nano /etc/dhcpcd.conf & add these lines to the end of the file
static ip_address = 192.168.0.23/24
static routers = 192.168.0.1
static domain_name_servers = 192.168.0.1
Note : In the above line, I have set 192.168.0.23 as my default raspberry pi 4 NAS Server IP address you can use any series
Between 192.168.0.2 - 192.168.0.24
Other Linux Videos
How To Dual Boot Windows 10 & Linux UBUNTU
https://www.youtube.com/watch?v=jwohonyVG8c
How to install Kali Linux 2020.1 In Virtual Box :
https://www.youtube.com/watch?v=_h1LFTrbwAk
How to install Kali Linux 2020.1 In Virtual Box :
https://www.youtube.com/watch?v=_h1LFTrbwAk
Pop OS Review
https://www.youtube.com/watch?v=-1iIfmtjyI0
……………………………
▶ Follow Me
On Social Media
……………………………
✔ Facebook - http://bit.ly/2OF3LxA
✔ Instagram - instagram.com/_kskroyal
✔ For Enquires & Any Issues - business.ksktech@yahoo.com
Music used in the video
YouTube Free Music - [ Root Of Legend]
Outro Music Credits
JPB & MYRNE - Feels Right (ft. Yung Fusion) [NCS Release]
https://www.youtube.com/watch?v=dXYFK-jEr8Y
Видео RASPBERRY Pi 4 - How To Build POWERFUL NAS | ULTIMATE Raspberry Pi 4 NAS Server Setup 2020 канала Ksk Royal
Показать
Комментарии отсутствуют
Информация о видео
Другие видео канала
 Raspberry Pi 4 OpenMediaVault NAS
 Raspberry Pi vs ASUSTOR NAS Head-to-Head Part 1 - Hardware
 320 TERABYTES in a normal case!! - The DIY 4k editing NAS
 you need to learn Docker RIGHT NOW!! // Docker Containers 101
 Raspberry Pi Projects
 i put a DARK WEB website on a Raspberry Pi!!
 PiVPN : How to Run a VPN Server on a $35 Raspberry Pi!
 Backing Up Your Life is THIS Easy
 Building a Raspberry-Pi Storage Server with OpenMediaVault
 Raspberry Pi 4 Getting Started
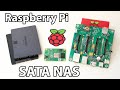 Building the best Raspberry Pi NAS - Wiretrustee SATA
![How to build a DIY NAS from an OLD PC [0$-50$] Budget | TrueNAS](https://i.ytimg.com/vi/FN3NhrD3KWo/default.jpg) How to build a DIY NAS from an OLD PC [0$-50$] Budget | TrueNAS
How to build a DIY NAS from an OLD PC [0$-50$] Budget | TrueNAS Build your own NAS! A custom Raspberry Pi build with OpenMediaVault and an Argon One M2 Case
 Raspberry Pi vs ASUSTOR NAS Head-to-Head Part 2 - the VERDICT!
 Set Up Your Own VPN at Home With Raspberry Pi! (noob-friendly)
 How to Setup a Raspberry Pi LEARNING Desktop (Linux, Hacking, Coding)
 Budget Storage Server 2021! | 80TB NAS
 Full Setup Quad Sata Hat for Raspberry Pi 4 NAS Review
 Raspberry Pi Home Server - UniFi Controller Tutorial
 VMware on a Raspberry Pi!?!?! (ESXi Install)