- Популярные видео
- Авто
- Видео-блоги
- ДТП, аварии
- Для маленьких
- Еда, напитки
- Животные
- Закон и право
- Знаменитости
- Игры
- Искусство
- Комедии
- Красота, мода
- Кулинария, рецепты
- Люди
- Мото
- Музыка
- Мультфильмы
- Наука, технологии
- Новости
- Образование
- Политика
- Праздники
- Приколы
- Природа
- Происшествия
- Путешествия
- Развлечения
- Ржач
- Семья
- Сериалы
- Спорт
- Стиль жизни
- ТВ передачи
- Танцы
- Технологии
- Товары
- Ужасы
- Фильмы
- Шоу-бизнес
- Юмор
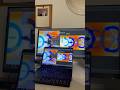
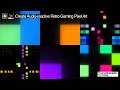
TouchDesigner audio detection in 3 simple steps #touchdesigner #touchdesignertutorial #vj
This 3-step basic audio detection workflow helps you get clean, consistent audio triggers in TouchDesigner.
The exact workflow:
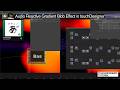
1️⃣ Isolate your target frequency band
If you're working with a single audio file, use the audioAnalysis component from the TouchDesigner Palette to extract the high, mid, or low frequencies, or other desired options.
I'm using the high-frequency band for this demo (comment 'workflow' to get my customized audio detection component)
If you have different stems and or specific band to work with, jump to step 2.
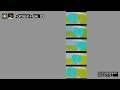
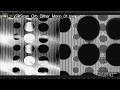
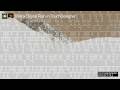
2️⃣ Visualize and find your threshold
Connect to a Trail CHOP to view your audio amplitude history. Start with an estimated value, then fine-tune alongside your visuals to find the ideal threshold.
3️⃣ Convert triggers to a desired range
Feed the signal into a Logic CHOP set to "Off when outside bounds". Send clean pulses to a Count CHOP, then enable Loop Min/Max to lock it to your desired output range.
Find it useful? Save this workflow for your next A/V project.
Follow for more TouchDesigner tutorials and network breakdowns.
Commercial-use project file and more audiovisual effect downloads in bio.
#touchdesigner #audioreactive #livevisuals #generativeart #vjing
Видео TouchDesigner audio detection in 3 simple steps #touchdesigner #touchdesignertutorial #vj канала instant infinite
The exact workflow:
1️⃣ Isolate your target frequency band
If you're working with a single audio file, use the audioAnalysis component from the TouchDesigner Palette to extract the high, mid, or low frequencies, or other desired options.
I'm using the high-frequency band for this demo (comment 'workflow' to get my customized audio detection component)
If you have different stems and or specific band to work with, jump to step 2.
2️⃣ Visualize and find your threshold
Connect to a Trail CHOP to view your audio amplitude history. Start with an estimated value, then fine-tune alongside your visuals to find the ideal threshold.
3️⃣ Convert triggers to a desired range
Feed the signal into a Logic CHOP set to "Off when outside bounds". Send clean pulses to a Count CHOP, then enable Loop Min/Max to lock it to your desired output range.
Find it useful? Save this workflow for your next A/V project.
Follow for more TouchDesigner tutorials and network breakdowns.
Commercial-use project file and more audiovisual effect downloads in bio.
#touchdesigner #audioreactive #livevisuals #generativeart #vjing
Видео TouchDesigner audio detection in 3 simple steps #touchdesigner #touchdesignertutorial #vj канала instant infinite
Комментарии отсутствуют
Информация о видео
14 мая 2026 г. 0:17:26
00:01:12
Другие видео канала