Paper Beads updated dipping & stringing method
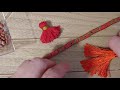
Hello Friends, I wanted to share this new method with you since my previous video as beginner. As I was just embarking on this journey , the road to paper bead heaven. In this tutorial I have recreated my original way of stringing and dipping method. After a 1 year of this process I found I could cut corners and spend more time on actually created my jewelry pieces. I string my beads without any crimp or waist beads. Creating space between your beads prevents PC petrifier from building up in between the bead themselves.
I also have change my Drying rack from a small stand alone to a clothes drying rack. I can dip more beads at a faster rate to accommodate my increase volume of beads, Since I sell the beads and strips in my Etsy store. This certainly allows a much more quicker and easier flow of creating my paper beads.
http://www.belliebeads.com/#/
Supplies:
Scissors
Monofilament 25 lb-can you a lighter weight-Walmart
Clothes Drying rack for hanging dipped beads-Purchased at Target
Seed beads -to tie off the end of string
S hooks to hang strung beads-Amazon
Thank you for your supporting my channel!
My etsy shop: https://Belliebeads.etsy.com.
I invite you to join my Paper Bead Group @ https://www.facebook.com/groups/236164590836471
Видео Paper Beads updated dipping & stringing method канала Bellie Beads
Показать
Комментарии отсутствуют
Информация о видео
Другие видео канала
 Paper Beads made with Tissue/Paper Napkins
 Dipping method for paper beads
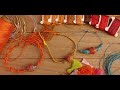 Paper beads 16mm Round Bead
 Paper bead.How to string and prepare for glazing
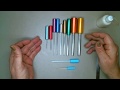 DIY Paper Bead Rolling Tool
 How to make GORGEOUS FANCY PAPER BEADS, learn all the BEST HACKS now!
 How to make Paper Beads Chandelier #paper beads #recycle
 Pillow paper beads | How to make Paper beads pillow shape | #paperbeads
 How to make focal paper beads - no measuring - scrap paper - easy fun tutorial
 How to Make Glass Beads!
 Making Paper Beads - My Clumsy Way of Making Bead Dangle Charms - By Request
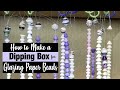 How to Make a Paper Bead Glazing Dipping Box for Under $10
 Teardrop Shape 8mm Paper bead-T1566
 How to Make Small Micro Paper Beads
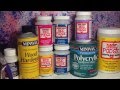 Paper Beads and My Experimentation with Different Sealer Products
 Boho Beads / Boho Perlen / Bohemian Beads
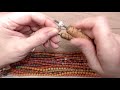 Round, Rounder, Roundest paper bead
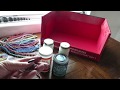 A fast and efficient way to glaze paper beads
 2 ways: Straight or Criss Cross Wire Wrapped Cabochon Pendant Tutorial
 Glazing Paper Beads 2017