- Популярные видео
- Авто
- Видео-блоги
- ДТП, аварии
- Для маленьких
- Еда, напитки
- Животные
- Закон и право
- Знаменитости
- Игры
- Искусство
- Комедии
- Красота, мода
- Кулинария, рецепты
- Люди
- Мото
- Музыка
- Мультфильмы
- Наука, технологии
- Новости
- Образование
- Политика
- Праздники
- Приколы
- Природа
- Происшествия
- Путешествия
- Развлечения
- Ржач
- Семья
- Сериалы
- Спорт
- Стиль жизни
- ТВ передачи
- Танцы
- Технологии
- Товары
- Ужасы
- Фильмы
- Шоу-бизнес
- Юмор
Custom Tkinter Student Management System Tutorial | Full UI Design Part 1
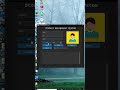
Welcome to Part 1 of the Student Management System Tutorial using CustomTkinter in Python!
In this video, I show you how to create the main UI structure, frames, layout design, and the base setup for our modern CustomTkinter project.
🚀 What You Will Learn in This Part:
✔ Creating modern frames in CustomTkinter
✔ Building the main structure of the Student Management System
✔ Designing professional-looking UI components
✔ Setting up layout, inputs, and base functions
✔ Preparing the project for next parts
✔ Adding avatar space & text fields
✔ Creating clean GUI styling for a modern dashboard look
This is the foundation of the full Student Management System we will build in this series.
In the next part, I will add:
👉 Gender selection feature
👉 Avatar & icons
👉 Button functionality (Add, Update, Delete, Show)
👉 Scrollable student data display
👉 File handling system
👉 Modern animations
If you want the full advanced version, comment "NEXT PART"!
📌 Subscribe for the full CustomTkinter playlist!
📌 Like & Share to support the series ❤️
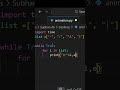
source code:
from customtkinter import *
from PIL import Image
root = CTk()
root.iconbitmap("icon.ico")
set_appearance_mode("dark")
set_default_color_theme("blue")
root.title("Student managment system")
root.geometry("700x600")
def add():
name = name_entry.get()
roll_no =rolno_entry.get()
Class = class_entry.get()
with open("student.txt","a")as f:
f.write(f"{name} | {roll_no} | {Class}\n")
result.configure(text = "Saved successfuly!")
label = CTkLabel(root,text="Student managment system",font=("Courier New",35,"bold"))
label.pack(pady=5)
frame = CTkFrame(root,width=600,height=500)
frame.pack(pady=5)
name_entry = CTkEntry(frame,placeholder_text="Enter Name...",width=300)
name_entry.place(x = 30,y =20)
rolno_entry = CTkEntry(frame,placeholder_text="Enter Roll no...",width=300)
rolno_entry.place(x = 30,y =70)
class_entry = CTkEntry(frame,placeholder_text="Enter Class...",width=300)
class_entry.place(x = 30,y =120)
image_frame = CTkFrame(frame,width=200,height=200)
image_frame.place(x = 398,y = 2)
btn = CTkButton(frame,text="add",fg_color="green",command=add)
btn.place(x = 30,y = 170)
btn = CTkButton(frame,text="search")
btn.place(x = 30,y = 210)
search_entry = CTkEntry(frame,placeholder_text="Enter Roll no...",width=180)
search_entry.place(x =183,y =210)
btn = CTkButton(frame,text="update",fg_color="#B9FF48",text_color="#8A8787")
btn.place(x = 200,y = 170)
btn = CTkButton(frame,text="delete",fg_color="red")
btn.place(x = 400,y = 210)
result = CTkLabel(frame,text = "",font=("Courier New",25,"bold"),text_color="green")
result.place(x = 30,y = 240)
root.mainloop()
student management system python
customtkinter python project
python gui tutorial
custom tkinter tutorial
python student management system
python project for beginners
python gui design 2025
python tkinter project
customtkinter ui tutorial
modern python gui design
python beginner project full course
custom tkinter dashboard python
student management software python
Видео Custom Tkinter Student Management System Tutorial | Full UI Design Part 1 канала code with Subhan
In this video, I show you how to create the main UI structure, frames, layout design, and the base setup for our modern CustomTkinter project.
🚀 What You Will Learn in This Part:
✔ Creating modern frames in CustomTkinter
✔ Building the main structure of the Student Management System
✔ Designing professional-looking UI components
✔ Setting up layout, inputs, and base functions
✔ Preparing the project for next parts
✔ Adding avatar space & text fields
✔ Creating clean GUI styling for a modern dashboard look
This is the foundation of the full Student Management System we will build in this series.
In the next part, I will add:
👉 Gender selection feature
👉 Avatar & icons
👉 Button functionality (Add, Update, Delete, Show)
👉 Scrollable student data display
👉 File handling system
👉 Modern animations
If you want the full advanced version, comment "NEXT PART"!
📌 Subscribe for the full CustomTkinter playlist!
📌 Like & Share to support the series ❤️
source code:
from customtkinter import *
from PIL import Image
root = CTk()
root.iconbitmap("icon.ico")
set_appearance_mode("dark")
set_default_color_theme("blue")
root.title("Student managment system")
root.geometry("700x600")
def add():
name = name_entry.get()
roll_no =rolno_entry.get()
Class = class_entry.get()
with open("student.txt","a")as f:
f.write(f"{name} | {roll_no} | {Class}\n")
result.configure(text = "Saved successfuly!")
label = CTkLabel(root,text="Student managment system",font=("Courier New",35,"bold"))
label.pack(pady=5)
frame = CTkFrame(root,width=600,height=500)
frame.pack(pady=5)
name_entry = CTkEntry(frame,placeholder_text="Enter Name...",width=300)
name_entry.place(x = 30,y =20)
rolno_entry = CTkEntry(frame,placeholder_text="Enter Roll no...",width=300)
rolno_entry.place(x = 30,y =70)
class_entry = CTkEntry(frame,placeholder_text="Enter Class...",width=300)
class_entry.place(x = 30,y =120)
image_frame = CTkFrame(frame,width=200,height=200)
image_frame.place(x = 398,y = 2)
btn = CTkButton(frame,text="add",fg_color="green",command=add)
btn.place(x = 30,y = 170)
btn = CTkButton(frame,text="search")
btn.place(x = 30,y = 210)
search_entry = CTkEntry(frame,placeholder_text="Enter Roll no...",width=180)
search_entry.place(x =183,y =210)
btn = CTkButton(frame,text="update",fg_color="#B9FF48",text_color="#8A8787")
btn.place(x = 200,y = 170)
btn = CTkButton(frame,text="delete",fg_color="red")
btn.place(x = 400,y = 210)
result = CTkLabel(frame,text = "",font=("Courier New",25,"bold"),text_color="green")
result.place(x = 30,y = 240)
root.mainloop()
student management system python
customtkinter python project
python gui tutorial
custom tkinter tutorial
python student management system
python project for beginners
python gui design 2025
python tkinter project
customtkinter ui tutorial
modern python gui design
python beginner project full course
custom tkinter dashboard python
student management software python
Видео Custom Tkinter Student Management System Tutorial | Full UI Design Part 1 канала code with Subhan
Комментарии отсутствуют
Информация о видео
7 декабря 2025 г. 16:55:25
00:46:38
Другие видео канала