Part 4: 1966 Viscount Ambassador - Ceiling Paint Final
Final part showing the end result of installing the ceiling, trim and painting the 1966 Viscount Ambassador. Putting the effort in prep work will always yield better results and being patience is the key.
Note: My videos are not a tutorial/how to. I am not a qualified mechanic so please refer to your workshop manual with your work. Do not use the content on my channel as a replacement for a workshop manual or mechanic.
Видео Part 4: 1966 Viscount Ambassador - Ceiling Paint Final канала Rover Tasmania
Показать
Комментарии отсутствуют
Информация о видео
Другие видео канала
 Pelvarara Outing 2
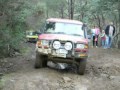 Jefferys - Discovery 1 v8 hill climb
 Part 2: 1966 Viscount Ambassador - rear walls and cupboard removal
 Land Rover Discovery 300tdi - Head and Cooland Temp Comparison
 Land Rover Series 2a 88 - Part 2: Propeller Shaft Rebuild
 1967 Land Rover Series 2a 109 - Windscreen Removal and Bulkhead Inspection
 1966 Viscount Ambassador: Hatch Lid Rebuild (long)
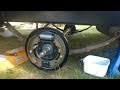 1977 Franklin Caravan Update 9: new axle and brakes
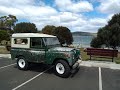 Land Rover Series 2a 88 - Out and about with Darcey
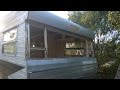 1966 Viscount Ambassador: Rear Window, Cladding and J-rail Reseal
 Land Rover Discovery 300tdi : Wet Rear Floor Question
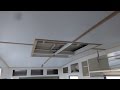 Part 3: 1966 Viscount Ambassador - Ceiling Undercoat Paint and Trim Install
 Land Rover Series 2a 88 - Servicing Lucas Wiper Motors
 Part 3: 1966 Viscount Ambassador - Upper Rear Wall Removal
 1966 Viscount Ambassador - rear j-rail and cladding reseal
 1977 Range Rover Classic 2 Door: Part 7 Dash and Seat Vinyl Prep
 Land Rover Series 2a 88 - Part 4: Chassis Cleanup
 Millard Caravan: Ready For Registration
 Land Rover Series 2a 88 - Part 2: Refurbishing Fuel Tanks
 Land Rover Series 2a 88 - Part 15: 2.25 Diesel Engine Work