HTC One A9 Display Assembly Repair - Fixez.com
https://www.fixez.com presents the official HTC One A9 Screen Replacement Guide. Life is full of annoyances, but dealing with a cracked HTC One A9 display assembly does not have to be one of them! Following the step-by-step HTC One A9 screen repair instructions we have provided will help you safely replace a damaged or faulty HTC One A9 display assembly. Visit Fixez.com for all of the DIY HTC One A9 replacement screens, parts and tools you need to fix your cell phone quickly, and affordably. https://www.fixez.com/store/htc/htc-one-a9
If you need your HTC One A9 repaired ASAP instead- we have you covered there too. Contact one of our skilled technicians at 866-233-6460 or support@fixez.com and they will fix your device for you. They are available Monday – Friday, 9am to 5pm PST.
Subscribe to our YouTube Channel for additional DIY smartphone and tablet teardown and repair videos! https://www.youtube.com/channel/UCDJrZCUtdJQaJq0akRCt3Ng
Like us on Facebook: https://www.facebook.com/fixez.com
Follow us on Twitter: https://twitter.com/fixezdotcom
HTC One A9 Display Assembly Repair Video Transcription:
Warning:
You are performing this repair at your own risk
We claim no responsibility for any damages that might occur
The DIY HTC One A9 repair tools used in this video can be found here: https://www.fixez.com/categories/repair-tools
Step 1
Power down your HTC One A9 smartphone.
Step 2 (HTC One A9 Nano SIM Card Tray and microSD Card Tray)
Eject the Nano SIM card tray and then the microSD card tray.
Step 3 (HTC One A9 Display Assembly)
Begin to free the HTC One A9 display assembly by using the heat gun to warm up the adhesive.
With the precision knife carefully create separation and insert a playing card to start slicing through the adhesive.
Take your time and apply additional heat as needed.
When attacking the adhesive, be mindful of the capacitive home button and fingerprint sensor.
The HTC One A9 screen is still connected to the motherboard. Do not try to remove it completely, or you will damage the data cable connecting the display to the middle of the phone.
Remove the following 2 Phillips screws securing the bracket to the motherboard.
Remove the HTC One A9 display cable bracket.
Use the spudger to disconnect the display cable and remove the HTC One A9 display assembly.
* To reassemble your device, follow the steps in reverse order.
Видео HTC One A9 Display Assembly Repair - Fixez.com канала Fixez.com
Показать
Комментарии отсутствуют
Информация о видео
Другие видео канала
 HTC A9 Display Wechsel tauschen reparieren- einfach und schnell (Deutsch)
 HTC One A9 Battery Replacement Guide - RepairsUniverse
 Asus ZenFone 3 Display Assembly Repair - Fixez.com
 iPhone 8 Plus Screen Repair Guide - Fixez.com
 Nokia 6 Teardown Repair Guide - Fixez.com
 HTC One A9 Review: How does it fare in 2017?
 HTC Desire 630 Dual sim (D630n)замена дисплейного модуля (разборка,ремонт)
 Samsung Galaxy J3 (2016) Screen Repair, Teardown and Reassemble - Fixez.com
 How to disassemble 📱 HTC One A9 2PQ9100 Take apart Tutorial
 Essential Phone Teardown Repair Guide - Fixez.com
 HTC A9 Battery Replacement
 ZTE Axon 7 Mini Screen Repair, Teardown and Reassemble Guide - FIxez.com
 HTC One A9 Tear Down Screen Battery Chargeport Replacement - Disassembly
 Замена аккумулятора htc desire 820
 Samsung Galaxy A01 LCD Replacement Teardown Disassembly SCREEN Repair Video
 HTC One Disassembly Tear Down Repair
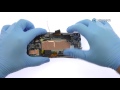 HTC 10 LCD & Touch Screen Replacement Guide - RepairsUniverse
 HTC One A9 Battery Repair - Fixez.com
 Official HTC One (M8) Screen Repair & Disassemble