#6 VAN BUILD | Full Window Install - Sliding Door
𝗖𝗥 𝗟𝗔𝗨𝗥𝗘𝗡𝗖𝗘 𝗪𝗜𝗡𝗗𝗢𝗪 𝗜𝗡𝗦𝗧𝗔𝗟𝗟 𝗣𝗔𝗦𝗦𝗘𝗡𝗚𝗘𝗥 𝗦𝗜𝗗𝗘
𝙈𝘼𝙏𝙀𝙍𝙄𝘼𝙇𝙎
* CR Laurence Window - Van Passenger Sliding Door
* Sprinter - t.ly/Krn2
* Transit - t.ly/PSrt
* Promaster - t.ly/e1yd
𝙏𝙊𝙊𝙇𝙎
* Jigsaw - https://amzn.to/3hiW909
* Metal Jigsaw blades - https://amzn.to/2RaixON
* File set - https://amzn.to/3uHnZqR
* Rustoleum Paint - https://amzn.to/3w1PYBI
* Screwdriver - (you should have one!)
* Drill - https://amzn.to/3eIGkyt
* Metal drill bit - https://amzn.to/3y68FX5
* Box cutter / Razor knife - https://amzn.to/3bksKPA
* Masking tape - https://amzn.to/33DuhMp
* Sharpie marker / pencil
𝙄𝙉𝙎𝙏𝘼𝙇𝙇𝘼𝙏𝙄𝙊𝙉 𝙎𝙏𝙀𝙋𝙎
1. Remove inside frame edge from window
2. Use interior frame to create cardboard stencil
1. )Tape down frame
2. ) Trace around interior edge
3. ) Make sure to push down as you trace (frame edge is curve to fit window shape
3. Interior of door (Ford Transit) has a window edge that exists where window normally goes
4. Tape stencil to inside of door
5. Drill holes around the stencil to create an outline on the outside of the van, where you can also trace stencil
1.) Check stencil outline with the interior frame edge
6. Trace stencil on the outside of sliding door
1.) Make sure not to flip or alternate your stencil when transferring to outside
2. )Once aligned with screw holes, trace stencil on the outside of the van
Pro-Tip: it’s always better to cut the hole smaller for your first try. You want this window to fit snugly inside the cut out area.
7. Once you feel comfortable with stencil transfer, use pilot drill hole to start cutting.
1.) Jigsaw is the recommended tool for cutting your window out
8. You may need to refit, grind, cut, the edges to perfectly fit…
9. Once you confirm you have a window that fits:
1.) File around edges
2.) Paint edges with rustoleum primer and paint
10. Once Dry:
1.) Install window!
2.) Install interior window edge
3.) Drill a few of the screws in with a drill, but HAND TIGHTEN!
4.) You will need to go around the frame multiple times hand tightening to create a tight fit.
5.) Inspect the outside edge of the window to make sure there is no gap between window frame and door frame
6.) We noticed a large gap before we hand tightened the screws, thought we f@#$ed up… but then realized we just needed more RAW POWER! And had to tighten screws down way more.
If you enjoyed this video, please SUBSCRIBE and LIKE! Your mouse click will directly support to broke van builders and our dream to eat moderately priced cheese and travel the country!
All the love,
Nate & Maud
To see all our adventures:
IG: @VanningWilder
FB: @VanningWilder
http://www.vanningwilder.com
Thanks and please send us your questions in the comment section below and we’ll try to respond ASAP!
Видео #6 VAN BUILD | Full Window Install - Sliding Door канала Vanning Wilder
Показать
Комментарии отсутствуют
Информация о видео
Другие видео канала
 How to Install a Van Window | CR LAURENCE | Step-by-Step | Van Build Series
 Amateur Builders turn SPRINTER VAN to BEAUTIFUL TINY HOME during PANDEMIC | FULL TIMELAPSE
 CR Laurence Window Installation | Sliding Door | Bunk RV Window | PROMASTER VAN BUILD SERIES | EP 10
 Install Sliding Door T-VENT Window | FOUR SEASON VAN LIFE | EP.6
 $150k vs. $40k SPRINTER VAN (full tour)
 #7 VAN BUILD | DIY Affordable Window Covers!
 VAN TOUR | With Hidden Shower // Toilet
 2020 Transit CRL 1033 Bunk Windows
 CR Laurence Universal Window Install! Ram ProMaster Van Build Conversion - Episode 11 | Jason Klunk
 HOW TO Install CR Laurence Windows in a 2020 Mercedes Sprinter 4x4 | Rossmönster Vans
 CRL FW625R Passenger Sliding Door T-Vent Window Sprinter Van
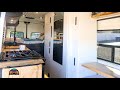 Ford Transit Camper Van With Shower Toilet & Double Sliding Doors - Adventure Tiny House
 Best Diesel Heater on a Budget | Sprinter Van Install
 Sliding Door Window Install - Ray Outfitted How To
 Budget Van Conversion | Ford Econoline $3000!
 CRL Window Install in 60 Seconds
 Car Craftsman Builds DIY 144" Sprinter Van - Shower, Toilet, Dual Slider + Off-Grid Ready
 #2 VAN BUILD | DIY Full Floor Install
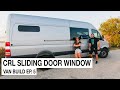 Install a CRL Sliding Door Window on a Sprinter Van - Van Life Build Series Ep 5
 VAN BUILD | INDUCTION STOVE VS GOAL ZERO | STRESS TEST