2014-2019 Impala Front Bumper Removal | ReveMoto
Learn how to remove your Chevrolet Impala front bumper the right way! This bumper removal process only requires a few tools.
Where to buy: https://bit.ly/14-19ImpalaFrontBumper
Source: https://www.revemoto.com
0:00 Start
0:21 Intro
0:41 Radiator cover removal & top bumper bolts
1:58 Fender bolt removal
2:47 Fender liner bolts/clips
4:31 Lower bumper bolt
9:18 Bumper removal
10:31 Outro
Thank you for stopping by to watch our Chevy Impala front bumper removal. The newer Impala vehicles have a very aggressive and sporty front bumper compared to the older models. There are definitely a lot more bolts and screws to remove off this bumper. But, that doesn't mean it's more difficult than the older model, it just takes a little longer. We'll show you how to remove every bolt and screw, you'll be a pro after watching this video.
TOOLS NEEDED:
You will need a 7mm wrench or socket wrench, a panel clip removal tool, or 2 flathead screwdrivers. You'll also need a torques bit T-15 for the fender liner bolts.
PROCESS:
We started by removing the radiator cover to expose the top bolts on the bumper. Very easy and straightforward. Be sure to not lose any of the install hardware, it's okay if you have a couple extra bolts but it is not recommended. Next, we moved down to the fender liner or the end of the bumper. Our bumper has damage on the driver side fog light area which caused the bumper to dip. It was pretty easy to work with. You do have to turn your wheel or completely remove it to reach the torques bit screws. We like to work less, so we turned the wheel and used the torques bit into a smaller socket. Once those are off, remove the 7mm bolt that connects the bumper to the fender bracket. Repeat this step on each side. Then we moved to the bottom bumper and splash shield. There are quite a few bolts and screws here. Be sure to remove the splash shield from the lower engine cover. You do not have to remove the lower engine cover, you just have to disconnect it from the splash shield and bumper. Now you are ready to remove your bumper, but be sure to unplug the fog lights if you have any. Ours had the cover but there is still a wire harness that connects to what I believe is the ambient sensor.
Follow Us on:
FB: https://www.facebook.com/ReveMoto/
IG: https://www.instagram.com/revemoto/
Twitter: https://twitter.com/revemoto?lang=en
_____________________________________
#impala #chevrolet #chevyimpala #howto #revemoto #paintedautoparts #onlinepaintedparts #chevy #diyproject #diy #automotive #howto
DISCLAIMER: While ReveMoto tries to make the information in this video as accurate as possible, we make no claims, promises, or guarantees about the accuracy, completeness, or applicability of the content. No information contained in this video shall create any expressed or implied warranty or guarantee of any particular result. All do-it-yourself (DIY) projects entail some risk. It is the sole responsibility of the viewer to assume this risk. ReveMoto is not responsible or liable for any loss, damage (including, but not limited to, actual, consequential, or punitive), liability, claim, or any other injury or cause related to or resulting from any information posted in this video.
Видео 2014-2019 Impala Front Bumper Removal | ReveMoto канала ReveMoto - Pre-Painted Auto Body Parts
Показать
Комментарии отсутствуют
Информация о видео
25 июня 2021 г. 23:37:54
00:10:47
Другие видео канала
 2014 - 2019 Chevrolet Impala Outside Ambient Air Temperature Sensor Replacement
 2015 CHEVY IMPALA MESH GRILL INSTALL
 ZTZ HYPERSHIFT DIP
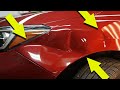 NASTY 🤢 Fender Dent Repair
 Chevy Impala Headlight Change-2014 to 2020
 How to Fix Your Bumper - The Easy Way
 Chevrolet Impala 2014-2019 MyLink DVD USB Video In Motion While Driving Bypass GM Interface LockPick
 Trim Illusion ABS460 Chevy Impala Overlay Grille Installation
 How to Remove Replace a 2008 - 2012 Malibu Front Bumper Cover
 IMPALA 2019 Model,Replacement & Alignment of front Bumper by: Cesar Betorio ,#65
 Trent Shows You The 2019 Impala Premier!!
 Spyder Auto Installation: 2014 - 2017 Chevrolet Impala Headlights
 Front bumper replacement on an Impala
 YOU WILL NOT BELIEVE WHAT I JUST ADDED TO MY NEW IMPALA
 Paint your car at home. How to repair and paint a plastic bumper cover.
 How To - Remove Front Bumper Chevy Malibu (2014)
 как снять передний бампер шевроле круз cruze chevrolet саня марк
 How To: Remove 2020 Malibu Bumper And Grille
 2011-2017 Chevy Caprice PPV - Replace Front Headlamp Assemblies
 serpentine belt replacement chevy impala