INSTALL GUIDE: Future Classic 5x112 Wheel Spacer Set (on F95 X5M)
STEP 1: Jack up your X5M and place a jackstand underneath the car for safety purposes. Loosen the lug bolts and remove your front wheel for access to the hub area.
STEP 2: Remove the OEM hub bolt(s). The front wheels will require a 5mm Allen, whereas the rear uses a 6mm. Note that the Future Classic replacement hub bolts will both use a 5mm Allen.
STEP 3: Using the included brush and Copaslip anti-seize, apply a thin layer of the anti-seize to the OEM hub area before fitting the spacers.
STEP 4: Line up the Future Classic spacer with the vacant hub and lug bolt holes and press it into place until it is flush against the hub area. Apply anti-seize to the FC extended hub bolts and secure the spacer to the hub.
STEP 5: Re-install the OEM wheel using the Future Classic wheel hanger pin set. Thread the pins into two adjacent lug bolt holes and slide the wheel over them until seated. Fit the FC extended lug bolts into the vacant lug bolt holes and then remove the pins to finish the lug bolt installation.
STEP 6: Lower the car back to the ground and torque your wheels to OEM specification. Drive the car to verify properly seated lugs and re-torque once the car is cool. Repeat these steps for all four wheels.
Видео INSTALL GUIDE: Future Classic 5x112 Wheel Spacer Set (on F95 X5M) канала IND Distribution
Показать
Комментарии отсутствуют
Информация о видео
Другие видео канала
 INSTALL GUIDE: IND F95 X5M Painted Front Reflector Set
 INSTALL GUIDE: BMW LED Door Projector Set
 INSTALL GUIDE: 3D Design A90 Supra Carbon Trunk Spoiler
 How To Superclean Alloy Wheels
 BEHIND THE SCENES: Future Classic Motorsport Wheel Spacers (for BMW and Porsche)
 INSTALL GUIDE: RKP E90 M3 Alcantara GTS Armrest Delete
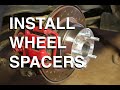 How to PROPERLY Install Wheel Spacers
 INSTALL GUIDE: Autotecknic F95 X5M Painted Shift Paddle Set
 Car Painting: Full Car Paintjob Guide
 Tire Machine: Tire Remove & Install
 Future Classic Wheel Spacers - Best Spacers I've Seen!
 INSTALL GUIDE: 3D Design A90 Supra Carbon Side Skirt Set
 Installing the MSS HAS Kit on our F97 X3M (Video by Unscene Media)
 Separadores de aluminio para llantas
 How to Repair Curb Rash on any wheel rim
 INSTALL GUIDE: 3D Design F97 X3M Carbon Front Lip
 PlastiDip on Rims - New Brake Masking System!
 Wheel Spacers vs. Wheel Adapters
 5x115 vs 5x114.3 Explained & Ruff R1 Racing Fitment Issue Follow Up
 INSTALL GUIDE: 3D Design Aluminum Pedal Set