CBI Dual Swing Arm Rear Bumper Install (Part I)
In this video, we show you how to install a CBI Rear Plate or CBI Rear Hybrid bumper on your 3rd Generation Toyota 4runner. Part 1 is for those that have a CBI bumper without swing-out(s). Part 2 will be additional instruction for those that bought a single swing-out or dual swing-out rear bumper from CBI with associated options like a jerry can holder and tray table.
Here's a link to Part 2: https://youtu.be/2t2zj79EmDc
CBI Off Road Fab
http://www.cbioffroadfab.com/
**PARTS**
*Sonoran Steel Rear Polyurethane Body Mounts
http://www.sonoransteel.com/index.php?main_page=product_info&cPath=1_11&products_id=10
*5 feet of 7/32" Vacuum Hose - (to fit over stick bolt rods to prevent vibration noise)
**HELPFUL TOOLS**
**If you don't see a tool you need listed below, here's a master copy of Timmy's suggested tools:
https://docs.google.com/document/d/1TV08fumiXvyrb6yBMPl0gsp7UlcQEa9lHtqFNiZWOVI/edit?usp=sharing
*Mayhew 5 Piece Prybar Set - (used a prybar to force exhaust grommet off post. This is a nice set of pry bars.) https://amzn.to/2Ob8THw
*Dewalt 1/2" Drive Impact Gun - (used for the bigger fasteners in the video. Nice gun with lots of power) https://amzn.to/2M2Y9J1
*Dewalt 3/8" Impact Gun - (used for some of the smaller fasteners in the video. Nice and compact but still has plenty of power) https://amzn.to/2uqWnZy
*Dewalt Batteries
https://amzn.to/2urcx59
*Dewalt Battery Charger
https://amzn.to/2Ud8RlY
*1/2" Drive Regular Impact Extension Set
https://amzn.to/2J7FYko
*1/2" Drive Deep Metric Impact Socket Set
https://amzn.to/2WfSTGD
*1/2" Drive Shallow Impact Socket Set
https://amzn.to/2pCrdPQ
*3/8" Drive Regular Impact Extension Set
https://amzn.to/31AoCmC
*3/8” Drive Shallow Impact Socket Set
https://amzn.to/2KnoYaq
*3/8" Drive 6 Point Metric Standard Socket Set
https://amzn.to/32WIh0M
*Milwaukee Mi12 Cordless Ratchet - (used to remove some of the fasteners in the video. This will speed up the process or removing and installing fasteners) https://amzn.to/2utRZsE
*Milwaukee Cordless Drill - (used to remove screws and drill holes into frame)
https://amzn.to/2BKBagQ
*Milwaukee M12 Batteries (2 Pack)
https://amzn.to/2uoQlZs
*Milwaukee M12 High Capacity Battery
https://amzn.to/2HEFTpu
*Milwaukee M12 Battery Charger
https://amzn.to/2uo2o9x
*Straight Needle Nose Pliers - (used to assist pulling plastic mud flap clips)
https://amzn.to/2pQ6yIa
*Auto Trim Removal Set - (used to remove interior plastic trim piece)
https://amzn.to/37vgzvH
*Long Set of Ratcheting Box End Wrenches - (used to break free and tighten rear body mount)
https://amzn.to/2oOhndL
*CDI 3/8" Drive 10-100 Foot Pound Torque Wrench - (used to torque body mount bolts)
https://amzn.to/2U2vUA4
*Harbor Freight 2000 lb Transmission Jack - (works really well and is affordable)
https://www.harborfreight.com/2000-lbs-low-profile-transmission-jack-60240.html
*Spring-loaded Center Punch - (used to mark holes before drilling)
https://amzn.to/2MKfebY
*Red Paint Pen - (used to mark holes to drill)
https://amzn.to/34ngQid
*Drill Bit Set - (different sizes used to drill holes in frame)
https://amzn.to/2pSfywn
*File Set - (used to clean up holes drilled into frame)
https://amzn.to/2qJfmzX
*1/2" Drive Flex Head Gear Wrench Ratchet - (used to tighten up frame bolts)
https://amzn.to/2Wnbq2r
*1/2" Drive 6 Point Standard SAE Socket Set
https://amzn.to/2PoYdnY
**As Amazon Associates we earn from qualifying purchases.
Видео CBI Dual Swing Arm Rear Bumper Install (Part I) канала Timmy The Toolman
Показать
Комментарии отсутствуют
Информация о видео
Другие видео канала
 CBI Dual Swing Arm Rear Bumper Install (Part 2)
 Incredible Transformation Of A 1990 Toyota Pickup!!!
 CBI Offroad Front Bumper Install on the 4Runner!
 Rig Walk-Around: Alex's Trail-Ready 3rd Gen 4Runner
 Toyota Tacoma - Absolutely Must Have Mod Before Upgrading to Bigger Tires - Gear Install - Reaction
 Answering FAQs for Tacoma Rear Bumper
 CBI T3 High Clearance Rear Bumper Install
 Suspension Lift (Coils and Shock Replacement)
 The Custom Toyota 4Runner Bumper Is Complete!
 3rd Gen 4Runner Lift
 4th Gen Rear Strike Bumper Install
 ARB Winch Bull Bar Installation on a 2004 Toyota 4Runner
 Flipping 3rd Gen 4Runner P4- Rust Treatment/Hitch Install
 Hefty Fabworks 5th Gen 4Runner Rear Bumper Installation Video
![【44】 ► Swing-Out Tire Carrier Rear Hitch - RidgeRunner Install | 5th Gen 4Runner Mod [4K]](https://i.ytimg.com/vi/TJBlhIVW-Yk/default.jpg) 【44】 ► Swing-Out Tire Carrier Rear Hitch - RidgeRunner Install | 5th Gen 4Runner Mod [4K]
【44】 ► Swing-Out Tire Carrier Rear Hitch - RidgeRunner Install | 5th Gen 4Runner Mod [4K] Durobumps Installation (3rd Gen 4runner)
 3rd Gen 4Runner UCA Install
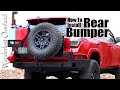 How To Install CBI Offroad Steel Rear Bumper On 4Runner
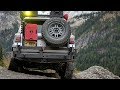 Why I added 100’s of lbs in Steel Bumpers to my 4Runner (PLUS C4 LoPro Bumper Giveaway)