How to print photos with Persnickety Prints (2020)
https://DigitalScrapbookingHQ.com/persnicketyprints
If you've ever wanted to print your scrapbook pages, but it's seemed a bit daunting, I'm here to help!
I've recorded all new tutorials for you demonstrating the process for my favourite printing services.
So you've got all your pages finished, proofread and saved as a high quality image. What's next?
First, you need to upload your images.
Log in to Persnickety, or create a new account.
Then click Upload at the top of the screen.
You'll then be taken to the upload screen where you can drag and drop photos or browse to them on your computer.
Then simply click the Done button when the files are uploaded.
Your photos are automatically uploaded at full resolution and Persnickety doesn't apply any auto-correction, which is perfect for printing digital scrapbook pages.
Then, you need to choose your format. At Persnickety, you can print square photo prints to fill your D-ring albums.
Next, select your photos from within your photo library and select Order Prints.
You have several options to choose from for square prints. From the photographic prints, and select the size you want. I selected 12x12".
Then click Next.
The next step is to select the paper. I prefer Matte Photographic paper, but you can choose glossy or metallic too. Make your selection then click next.
Now you can choose the quantity you want to print of each image. You choose individual quantities for each layout if you want to.
When you have finalised everything, click next.
You can add more photos to print or click Proceed to Checkout.
Add in your billing details, and don't forget to add any of the print credits you have bought.
You can see my results with Persnickety here.
Persnickety Prints have a quick turnaround time (even to Australia!). I've always been impressed with the quality of their prints each time I've ordered in the last 8 years.
So, go ahead and check Persnickety out here and happy printing!
Видео How to print photos with Persnickety Prints (2020) канала Digital Scrapbooking HQ
Показать
Комментарии отсутствуют
Информация о видео
Другие видео канала
 Photo Books - Done for you! My Plus Eight Pitch (2023)
 Paint using the brush tool in Photoshop Elements
 SIP48 DIY Bundle
 Go Photos Work Along Lesson 1
 Find your Project Life and Pocket Scrapbooking Style cards with Photoshop Elements Organizer
 ABCs of PSE: D is for Default Colors (Photoshop Elements 2021)
 2018 Birthday Giveaway
 ABCs of PSE: H is for the Hand Tool (Photoshop Elements 2021)
 ABCs of PSE: E is for the Eraser Tool (Photoshop Elements 2021)
 2017 Holiday Faves Flip Through
 Create a Scrapbook Layout from a Template
 ABCs of PSE: C is for the Crop Tool (Photoshop Elements 2021)
 Printed Layouts Review with Persnickety Prints
 Go Photos Work Along Lesson 3
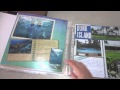 Project Life memorabilia
 Photoshop Elements tutorials on Youtube from Digital Scrapbooking HQ
 Print your Photos with FOREVER
 Digital Scrapbooking: 9 years of layouts in 20 minutes
 Photoshop Elements Organizer Myths
 How to make Quote Graphic in Photoshop Elements 2021