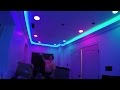
LEDs and Corner Molding make any room look amazing for $1/ft
Crown molding LEDs on a budget. Comes out to about $1 a foot, but still looks amazing.
Parts:
LEDs - http://a.co/d4t9QQN
Inside Corner Molding - https://www.lowes.com/pd/0-6693-in-x-8-ft-Composite-Inside-Corner-Wall-Panel-Moulding/3401982
Finishing nails - https://www.lowes.com/pd/Hillman-16-Gauge-1-in-White-Finish-Panel-Nail/3036065
Nail punch - http://a.co/iyVOfPv
Caulking - http://a.co/3cJaB3S
Mitre Box - http://a.co/2gCIWTM
20 awg wire - http://a.co/d17Epx6
Power supply - http://a.co/jcAkyex
Steps:
Plan and measure where you want the lights.
Decide how far from the ceiling you want to put the molding.
3” to the bottom of the molding (lights about 2 ½” from the ceiling) looked best for my room.
Mount the molding. Mitre the corners.
Tap in the finishing nails with the punch so you don’t bang up your molding. Caulk the bottom edge and the corners
Peel the backing off the lights and lay them on the molding.
Add connectors wherever strings join together. Match +’s and -’s.
Run power wire to strips.
Add power every 2 strings, or about every 30’.
Decide where you want your switch. Wire it and mount it.
Enjoy your beautiful, elegant, cheap new lights!
Видео LEDs and Corner Molding make any room look amazing for $1/ft канала DrZzs
Показать
Комментарии отсутствуют
Информация о видео
Другие видео канала
 🔥👉🏻 How to Install Crown Molding with Indirect Lighting from Start to Finish in 4 Hours DIY
 Crown Molding with Indirect Lighting Installation
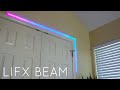 LIFX BEAM - Smart Lighting
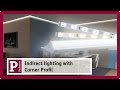 Indirect lighting: Plaster mouldings and cove lighting with LED strips and Corner Profile
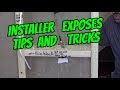 3 EASY WAYS TO HIDE WIRES CABLES IN WALL & FIND STUDS
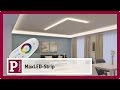 Indirect, glare-free LED lighting with MaxLED Strips
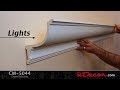 CM-5044 Polyurethane Crown Molding by uDecor
 Easy Crown Molding Informercial
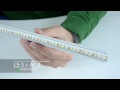 How to mount LED strip to aluminium profile and how to achieve linear effect
 6 Light Strip Ideas: Ultimate Light Strip Setup
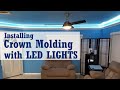 Poor Man's DIY: Installing Crown Molding with LED Lights
 Make An L.E.D Illusion Mirror!
 Crazy Lights LED indirect lighting for the ceiling.
 Aluminium profiles for indirect lighting by LED Strips - very easy to assemble
 Installing Ceiling Beams And Crown Molding
 Easy Crown Molding diy molding, Peel & Stick it is that easy!
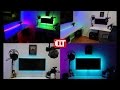 Best $17 Setup You'll Ever Spend! EPIC RGB LED's
 DIY a dropped ceiling light box
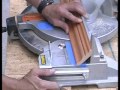 How to cut crown molding the easy way!
 How to install CROWN MOLDING using Sawset