Backpacking Navigation #2 - Map, Compass & GPS - CleverHiker.com
10 Best Backpacking Tents: https://www.cleverhiker.com/best-tents-backpacking
10 Best Hiking Shoes & Boots: https://www.cleverhiker.com/footwear
10 Best Sleeping Bags and Quilts: https://www.cleverhiker.com/best-sleeping-bags
10 Best Sleeping Pads: https://www.cleverhiker.com/best-sleeping-pads
10 Best Backpacking Packs: https://www.cleverhiker.com/best-backpacking-backpacks
10 Best Backpacking Stoves: https://www.cleverhiker.com/best-backpacking-stoves
CleverHiker Top Gear Picks: https://www.cleverhiker.com/top-gear-picks
More Gear Recommendations: https://www.cleverhiker.com/best-backpacking-gear-guide
See the FULL series for FREE at https://www.cleverhiker.com
Navigation – Map and Compass and GPS
Any expert will tell you that a map and compass are essential items for any backcountry trip. But they won’t do any good if you don’t know how to use them.
If you need to brush up on your skills or want learn some advanced techniques, consider signing up for an orienteering course in your area.
The first navigation tool you need to understand is your map. Maps come in all shapes and sizes and they will provide a detailed image of the land you’ll be traveling through.
A topographical map is the tool that you’ll need to navigate in the wilderness. Topo maps are much more accurate, detailed, and they provide an elevation profile of the area.
Understanding contour lines is really the key to understanding topographical maps. Contour lines are the small squiggly lines that cover the entire map.
A single contour line marks a given elevation on the map. For example, the 5,000 feet contour line goes in a circle around this mountain touching every point where the elevation is 5,000 feet.
If you travel up or down in elevation, you’ll hit a new contour line, which will denote a different elevation. If you walk uphill for example, you will hit the 5,100 foot contour line.
Contour lines never intersect. When contour lines are close together, it denotes very steep changes in elevation, like a steep cliff. When they are far apart, it denotes more gradual or gentle changes in elevation, like a valley floor or a field.
Your compass is the tool that you will use with your topographical map to help you locate yourself and plan a route without using any trails to get to a destination.
Even if you plan on traveling on-trail for your entire trip, knowing how to use a compass can come in very handy.
To learn how to use a compass, let’s start out by taking a look at the parts of the compass.
Parts of a compass:
• Needle – always points to magnetic north
• Dial or bezel - is that part that spins
• Orienting lines – are on the back of the dial, they spin when the dial spins
• Degree or index lines – are the marks around the dial
• Direction of travel arrow – is the direction you’ll walk after you take your reading
Taking a compass bearing is pretty straightforward. Lets say for example that our trail has been covered in snow, and we don’t know which way to travel.
Here’s what we’d do:
1) Locate where we are on the map
2) Then, we would line the edge of our compass up with the direction we want to travel being as precise as possible.
3) Next, we turn the dial on our compass until north on the bezel lines up with north on the map and the orienting lines on the compass line up with the north south lines on the map.
4) Once we have it all lined up and we’ve double checked our route, we remove the compass from the map, correct for declination if necessary (remember, east is least, so for this map we would subtract 13 degrees), hold the compass away from our body, and turn our body until the compass’s needle lines up with the orienting arrow pointing north. Put the mouse in the house.
5) Now, the direction of travel arrow is pointing towards our destination. If we’re in a large open area, you can pick a defined point on the horizion and walk directly towards it. Or if we’re in a forest, we can pick an object like a tree, walk to it, then hold up our compass and pick another point to walk to.
If you’re traveling by compass for long distances, it’s important to get very accurate readings and to use landmark clues like rivers, peaks, roads, and ridges to make sure you hit your mark.
A 1 degree mistake on a compass reading can put you off your mark by over 100 feet after you’ve traveled a distance of one mile. So planning a smart route is key to succeeding over long distances.
Don’t shoot for a small target that is many miles away, because you’re likely to miss your target. Instead, use the terrain to your advantage and pick shorter goals to make sure you stay on track.
Another very helpful tool for navigation is a GPS device. If you’re going on a trip that will require lots of off trail navigation, a GPS device can be a very useful tool to have.
If you get lost, a GPS unit will give you your exact coordinates, which you can use with your map to pinpoint exactly where you are.
Видео Backpacking Navigation #2 - Map, Compass & GPS - CleverHiker.com канала Dave Collins
Показать
Комментарии отсутствуют
Информация о видео
Другие видео канала
 Backpacking Navigation #1 - Staying Found - CleverHiker.com
 Magnetic Declination Demystified
 5 Essential Backpacking Knots - Cleverhiker.com
 How to Get Free Topo Maps - Map and Compass Skills - Video 1
 How to Find Your Position on a Topo Map Using a GPS & UTM
 Navigation: Map and Compass Duo
 SILVA Navigation School
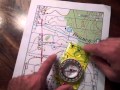 Orienting a Map and Compass
 Map and Compass (Simplified)
 How to Ice Axe Self-Arrest - CleverHiker.com
 Learn to Love Backpacking in the Rain - CleverHiker.com
 Backpacking Bear Encounters - Truth and Myth - CleverHiker.com
 High Elevation Hiking Tips and Lightning Storm Protection - CleverHiker.com
 Emergency First Aid Skills for the Backcountry - CleverHiker.com
 In and Out Navigation: The Easiest Way to Use a Compass
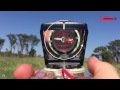 Compass Navigation Tutorial
 Truly Understanding A Compass
 1:24000 Topographic Mapping Basics (Part I)
 Backpacking Hygiene - Keeping Clean in the Wilderness - CleverHiker.com
 How to Use a Compass || REI