ITH Doll Tutorial PART 2- Attaching Arms
In this part, we learn how to sew the dolls arms onto her body. Most dolls have the arms sewn into the body greatly limiting the mobility and fun factor of the doll. But with the arms attached, she is easier to dress and pose. We'll use buttons, upholstery thread and a 5" doll needle to make two passes through each arm. Using buttons takes all of the tension off the fabric resulting in a durable, longlasting attachment that is more child friendly than sewing just the fabric together. Its super fun. This digital design is for embroidery machine user and the design can be purchased at planetapplique.com
Видео ITH Doll Tutorial PART 2- Attaching Arms канала planetapplique
Видео ITH Doll Tutorial PART 2- Attaching Arms канала planetapplique
Показать
Комментарии отсутствуют
Информация о видео
Другие видео канала
 ITH Doll Tutorial PART 3- The Hair 1
![DIY Posable Felt Doll [narrated]](https://i.ytimg.com/vi/Fiop4mn6R_8/default.jpg) DIY Posable Felt Doll [narrated]
DIY Posable Felt Doll [narrated] FANCYDOLLS WORKSHOPS: Присоединяем руки и ноги к телу куклы/Attaching arms and legs to the doll body
 In the Hoop Kitty Tutorial Part 1: The Kitty
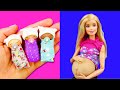 DIY Miniature Baby for Barbie
 How to Sew a Button Joint
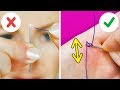 18 SIMPLE SEWING HACKS THAT WILL CHANGE YOUR LIFE
 How to make Felt Doll part 1
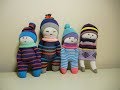 Cute Sock Dolls -- DIY Stuffed Toys -- Easy and Fast
 Customizing Doll Patterns - Excerpt
 Rag Doll Making Project - Part 3 - Sewing The Arms, Legs, Head & Body - Alice's Bear Shop
 TUTORIAL: How to make a base plushie-anime/human/game character, chibistyles- Cloctor Creations
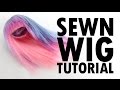 Sewn Doll Wig Tutorial How-To
 Handmade Doll DIY - Black Handmade Rag Doll Eyes DIY -Textile Doll Instructions - Part 4
![DIY Posable Felt Doll [timelapse]](https://i.ytimg.com/vi/d4zoU9I_KLU/default.jpg) DIY Posable Felt Doll [timelapse]
DIY Posable Felt Doll [timelapse] ITH Doll Tutorial PART 1-Planet Applique
 How to sew a doll
 How to attach waldorf doll arms
 ITH Doll Tutorial PART 3B: Hairstyle 2
 Sew a Bunny - Great Gift with a Free Pattern