Tamiya Ducati 888 Superbike Racer 1/12 | The Inner Nerd
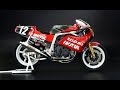
Tamiya Ducati 888 Superbike Racer in 1/12 scale by The Inner Nerd
Instructional time lapse video of the full build, and painting of the 1/12 scale Ducati 888 Superbike Racer by Tamiya in as shown by The Inner Nerd
The first part of this video shoes the build up of the engine and chassis using Tamiya Extra Thin Poly Cement and Tamiya Extra Thin Quick Setting Poly Cement. Also included in this section is the inclusion of Aftermarket Photo Etched parts which are applied with Loctite 406 CA Superglue to add more detailing into the scale model. Some scratch building using Evergreen Polystyrene Rods and Sheet also adds to the detailing of the model. This completes the model in a more detailed way by adding hydraulic and electrical wires like on the real subject.
The second part of the video shows the build of the chassis and interior details. Fine grit sanding papers and sponges are used to prepare the surface for painting where mold lines need to be removed. I use 3M and Tamiya sanding sponges and papers in 800, 1200, 2000, 3000 & 6000 dpi grits to get a smooth and even surface. Ultimate Modelling Tools Perfect Plastic Putty is used to fill and y gaps between panels to get a consistent surface on the model and fill any gaps that are unsigtly. Mr Hobby Mr Surfacer 1000, 1200, & 1500 finishing primer is used to prime all the parts on the scale model ready for painting. This helps highlight the imperfections on the parts before the top colour coat from Tamiya, Mr Color, Gunze Sangyo or Zero Paints is applied. I use Mr Hobby Mr Surfacer Grey and Black surfacers to prime the parts. This to help highlight the imperfections on the parts before the top colour coat in both a light and dark colour.
The third part of the video shows the painting of the body shell pieces. Here I use Zero Paints Lacquer colour to paint the body in a colour matched paint to the manufacturer. I spray in light coats to build up the paint in thin layers until the body colour is uniform. I use Harder & Steenbeck Evolution Silverline is used with Badger 1100 with Anti-Pulsation Tank Working Pressure
22psi (1.51bar). Also included in this section is the Engine Exhaust painting using Alclad 2 Lacquers
(Airframe Aluminium, Aluminium, Steel, Jet Exhaust, Copper, Pale Burnt Metal, Polished Brass) and Tamiya clear paints Clear Re, Blue, Green, Yellow and Orange to create a burnt metal effect. 3 layers of Gunnze Sangyo Mr Color GX-100 Superclear III clear gloss seal the decals in. I also use Zero Paints Diamond Finish 2K Clear which is a 2 pack 3 part clear coat system used to create a diamond mirror like shine on the painted surface. This pack contains a Thinner, Hardener & Clear which have to be mixed manually to create the correct mix ratio. This is applied in dust coats followed by 3 wet layers with one day separating each coat. Decals follow painting with the aid of Mr Hobby Mr Mark Setter & Softer products. These products allow the decal to form to the shapes and panel lines of the surface which you can see in the video.
Next up is the flat and polish technique to reduce and remove the orange peel effect found when spraying thick clear coats of Zero Paints Diamond Finish 2K Clear. I start by using 2000 grit 3M sanding sponge to cut through the top layer of clear and create a smooth and even surface. 3000 grit 3M sanding sponge to smoothen the surface further and remove the cutting scores made by the 2000 grit 3M sponge.
After the orange peel effect has been removed through 2000 & 3000dpi sanding I use Tamiya Polishing Compounds; Coarse, Fine and Finish to buff the surface to a shine and mirror like finish. First the Tamiya Coarse Polishing Compound is used to buff out the scratches made by sanding and begin to create a shine. Next up is Tamiya Fine Polishing Compound which further buffs the surface creating a deeper shine and smoother looking finish to the Zero Paints Diamond Finish 2K Clear coat. Final stage is using 2 passes Tamiya Finish Polishing Compound
#saveyourinternet
*Items Used*
Airbrush: Harder & Steenbeck Evolution Silverline Solo Needle/Nozzle: 0.15mm
Compressor: Badger 1100 with Anti-Pulsation Tank Working Pressure 22psi (1.51bar)
Paint: Mr Hobby Mr Surfacer 1000, Mr Hobby Mr Surfacer 1200 & Mr Hobby Mr Finishing Surfacer 1500 thinned with cellulose lacquer thinner
Tamiya Acrylics thinned with Tamiya X-20A Thinner
Mr Hobby Aqueous
Abteilung 502 Oils – Black / Industrial Earth / Olive Green
Winsor & Newton Oils – Yellow Ochre / Raw Umber / Burnt Sienna / White
AK Interactive Pigments - Gun Metal, Europe Earth, Russian Earth, Medium Rust, Pigment Fixer
Vallejo Masking Fluid
Winsor & Newton UV Cut Matte Enamel Varnish
Brushes: Pure Sable Brush - Various Sizes
Glue: Tamiya Extra Thin Cement
Tamiya Poly Cement
Revell Contacta Professional
Loctite 406 CA Superglue
Sanding: 3M 600p / 800p / 1200p / 2000p / 3000p sheets & sponges
Tamiya Polishing Compounds (Course, Fine & Finish)
Evergreen Polystyrene Sheet/Rod/Strips
Видео Tamiya Ducati 888 Superbike Racer 1/12 | The Inner Nerd канала The Inner Nerd Scale Modelling
Показать
Комментарии отсутствуют
Информация о видео
4 мая 2019 г. 13:10:44
00:28:29
Другие видео канала
 Yoshimura Suzuki GSX-R750 1986 1/12 Fujimi - Motorcycle Model
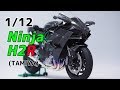 Building Tamiya「1/12 Kawasaki Ninja H2R」
 Lamborghini Huracán Performante 1/24 | The Inner Nerd
 Snow Harrier GR.7 1/48 | The Inner Nerd
 Sherman M4A3 Winter Camouflage | The Inner Nerd
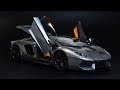 Lamborghini Aventador 1/24 Aoshima - Car Model
 Ferrari 330 P4 24h LeMans 1/24 Fujimi - Car Model
 Ferrari 312T Hasegawa 1:20 Niki Lauda - Formula 1 Model
 Ducati 851 SP3 | Classic Bike Investment with Paul Jayson | The Motorcycle Broker
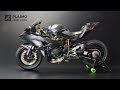 Kawasaki Ninja H2R - Tamiya 1/12 - Motorcycle Model
 P-51 D-5 Mustang Eduard 1/48 - Miss Steve - Aircraft Model
 #02 Building 1/12 HONDA VFR750R (RC30) 「Frame and Engine assembly.」
 #03 Building 1/12 DUCATI 1199 PANIGALE S TRICOLORE 「Exhaust system and Mainframe」
 Airfix 1:72 Avro Lancaster B.III
 Ducati 888 Superbike Racer Tamiya 1/12 Full Video build
![[Full build] Honda CBR1000RR-R Fireblade SP Make It 1/12 Scale step by step build (Tamiya)](https://i.ytimg.com/vi/_3X7eGGa4_U/default.jpg) [Full build] Honda CBR1000RR-R Fireblade SP Make It 1/12 Scale step by step build (Tamiya)
[Full build] Honda CBR1000RR-R Fireblade SP Make It 1/12 Scale step by step build (Tamiya) Yamaha 1600 RoadStar - 1/12 - Tamiya - Complete build
 Building a Lotus Type 78 Tamiya F1 1/20 Scale Model Kit
 #05 Building 1/12 HONDA CBR1000RR-R + LED 「Complete!」