How to Create a 3D Text in GIMP 2.10.14 | Easy 3D Text Tutorial With Gimp for Beginners
In this video we are going to discuss in an easy way for beginners using the free yet powerful software GIMP in step by step on how to create 3D text in GIMP 2.10.14, a easy 3D Text tutorial with gimp for beginners.
Like the video.Comment.Share.
Subscribe: http://bit.ly/2FVkPrW
To get started, go to file,new enter desired dimensions then go to advanced options and I will select the fill with white, click ok, next I will select the text tool click on my scene, and we drag to make a box I will change the color of my font to a gray color that's okay you can also change the font if you would love to from here, I will click here inside my box and type my desired text, then I will select my text, and increase the size as preferred, that's okay, next I will select the move tool in order to move my text layer to the middle of my image, but if you would love to Center your text exactly in the center of the image, you can go to, select the alignment tool select, then set the align mode relative to image, then select your text layer and align it to the center of target, and to the middle of the target, it is exactly centered now, next I will duplicate my text layer by click and hold then drag towards this button, and now it is duplicated, I will hide the top layer for now and select the origin text which is the layer which has beneath, and then apply filters from filters menu,blur,zoom motion blur, I will reduce the blurring factor to the negative because over the positive values the text appears to be moving away from us, and we need to exactly the opposite and be right here zooming toward us in which we will make it and negative and I will select negative zero point one you can't change as you desire and of course you can modify the center X and center y in which it will specify that the perspective point that you are looking to, in which direction you are looking to the text, I will keep it centered at the text for now, you can of course experiment with different techniques and different angles, now which this is selected, I will select the select by color tool and select the background of the text, now the background is completely selected I want to invert it to select exactly my text every pixel of text. I will go to select invert now my selection is completely inverted then I will select the gradient tool and you can choose your desired gradient choose whatever gradient you would like to, I chose this one here, and I click all and drag while holding ctrl to snap strict and of course you can adjust the points of the slider to move the position of the points you can move your points as you desire and you can click on a single point and change the color I like the colors for now but in case you want to reverse the order of the colors, press the reverse, now the shape is radial, okay then if you are satisfied with the results press Enter the following you will reveal our hidden text, and see all it looks like it is 3d, this is an optical illusion now you can change of course the color of your text I will make sure I've selected none by going to select menu done select the text tool and select my text that I want to change the color to, feel free to experiment with different colors and choose what you like, now this looks okay for now, I like this color I will create a new layer in which it will be empty, it will be empty by default I will press ok but I hold alt while selecting the text you can see the text is selected precisely by each element in the layer, make sure you've selected the layer the new empty layer then go to ellipse select tool and make an ellipse but make sure the mode of the ellipse selection is intersected, because we want to select the portion of the text which intersect with the ellipse, and the importance of this step is to give an illusion of our text and artificial lighting, or as you can say to make it more pop up to the vision, now right click on the layer add legal mask and you will select the selection in which the selection will be only visible and the rest of the layer will be completely transparent, next I will select the gradient tool and change the pattern to the simple foreground background color, I will change the foreground to white and keep the background to black you can click all and drag a slider and this is that we are not coloring the layer, but in fact we are adjusting the masks of the layer, this is called a mask not put the actual layer in which the transparency would be affected to check over the world we will be select now the visible layer and fill with bucket fill tool, select the foreground color which is white and fill the whole selection, as you can see it is filled with the color white but not transparent as we would like to, we will go back to the layer mask select the gradient tool and reapply the gradient if desired we can switch the order by going to reverse, adjust our slider, and we of course we can move the mixing between colors.
Видео How to Create a 3D Text in GIMP 2.10.14 | Easy 3D Text Tutorial With Gimp for Beginners канала hodhod
Показать
Комментарии отсутствуют
Информация о видео
Другие видео канала
 Top 5 Text Effects in GIMP
 GIMP Text Effects - 3D Text
 HOW TO USE GIMP - Complete Tutorial for Beginners 2020
 Life Vest Inside - Kindness Boomerang - "One Day"
![How to Create Water Dispersion Effect in Gimp (2.10.14) [2020] | Multi Language Subtitles](https://i.ytimg.com/vi/5RHGgnKFtUk/default.jpg) How to Create Water Dispersion Effect in Gimp (2.10.14) [2020] | Multi Language Subtitles
How to Create Water Dispersion Effect in Gimp (2.10.14) [2020] | Multi Language Subtitles Simple Logo Design Tutorial with GIMP
 How to create a easy 3D Text in GIMP | Photoshop Alternative | #75
 GIMP Tutorial: 3D Text Effect
 How to Remove Picture Background GIMP 2020 | Gimp 2.10.14 Take an Element From Photo
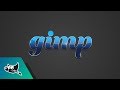 GIMP Tutorial: Glossy Text Effect
![Remove Background With Complex Hair Using Gimp 2.10.14 [2020] | English Subtitles](https://i.ytimg.com/vi/Iob-4mV-_9g/default.jpg) Remove Background With Complex Hair Using Gimp 2.10.14 [2020] | English Subtitles
Remove Background With Complex Hair Using Gimp 2.10.14 [2020] | English Subtitles Create Better 3D Text in GIMP with This Ingenious Method
 Create a handwritten or write-on revealing text effect using GIMP and SHOTCUT
 GIMP Text Effects Tutorial {Dripping Paint}
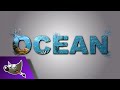 HOW TO PUT AN IMAGE INSIDE TEXT USING GIMP: making text stand out with this great effect tutorial
 How To Design Logo 3D In Gimp / Logo Tutorial
 Advertising banner design | gimp hindi / हिन्दी मे
 Efeito metálico - Gimp
 GIMP 2.10 Tutorial: Flower Portrait Abstract Collage (Marcelo Monreal)
 How to Wrap Text to Circle GIMP 2.10.14 2020 | Step by Step Tutorial For Beginners | Easy Fast Help