How to program the KT-LCD3 Electric Bike Computer. 20 E-bike functions
E-bike tips. Step by step, programming of the KT-LCD3 Electric Bike Computer. 20 E-bike functions
Visit us @ https://augustineebikes.com.
Check out a just a few of our ebike blog pages.
Check out bikes for under $500 https://augustineebikes.com/mountain-bikes/
Rear Hub Ebike Conversion Kits https://augustineebikes.com/hub-conversion-kits
Front Hub Conversion Kits
Mid Drive Ebike Conversion Kits https://augustineebikes.com/1middrive-kits
All Weather Electric Mobility Scooter
http://amzn.to/2fhkQcS
E-Bike Controllers https://augustineebikes.com/ebike-controllers-2018
This video contains affiliate links: We part of the amazon affiliate program and thank you for your support.
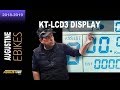
E-Bike. The #KT-LCD3 is a powerful E-bike computer that determines and controls over 20 important functions on your ebike. The KT LCD3 is connected directly to your controller box and controls these functions, just to name a few
Trip speed as well as maximum speed
handlebar functions
power-assist startup
Power assist ratio
km vs mph
Cruise function
Battery capacity indicator
Real-time battery voltage
Motor power and temperature
Brake display
Turn on backlighting and lights
Environment temperature display
deFault code display
User parameter settings
supply voltage identification
and more.
To turn on the KT-LCD display, first turn on your battery then press the middle function button for 3 seconds. This brings up the first of 3 information displays about showing information about your ebike, such as battery levels, trip distance, temperature, cruise function, lights, brakes, motor temperature, error codes and more. To scroll through the 3 displays, press the middle function button briefly and it will change from display to display.
To control the general project settings hold down the up and down arrow keys for 3 seconds. This will bring you to your first settings. Here you can control maximum speed, wheel size, (very important), mph vs km, and temperature settings. To change the settings use the up and down arrow keys, when your selection appear press the middle function button It will save your settings and allow you to scroll to the next settings. When you are done making your selections hold down the up and down arrow keys for 3 seconds. This will bring you to the Parameter settings menu, where you will see a blinking P1 at the bottom of your screen.
P1 controls your motor characteristic parameters. You will want to check with your manufacturer for the correct settings for your motor.
Press the middle button to scroll to P2.
P2 controls wheel speed pulse signal. Again if you don't know consult your manufacturer.
P3 Sets your pedal assist function. The settings are 0 through 5. When set to 0 the
throttle is dependent on the PAS Gear Ratio. When set to 5 the throttle
will provide the most power.
P4 Sets the Throttle Start-Up Setting. This is an important one. When set to 1 the throttle will only activate the motor after the motor has been activated via pedaling.
When set to 0 the throttle activate the motor when triggered
P 5 is your Power Monitoring Setting. Again this is important. If the setting isn't correct you won't be able to determine how much you have left in your battery. There are settings for 24v, 36v and 48v. If you don't know the correct settings, set this to 0 for real-time voltage mode.
When done with these 5 settings press the up and down arrow keys to move to the C Parameter settings.
C1 is your Throttle Start-Up Setting. Check your manual for your preferred settings
C2 is your Motor Phase Classification Coding Mode. These parameters set the different phases of the motor when using a sine wave drive.
C3 is your Power Assist Ratio Gear. The settings are 0-5, 0 being the least pedal assisted by the motor and 5 being the most.
C4 is your Handlebar Function Setting. This controls various aspects of your throttle handling.
C5 controls your maximum operating current. Check your manual for the appropriate setting.
C6 is the backlight brightness setting for your LCD display. Settings are 1 through 5. 5 being the brightest.
C7 is your Cruise Function Setting if your controller supports cruise. 0 disabled. 1 enabled.
C8 is the Motor Operating Temperature Display Setting. 0 disabled, 1 enabled. I enable this.
C9 is the Startup Password Setting
C10 Restore Default Setting. This is important if you have entered the wrong setting and need to start over. Press y to reset and n to keep existing settings.
C11 is your LCD Attribute Setting. Choices are 0 – 2. I would leave this at 0
C12 parameters are settings for the controller's minimum operating voltage. Check your manual before changing.
C13 is the ABS Brakes and Anti-Charge Control Setting. Again check your manual before changing.
And finally C14 is your Power Assist Tuning Setting. Settings are 1 -3, 3 being the strongest.
Видео How to program the KT-LCD3 Electric Bike Computer. 20 E-bike functions канала AUGUSTINE EBIKES 2021
Visit us @ https://augustineebikes.com.
Check out a just a few of our ebike blog pages.
Check out bikes for under $500 https://augustineebikes.com/mountain-bikes/
Rear Hub Ebike Conversion Kits https://augustineebikes.com/hub-conversion-kits
Front Hub Conversion Kits
Mid Drive Ebike Conversion Kits https://augustineebikes.com/1middrive-kits
All Weather Electric Mobility Scooter
http://amzn.to/2fhkQcS
E-Bike Controllers https://augustineebikes.com/ebike-controllers-2018
This video contains affiliate links: We part of the amazon affiliate program and thank you for your support.
E-Bike. The #KT-LCD3 is a powerful E-bike computer that determines and controls over 20 important functions on your ebike. The KT LCD3 is connected directly to your controller box and controls these functions, just to name a few
Trip speed as well as maximum speed
handlebar functions
power-assist startup
Power assist ratio
km vs mph
Cruise function
Battery capacity indicator
Real-time battery voltage
Motor power and temperature
Brake display
Turn on backlighting and lights
Environment temperature display
deFault code display
User parameter settings
supply voltage identification
and more.
To turn on the KT-LCD display, first turn on your battery then press the middle function button for 3 seconds. This brings up the first of 3 information displays about showing information about your ebike, such as battery levels, trip distance, temperature, cruise function, lights, brakes, motor temperature, error codes and more. To scroll through the 3 displays, press the middle function button briefly and it will change from display to display.
To control the general project settings hold down the up and down arrow keys for 3 seconds. This will bring you to your first settings. Here you can control maximum speed, wheel size, (very important), mph vs km, and temperature settings. To change the settings use the up and down arrow keys, when your selection appear press the middle function button It will save your settings and allow you to scroll to the next settings. When you are done making your selections hold down the up and down arrow keys for 3 seconds. This will bring you to the Parameter settings menu, where you will see a blinking P1 at the bottom of your screen.
P1 controls your motor characteristic parameters. You will want to check with your manufacturer for the correct settings for your motor.
Press the middle button to scroll to P2.
P2 controls wheel speed pulse signal. Again if you don't know consult your manufacturer.
P3 Sets your pedal assist function. The settings are 0 through 5. When set to 0 the
throttle is dependent on the PAS Gear Ratio. When set to 5 the throttle
will provide the most power.
P4 Sets the Throttle Start-Up Setting. This is an important one. When set to 1 the throttle will only activate the motor after the motor has been activated via pedaling.
When set to 0 the throttle activate the motor when triggered
P 5 is your Power Monitoring Setting. Again this is important. If the setting isn't correct you won't be able to determine how much you have left in your battery. There are settings for 24v, 36v and 48v. If you don't know the correct settings, set this to 0 for real-time voltage mode.
When done with these 5 settings press the up and down arrow keys to move to the C Parameter settings.
C1 is your Throttle Start-Up Setting. Check your manual for your preferred settings
C2 is your Motor Phase Classification Coding Mode. These parameters set the different phases of the motor when using a sine wave drive.
C3 is your Power Assist Ratio Gear. The settings are 0-5, 0 being the least pedal assisted by the motor and 5 being the most.
C4 is your Handlebar Function Setting. This controls various aspects of your throttle handling.
C5 controls your maximum operating current. Check your manual for the appropriate setting.
C6 is the backlight brightness setting for your LCD display. Settings are 1 through 5. 5 being the brightest.
C7 is your Cruise Function Setting if your controller supports cruise. 0 disabled. 1 enabled.
C8 is the Motor Operating Temperature Display Setting. 0 disabled, 1 enabled. I enable this.
C9 is the Startup Password Setting
C10 Restore Default Setting. This is important if you have entered the wrong setting and need to start over. Press y to reset and n to keep existing settings.
C11 is your LCD Attribute Setting. Choices are 0 – 2. I would leave this at 0
C12 parameters are settings for the controller's minimum operating voltage. Check your manual before changing.
C13 is the ABS Brakes and Anti-Charge Control Setting. Again check your manual before changing.
And finally C14 is your Power Assist Tuning Setting. Settings are 1 -3, 3 being the strongest.
Видео How to program the KT-LCD3 Electric Bike Computer. 20 E-bike functions канала AUGUSTINE EBIKES 2021
Показать
Комментарии отсутствуют
Информация о видео
Другие видео канала
 ebike Tips. Programming the 24v, 36v, 48v, KT-LCD3 on-board controller computer
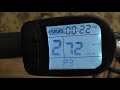 Дисплей LCD 5 / Настройки дисплея электровелосипеда
 How to install a Brushless DC Controller on Ebike: The missing manual
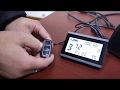 LCD setting P
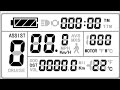 Заводские настройки электровелосипеда через LCD-3 дисплей !!! ПОШАГОВО И ПОДРОБНО !!!
 Sondors LCD Settings
 Ktlcd3 tacho kmh richtig anpassen konfigurieren perfekt abstimmen ohne speed sensor
 Programowanie wyświetlacza LCD3 w zestawie Rapid S-1100. www.bateryjnie.pl
 Bafang BBSHD 1000w Walk Around And Review 65kph - 40mph Test Run
 Electric Bike Kit Pedal Assist Display Operation
 EBIKE TIPS. The SW 900 LCD E-bike computer how to control it's 15 functions
 KT-LCD3 vs the new Color KT-LCD8H - Ebike displays
 TSDZ2 and LCD3 OpenSource firmwares: max battery current and power configurations and tests
 Improve your Ebike In 10 Minutes. Programming your SW-900 onboard computer
 BOOST your EBike's performance in 5 minutes by programming onboard computer
 How to make my Electric Bike go FAST
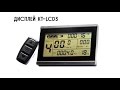 Дисплей KT-LCD3 на 36-90В
 Programming your controller with the KTLCD3 and SW900
 E-Bike Umbau Display NCB LCD03 Anleitung Kunteng LCD3