Vray For Sketchup #5/4 - Material Wrapper in vray for sketchup
Lesson_1 https://www.youtube.com/watch?v=X_ztoxtw7Ng&list=PLnADjKEBiMHbtaJ0PF9-uspa0Ph-6jgOT
Lesson_2 https://www.youtube.com/watch?v=QuzSYkEh4hs&list=PLnADjKEBiMHaH7SRszxrJzQCTTkLaDLuA
Lesson_3 https://www.youtube.com/watch?v=cWoyyDLf3Eg&list=PLnADjKEBiMHbUW0tFRZ9LPQNmi8B43r0-
Lesson_4 https://www.youtube.com/watch?v=_qGe8WUbdn8&list=PLnADjKEBiMHbWrlNLgxO7MWgvkxLja90E
Lesson_5 https://www.youtube.com/watch?v=z29oTYxqAHA&list=PLnADjKEBiMHYh3Xj1qYeBbyNcFTIt2SNM
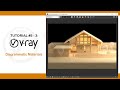
This module covers the workflow for inserting a CG object in a real-world photograph also called a backplate.
The first step in the process is loading the backplate image in to the Background slot in the Environment options in V-Ray Assets Editor. It is important the aspect ratio of the backplate matches the aspect ratio of the image we are going to render. One the background image is loaded we need to make sure we are using the proper mapping. This can be done in the UVW roll out by switching the UVWGenChannel parameter to UVWGenEnvironment. Next, we need to switch the Mapping Type parameter to Screen. We might need to adjust the brightness of the Background image to compensate for the Camera Exposure Value (EV). This is done by adjusting the number value next to the Background color swatch. In our particular scene, we need to set that value to 60. Finally, we need to enable the Environment Overrides for GI(Skylight) and Reflection and set their multipliers (the values next to each swatch) to 0. This makes sure that the Backplate is not considered when calculating GI and Reflections.
Next, we need to make sure that the CG object casts shadows on the table in our backplate. This is done with a plane that matches the table in the background. We need to make it invisible to the camera but still able to receive shadows. To do that we are going to use a Wrapper material applied to the plane. In order to catch the shadows, the Wrapper material requires that we give it a gray diffuse material to use as a Base material. To do that we set the Base material parameter to Ground_mtl (a Generic material that has its Diffuse parameter set to a gray color). We need to enable the Matte checkbox in the options of the Wrapper material – this makes it invisible to the camera. To catch the shadows, we enable the Shadows checkbox. Now the rendering should look like the wooden model is casting shadows on the table in our background image. We can use the Shadow color and Shadow brightness parameters to control the color and brightness of the shadows respectively. Finally, if we want to have a proper alpha channel for compositing purposes, we need to set the Alpha contribution parameter to -1. This will allow us to switch the backplate with a different image in Photoshop for example.
Видео Vray For Sketchup #5/4 - Material Wrapper in vray for sketchup канала Vray For SketchUp Tutorial Tips
Lesson_2 https://www.youtube.com/watch?v=QuzSYkEh4hs&list=PLnADjKEBiMHaH7SRszxrJzQCTTkLaDLuA
Lesson_3 https://www.youtube.com/watch?v=cWoyyDLf3Eg&list=PLnADjKEBiMHbUW0tFRZ9LPQNmi8B43r0-
Lesson_4 https://www.youtube.com/watch?v=_qGe8WUbdn8&list=PLnADjKEBiMHbWrlNLgxO7MWgvkxLja90E
Lesson_5 https://www.youtube.com/watch?v=z29oTYxqAHA&list=PLnADjKEBiMHYh3Xj1qYeBbyNcFTIt2SNM
This module covers the workflow for inserting a CG object in a real-world photograph also called a backplate.
The first step in the process is loading the backplate image in to the Background slot in the Environment options in V-Ray Assets Editor. It is important the aspect ratio of the backplate matches the aspect ratio of the image we are going to render. One the background image is loaded we need to make sure we are using the proper mapping. This can be done in the UVW roll out by switching the UVWGenChannel parameter to UVWGenEnvironment. Next, we need to switch the Mapping Type parameter to Screen. We might need to adjust the brightness of the Background image to compensate for the Camera Exposure Value (EV). This is done by adjusting the number value next to the Background color swatch. In our particular scene, we need to set that value to 60. Finally, we need to enable the Environment Overrides for GI(Skylight) and Reflection and set their multipliers (the values next to each swatch) to 0. This makes sure that the Backplate is not considered when calculating GI and Reflections.
Next, we need to make sure that the CG object casts shadows on the table in our backplate. This is done with a plane that matches the table in the background. We need to make it invisible to the camera but still able to receive shadows. To do that we are going to use a Wrapper material applied to the plane. In order to catch the shadows, the Wrapper material requires that we give it a gray diffuse material to use as a Base material. To do that we set the Base material parameter to Ground_mtl (a Generic material that has its Diffuse parameter set to a gray color). We need to enable the Matte checkbox in the options of the Wrapper material – this makes it invisible to the camera. To catch the shadows, we enable the Shadows checkbox. Now the rendering should look like the wooden model is casting shadows on the table in our background image. We can use the Shadow color and Shadow brightness parameters to control the color and brightness of the shadows respectively. Finally, if we want to have a proper alpha channel for compositing purposes, we need to set the Alpha contribution parameter to -1. This will allow us to switch the backplate with a different image in Photoshop for example.
Видео Vray For Sketchup #5/4 - Material Wrapper in vray for sketchup канала Vray For SketchUp Tutorial Tips
Показать
Комментарии отсутствуют
Информация о видео
29 июля 2018 г. 9:00:02
00:03:51
Другие видео канала
 Vray For Sketchup #5/3 - Diagrammatic Materials in vray for sketchup
 Vray For Sketchup #4/2 - Advanced Material in vray for sketchup
 Vray For Sketchup #3/4 - Simple Compositing in vray for sketchup
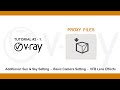 Vray For Sketchup #2/1 - Exterior rendering in vray for sketchup
 Vray For Sketchup #2/2 - Aerial Perspective in vray for sketchup
 Vray For Sketchup #5/1 - Caustics in vray for sketchup
 Vray For Sketchup #3/1 - Interior rendering in vray for sketchup
 Vray For Sketchup #2/9 - Advanced Fur in vray for sketchup
 Vray For Sketchup #2/8 - Proxy Shading in vray for sketchup
 Vray For Sketchup #1/1 - User Interface in vray for sketchup
 Vray For Sketchup #1/5 - Using IES Light in vray for sketchup
 Vray For Sketchup #2/3 - Advanced Sun & Sky in vray for sketchup
 Vray For Sketchup #1/6 - Using Light Omni in vray for sketchup
 Vray For Sketchup #5/2 -Vray Clipper in vray for sketchup
 Vray For Sketchup #4/3 - Advanced textures in vray for sketchup
 Vray For Sketchup #3/2 - Night Time Setup in vray for sketchup
 Vray For Sketchup #1/7 - 3D Animation in vray for sketchup
 Vray For Sketchup #1/9 - Advanced VFB in vray for sketchup
 Vray For Sketchup #1/4 - Using Spot Light in vray for sketchup
 Vray For Sketchup #3/3 - Render Elements in vray for sketchup