How to fix overheating & excessive fan noise on Dell XPS
FULL WRITTEN GUIDE CAN BE FOUND HERE AT OUR MEDIUM BLOG:
https://medium.com/@retinalnetwork/how-to-prevent-overheating-excessive-fan-noise-on-any-dell-xps-and-extend-battery-life-543f80a9ccdc
Timestamps:
Introduction (What the problem is): 0:00 - 1:00
Step 1 | Rollback BIOS from 1.14 to 1.13 | 1:00 - 1:53
Step 2 & 3 | Enable C-state control & disable Turboboost | 1:53 - 2:55
Step 4 | Install Dell Power Manager | 2:55 - 3:40
Conclusion | 3:40 - 3:56
How to fix overheating & excessive fan noise on ANY Dell XPS (also extends/improves battery life)
Background: I bought a new Dell XPS 13 2-in-1 (7390) laptop (I7 processor) and on non-demanding tasks it would become hot and the fans would turn on. I also noticed the battery draining faster than expected. This didn't make any sense to me; the laptop should have been handling these light tasks with ease. One time I left it on with a single chrome tab open and returned to my room a few minutes later to find it super hot with the fans blasting at max. At that point I knew; this wasn't normal and something had to be done.
Problem: While Dell's laptops are best in class hardware wise and excellent value for money, their software can be… well - dopey to say the least. Through my research and testing, I believe the main culprit is the newest BIOS version (1.14). The CPU is consistently using more power than it needed. However, I have included some additional steps I took which should also help prevent overheating and improve battery life.
Solution: With four simple steps I was able to completely solve this issue; the laptop remains cool during normal usage and has an excellent battery life. I believe the most important step was rolling back the BIOS version, though the other steps should also prevent overheating and excess battery use! I will show you how to do it all, and it should take you less than 5 minutes to do. This should work on a lot of Dell laptops, especially the XPS range, if you are facing similar issues; not just my specific model.
The four steps
Rollback BIOS from 1.14 to 1.13
Enable C-state control
Disable Turboboost
Install dell power manager
Steps 1
Navigate to the official dell website
Hover over the support tab and click "product support"; find your device by typing in the dell service tag (or it may find it for you automatically)
Go to the "drivers & downloads tab"
Scroll down to the system BIOS section, click the arrow to see more and click "older versions"
Download & install version 1.3.1
Restart your laptop
Steps 2 & 3
Restart your laptop and when the dell logo displays, repeatedly press F2 to enter the BIOS.
Navigate to "performance" and set:
Enable C-state control to "on"
Enable Intel Turbo Boost Technology to "off"
→ (Do not do this if you want to make use of the turbo-boost functionality and would like your CPU to be able to squeeze out that extra juice when working on demanding tasks.)
Then click apply changes & exit
Step 4
Open the Microsoft Store app
Find and install "Dell Power Manager"
Open it and navigate to "Thermal Management"
I recommend setting it to optimized; but if you value quietness at the expense of performance (e.g. you are not doing demanding tasks) you can select quiet. → (If you want the maximum performance and don't mind the extra heat and noise, select "ultra performance")
Please let me know in the comments if this worked for you. Did you do all the steps? Or did one step do the trick? If it didn't work for you, let me know too! I've got some more advanced things you could try, and I'll make a tutorial on how to do them if needed 😎
Видео How to fix overheating & excessive fan noise on Dell XPS канала RetinalRepairs
Показать
Комментарии отсутствуют
Информация о видео
Другие видео канала
 Dell XPS 17 9710 Overheating Issue (2021)
 Fix Laptop Fan Noise and Heat!!!
 Laptop Running Hot? Try This!
 Dell Laptop Overheating Fix (Official Dell Tech Support)
 Adjust Windows Power Settings to Reduce Fan Noise | HP Computers | @HPSupport
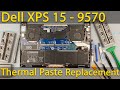 Dell XPS 15 9570 Disassembly, fan cleaning and thermal paste replacement
 Time To Say GOODBYE To The Dell XPS
 Dell XPS 15 9510 for Photographers and Content Creators
 FIX for Dell laptop fans always on and loud - solution for Inspiron, XPS, Latitude
 Improve AIRFLOW in your Dell G5 or XPS Gaming PC (step by step tutorial mod)
 How to Troubleshoot | Fix Fan Issues Dell (Official Dell Support)
 Dell XPS 15 9500 Full REVIEW - The Perfect 15-inch Laptop? | The Tech Chap
 Watch me struggle to repaste this overheating Dell XPS 15 laptop
 5 tips for your NEW Dell XPS laptop
 5 COMMON PROBLEMS To Look Out For! | DELL XPS 13, 15, 17 (2021)
 Fix The Buzzing Sound in any Laptop
 Dell XPS 13 9370 Disassembly, fan cleaning and thermal paste replacement
 Dell XPS 13 9310 Review - The 13” Laptop I’d Use!
 Fixing Dell's RTX 3060 Ti Pre-built Gaming PC
 Dell XPS 15 9510 Review (2021): Impressive All Rounder (FHD+)