Retrofit Projector Bi-Xenon Headlights DIY! EASY!
Videos covers the DIY installation and retrofit bi-xenon projectors into factory halogen headlights. It shows how to remove your headlights, how to polish your headlights correct, how to remove the lens from the headlight housing, how to install the projector into the headlight, and finally it shows before and after pictures.
The projectors used in this video are mini H1 bixenon projectors. They are designed for vehicles that have factory H4 or 9003 halogen headlights. The retrofit headlights were installed on a 2002 1st gen Toyota Tacoma.
The procedure is as follows:
1. remove headlights from vehicle (this is different based on your car)
2. Remove all of the auxiliary items from the headlights
3. Bake the headlights for 290 degrees for around 5-10 mins
4. pry the lens open using leverage
5. Remove the bulb holder and securing nut from projector
6. Drill a small hole in the headlights for the bi-xenon wires
7. Insert H4 ring into headlight and install projector putting silicone anti-vibration ring on the back of the projector before sliding it into place. Make sure bi-xenon wires are routed through the hole drilled into the lights. When the projector is fully seated, use the securing nut to tighten it. Reinstall the bulb holder.
8. Epoxy and glue in the chrome shroud
9. Use windshield gasket maker around the perimeter of the house and reinsert lens. Use some pliers to secure lens back to headlight
10. Bake again at 290 degrees for 5-10 mins
11. insert HID and get wiring completed
12. Reinsert in car and enjoy!
Видео Retrofit Projector Bi-Xenon Headlights DIY! EASY! канала Useful Vids
Показать
Комментарии отсутствуют
Информация о видео
Другие видео канала
 What is a Projector Retrofit? Everything you need to know before modding your headlights!
 What is the difference between Xenon and Bi-Xenon Headlights and Projectors?
 Seat LEON 1M 2001-2006 | Bi-Xenon HID projectors headlight Ugrade installation
 Fiat Fiorino Bixenon Mercek // DRL // Kayar sinyal // WS2812B Pixel Led Uygulaması
 Kia Joice | Bi-Xenon HID Projector & Angel Eyes Headlight Upgrade installation
 Amazon 2.5" Projectors Review + Disassembly & Cleaning
 MINI D2S 5.0 PROJECTOR RETROFIT | SJ (14-16) SUBARU FORESTER XT | FULL TUTORIAL | NUT & BOLT METHOD
![How To Install Retrofit Projectors With Bi-Xenon [10 Steps]](https://i.ytimg.com/vi/aesyBC6sSjY/default.jpg) How To Install Retrofit Projectors With Bi-Xenon [10 Steps]
How To Install Retrofit Projectors With Bi-Xenon [10 Steps] HID vs LED vs Halogen Headlights in Projector Housings
 TRS Tips: 7x6 Sealed Beam Bi-xenon Headlight Projector Retrofit Upgrade How-To
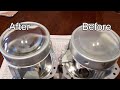 Team OTR Trucking | How to clean cloudy HID projection lenses
 How to Install a Dual Beam HID / Bi-Xenon HID Conversion Kit Relay Harness
 Projector Retrofit | Sulit kaya? | Toyota Corolla Lovelife
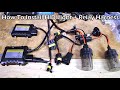 How To Install HID Light with Relay Wiring Harness
 VW Up! | HID Bi-xenon projector installation tutorial headlight Upgrade
 Should you choose LED or HID Bulbs? Everything you need to know!
 LASER VS HID VS LED Headlight Projectors Retrofits - WHICH IS BETTER? | The Retrofit Source
 DRL + HID Projector Headlights Installation
 EASY DIY RETROFIT | Bi-LED Projector Installation | Blackout Headlights | Hexagon Halo Angel Eyes