Total Beginner’s Guide to Epoxy Resin Liquid Shaker Charms
Please forgive me! I’m pretty soft spoken and I don’t have anything close to professional camerawork or editing software. Nevertheless, the technical quality of my tutorial aside, I really hope that if you’ve never worked with resin before, you will be able to follow my tutorial and make your very own shaker. Please let me know if there is anything that I missed (other than sanding your piece; I know I skipped that)!
Also please browse the description below, which contains time stamps to specific parts of the tutorial, a supply list and links to everything, some of my favorite mold and supply shops, and a couple further tutorials that might help with anything I didn’t show or explain clearly enough.
All the best luck!
Kathryn
TOPIC SHORTCUTS:
—————————
—Safety PSA 0:35
—Supplies you’ll need: 1:05
—What is Epoxy Resin?: 3:50
—Using a respirator: 5:20
—Comparing silicone and plastic molds 7:05
—Measuring and pouring resin 9:15
—Avoiding bubbles: 12:45
—Knowing when your resin is mixed properly: 15:40
—All about pigments 17:20
—Mixing colors: 21:00
—Mixing too much resin 23:20 (follow your brands casting limit suggestions)
—Adding glitter (and other things) in resin 24:40
—Prepping your mold and pouring 26:00
—How to colorblock with resin 27:00
—How to mix a smooth gradient 31:40
—How to demold your piece (plastic and silicone) 33:20
—What to fill your shaker with 36:40
—Cutting transparency film 37:15
—Filling my shaker time lapse 39:40 - 41:30
—Keeping inclusions from getting stuck 42:10
—Sealing the shaker 43:30
—The “liquid latex hack” 45:40
—Doming your shaker 47:20
—Popping bubbles methods 50:20
—Filling your shaker the rest of the way 52:15
—Plugging the hole and avoiding leaks 56:02
—Finishing touches 58:30
—Parting words 59:20
I forgot to mention that you can glaze the sides of your pieces with UV or Epoxy resin to make them super smooth and shiny end to end.
I also apologize that I didn’t make a section about sanding your piece! That’s it’s own separate topic I will have to cover at a later date.
SUPPLIES
—————————
The Basics:
—2 Part Epoxy Resin
—I use Art N’ Glow. Purchasing through this affiliate link gives me 10% back from your purchase. https://artnglow.refr.cc/moultingrook
—Nitrile gloves
—3m Half-face respirator
—3m organic vapor half face respirator filters
—Mixing Cups
—Popsicle sticks or disposable plastic makeup spatula
—Hand Drill
—Squeeze bottle or craft syringe
—Baby Oil
—Doming Mats
—Transparency film (I use Grafix Duralar 0.005mm)
—Dry erase marker
—UV light (handheld or nail lamp)
—UV resin (https://bit.ly/2J2GCPF)
—A scale (if your resin can be weighed 1:1 by weight.)
—Liquid latex
—Silicone tipped applicator brush
—Sandpaper, sand-sponges, files, efile, or dremel to sand with
The Pigment Options (most to least recommended):
—UV liquid pigments: (https://bit.ly/2WMwlLZ)
—Cast N’ Craft opaque and transparent dyes
—Alcohol Inks
—Powder pigments (https://solarcolordust.com)
—Acrylic Paint
—Glitter
—https://www.fairytaleglitter.com
—https://glitterhippo.com
—Hobby Lobby and Michaels have great selections
—Chalk Pastels
Amazon list with most of the above supplies: (http://a.co/bzxipkT)
Stickers, inclusions, etc:
—https://www.etsy.com/shop/HappyKawaiiSupplies
—https://www.miniaturesweethk.com
—I cannot recommend the above shops more. Most supplies I use I have bought from one of those two shops.
—https://www.etsy.com/shop/dazzlemewithcharm
—https://www.etsy.com/shop/candydecoholic
—https://sophieandtoffee.com
—@starry.supplies on Instagram
There are tons more amazing shops out there!
MOLDS:
—————————
There are so many amazing mold makers out there! Part of the fun is discovering them for yourself. These are just some of my favorites.
—————————
Plastic:
—https://www.etsy.com/shop/kawaiimoldsupply
—https://moldedfromlove.com
—https://www.etsy.com/shop/glitterglammolds
—https://www.etsy.com/shop/JodyHansenStudio
—https://www.etsy.com/shop/DiamondCCkawaiishop
—https://www.etsy.com/shop/Moldsbymia
Silicone:
(Listed by their instagram handles as most have regular sell-out releases)
@milky.rainbow.deco (Her kitty head is featured)
@moldparadise
@moonnoodleshop (Her grippie pallet is featured)
@kawaii_kitten241
@nekodecocraftshop
@mintyfreshpieces
And many many more amazing artists!
ADDITIONAL RESOURCES:
—————————
The shaker tutorial I learned from:
—https://youtu.be/95J4MB9PhJ4
Doming and glazing tutorials:
—https://youtu.be/0sn921LlLlM
—https://youtu.be/tMz8sHZkUZE
Basic non-Shaker tutorial (includes layering, stickers, better demonstration of mixing)
—https://youtu.be/E-vCMHY33Oc
Sealing stickers (non-waterproof) for resin:
—https://youtu.be/R_2cLd971HA
Again I can’t highly recommend https://miniaturesweethk.com highly enough as a one-stop shop for resin and decoden supplies.
Find me at: https://www.instagram.com/moultingrookcharms/
Buy my work at: https://www.moultingrookcharms.com
Видео Total Beginner’s Guide to Epoxy Resin Liquid Shaker Charms канала MoultingRook
Показать
Комментарии отсутствуют
Информация о видео
Другие видео канала
 Watch me resin: Valentines Day Edition | Sweet Art Crafts
 How to Seal & Fill Liquid Resin Shakers: NO LEAKS, FOOLPROOF
 Resin Crafts- Shaker Charms- Pyramid Boxes- Funshowcase
 Testing a New Much Cheaper Epoxy Resin
![78] 😱 Unexpected fun Molds for Resin 😄 Let’s Go SHOPPING!](https://i.ytimg.com/vi/nV9ne8JJZX8/default.jpg) 78] 😱 Unexpected fun Molds for Resin 😄 Let’s Go SHOPPING!
78] 😱 Unexpected fun Molds for Resin 😄 Let’s Go SHOPPING!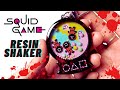 Watch me Resin: Squid Game Pink Soldiers Shaker Keychain (Resin&Shrink Plastic)
 Resin Feathering & Swirl Technique (with Epoxy Pastes) by Dream Dust Designs
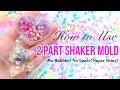 How to use 2 part shaker mold (No bubbles! no leaks! super shiny!) - by MiniatureSweet
 How to: Resin Shaker Charms | Watch me resin | Sweet Art Crafts
 Top tips and tricks to create RESIN ART for beginners
 Watch Me Resin | Shaker Keychain
 How to shape and sculpt a resin bowl (free form)
 Silicone Molds for Resin DIY Start to Finish
 Skull, Jar, Bottle, Gems, Glitter: Casting Resin in New Let’s Resin Molds
 Beginner Resin Lesson #1 - Epoxy resin
 #7 Tide Pool Splash! Resin Bowl (Bowl #6) part 1
 3 ways How to make shakers with normal moulds! Uv Resin Shakers - Resin Ideas
 15 MOST Amazing RESIN Creations
 Experiments with Resin
 LALALOVEABLES: Watch me resin Beginner resin tutorial ♡