Screen Printing in 10 minutes: Part 1 - preparing the layers
Making layers using transparencies. I used 8.5 x 11 in paper and transparencies, but you can use any size.
1) Tape printed copy or photo to table.
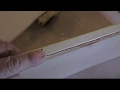
2) Make your registration marks - use a ruler. They will not show later.
3) Place transparency on top. Tape the top to the table, like a hinge.
4) Duplicate the registration marks from the layer below. Again, use a ruler - free hand is not good enough for screen printing, as layers will not line up as well.
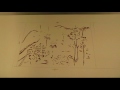
5) Use black marker, ink, etc to make a layer that light cannot penetrate.
6) Repeat steps 3-5 for each layer.
To see originals of what I am converting to screen prints in this video, visit danvanceart.com
Видео Screen Printing in 10 minutes: Part 1 - preparing the layers канала Dan Vance
1) Tape printed copy or photo to table.
2) Make your registration marks - use a ruler. They will not show later.
3) Place transparency on top. Tape the top to the table, like a hinge.
4) Duplicate the registration marks from the layer below. Again, use a ruler - free hand is not good enough for screen printing, as layers will not line up as well.
5) Use black marker, ink, etc to make a layer that light cannot penetrate.
6) Repeat steps 3-5 for each layer.
To see originals of what I am converting to screen prints in this video, visit danvanceart.com
Видео Screen Printing in 10 minutes: Part 1 - preparing the layers канала Dan Vance
Показать
Комментарии отсутствуют
Информация о видео
Другие видео канала