3D allover flower design hand embroidery tutorial,hand embroidery designs by Rup Handicraft
Title:3D allover flower design hand embroidery tutorial,hand embroidery designs by Rup Handicraft #ruphandicraft
@embroideryhobbyncollection
#ruphandicraft
#nokshikathadesign
#cushioncoverdesign
#sewinghacks
#embroiderytutorial
#flowerembroidery
#needlework
#sewing
#নকশীকাঁথাসেলাই
#নকশীকাথাডিজাইন
#সেলাইশিক্ষা
#হাতেরসেলাই
Materials You'll Need:
Fabric: Choose a fabric of your choice. Cotton or linen are good options for beginners.
Embroidery Hoop: This will keep your fabric taut and make the embroidery process easier.
Embroidery Thread: Use embroidery floss in the colors you need for your flower.
Embroidery Needles: Choose needles with a large eye to accommodate the floss.
Scissors: Small, sharp scissors for trimming the thread.
Pattern: You can find pre-made embroidery patterns online or create your own by drawing a flower design on paper.
Steps:
Prepare Your Fabric:
Cut your fabric to the desired size.
Place the fabric in the embroidery hoop, ensuring it's taut but not stretched too tightly.
Select Your Thread:
Choose the colors you need for your flower design.
Separate the floss strands according to your pattern. Most embroidery floss comes with six strands; you can use them all or divide them as needed for your design.
Thread Your Needle:
Cut a length of thread (usually around 18-24 inches) and thread it through the needle's eye.
Knot the end of the thread to secure it.
Start Stitching:
There are various stitches you can use for flower embroidery, but let's start with the most basic one: the satin stitch. This is great for filling in petals or leaves.
Bring the needle up from the back of the fabric at the starting point of your design.
Insert the needle down into the fabric close to where it came up, creating a straight stitch.
Bring the needle up again just beside the previous stitch.
Repeat this process, working from the outside of your design towards the center.
Outline and Add Details:
For outlining the flower petals or adding details like the center of the flower, you can use a backstitch or a stem stitch.
Backstitch: Insert the needle back into the fabric a short distance away, then bring it back up and insert it into the end of the previous stitch.
Stem Stitch: Create a line of diagonal stitches that are slightly slanted to the right or left, depending on your preference.
Add Leaves and Additional Elements:
Use simple leaf shapes and fill them in with the satin stitch or other stitches to add greenery to your design.
Finish and Secure:
When you've completed your design, knot the thread on the backside of your fabric to secure it.
Trim any excess thread carefully.
Optional: Iron Your Work: You can iron your finished embroidery from the backside on a low heat setting to remove any wrinkles.
Remember, practice makes perfect. Start with simple designs and stitches, and as you gain confidence, you can explore more complex flower embroidery patterns and techniques. Enjoy the process and let your creativity bloom!
Видео 3D allover flower design hand embroidery tutorial,hand embroidery designs by Rup Handicraft канала Rup Handicraft
Показать
Комментарии отсутствуют
Информация о видео
Другие видео канала
 Cushion Cover Design:Cushion Cover Design Embroidery with Tote Bag / হাতের সেলাই করা কুশনকভার ডিজাইন
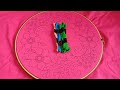 HAND EMBROIDERY! Latest Sofa/Pillow/Cushion/Table Cloth Round Design Embroidery Tutorial #85
 Hand Embroidery ! Bangladeshi Traditional Nokshi Katha Stitch Tutorial,Embroidery Designs
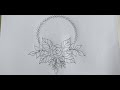 Flower Design Pattern Drawing Tutorial,simple mandala design,সুন্দর ফুলের ডিজাইন অঙ্কন Step by Step
 Border Design : Latest Hand Embroidery Border line Designs / EASY Embroidery Idea /বর্ডার লাইন সেলাই
 Hand Embroidery All over Design,Heart Florist Design Embroidery,Basic Hand Embroidery for Beginner
 Hand Embroidery Basic Stitches for Beginners,Different Stitches Birder line Design,বর্ডারলাইন সেলাই
 Cushion Cover Design ! Round Table Cloth Hand Embroidery Design //হাতের সেলাই করা কুশন কভার ডিজাইন
 Border Design ! EASY Embroidery Idea /Hand Embroidery Designs / How to Create Perfectly Borderlines
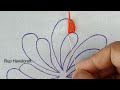 Herringbone Stitch Flower Hand Embroidery Tutorial,Flower Embroidery Designs
 Hand Embroidery Designs Patterns Tutorial !! Phulkari Borderline Embroidery,Nokshi Kantha Stitch-300
 Flower Embroidery Tutorial !! Very Easy Fly Stitch Flower Hand Embroidery Tutorial,Flower Stitch Nee
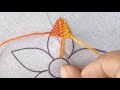 Amazing Flower Hand Embroidery Designs !! Very Easy Stitch Flower Needle Point art by Rup Handicraft
 Amazing Flower Hand Embroidery Designs ! 3(three) Step Design Flower Embroidery Tutorial New Tricks
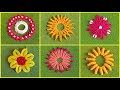 Rup Basic Flower Allover Design Hand Embroidery Tricks Six Flower Work by Rup Handicraft
 Traditional Nakshi Kantha Stitch Tutorial by Hand -362,আধুনিক কাঁথা টিউটোরিয়াল,Bordado a mano
 Hand Embroidery Designs !!! Nokshi katha Design Hand Embroidery Tutorial by Rup Handicraft
 কুশন কভার ডিজাইন সেলাই
 Hand Embroidery Cushion Cover Design #90 //,হাতের সেলাই করা কুশন/পিলো/ঠেবিলক্লথ/সোফা কভার ডিজাইন
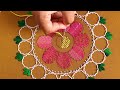 নকশী কাঁথা সেলাই ! Nokshi Katha,Hand Embroidery Traditional Bangladeshi Nokshi Katha Stitch Tutorial
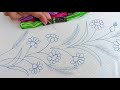 Hand Embroidery ! Embroidery Designs Tutorial,Borderline Design Hand Embroidery,Easy Embroidery Clas