Driveway Replacement & Radiant Snowmelt Install Time Lapse
Time Lapse Video of a 5 day driveway replacement project.
Day 1 involved drilling 12" diameter holes 48" deep for a future deck, followed by removing the existing driveway (partial concrete, partial asphalt), as well as removing the existing concrete sidewalks, walkways, and aprons. In order to get the PEX into the basement, we had to expose a existing 6" PVC pipe containing the existing PEX lines from the garage floor. I installed (2) 4" saddle wye's onto this pipe.
Day 2 involved pitching and tamping the entire base, followed by setting the 2x8 forms. Next we pitched and pinned the trench drains along the house. Then a lighter stone was brought in to help properly pitch the 2" rigid foam board, and before blocking access to the back yard with the foam board, we poured the sonotubes.
Day 3 started with finishing the foam board, and Mark from Crete Construction By Design wrapping up some misc items such as expansion joint, etc. Mark then installed flat 6x6 wire mesh so that I could zip tie the PEX down. The 4" PVC pipes leading down to the 6" pipe and into the basement were cut flush with the top of the foam board insulation. I started installing the PEX loops.
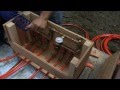
Day 4 consisted of finishing all of the Snowmelt loops for the heated driveway. Total there are 13 loops of 5/8" PEX, at approximately 225' each. I also installed conduit to bring power to the opposite side of the driveway for any future needs, as well as the Tekmar sensor socket for future automation of the system if desired. In the basement, I connected all 13 loops together, and pressurized the entire system to 80 psi.
Day 5 was pour day. To start I checked the pressure gauge from overnight. It did not loose even 1 psi. The pressure was reduced to 60 psi for the pour. Mark and his crew laid down several sheets of 3/4" plywood over the pex, to prevent the motorized power buggies from damaging it. Throughout the pour, I continuously checked the pressure gauge. It did not move the entire time, and in fact, the pressure slightly increased AFTER the pour, as the heat form the concrete curing raised the psi slightly. The concrete is 5" thick above the Foam board, and 7" thick along the outride edges. The small pieces of foam seen in the video between the forms were spacers to prevent the foam from shifting, and were removed as the concrete was poured. The concrete included fiber mesh, and the expansion joints were hand tooled in rather than saw cut, to prevent accidentally hitting a lifted PEX pipe. A 12" border was stamped with a slate pattern from the sidewalk back.
Day 6 (not recorded). The 12" stamped border was antiqued gray, and the entire driveway was sealed.
Subscribe for future videos including the snowmelt in action! Thanks for watching!
Видео Driveway Replacement & Radiant Snowmelt Install Time Lapse канала Christopher Decker
Day 1 involved drilling 12" diameter holes 48" deep for a future deck, followed by removing the existing driveway (partial concrete, partial asphalt), as well as removing the existing concrete sidewalks, walkways, and aprons. In order to get the PEX into the basement, we had to expose a existing 6" PVC pipe containing the existing PEX lines from the garage floor. I installed (2) 4" saddle wye's onto this pipe.
Day 2 involved pitching and tamping the entire base, followed by setting the 2x8 forms. Next we pitched and pinned the trench drains along the house. Then a lighter stone was brought in to help properly pitch the 2" rigid foam board, and before blocking access to the back yard with the foam board, we poured the sonotubes.
Day 3 started with finishing the foam board, and Mark from Crete Construction By Design wrapping up some misc items such as expansion joint, etc. Mark then installed flat 6x6 wire mesh so that I could zip tie the PEX down. The 4" PVC pipes leading down to the 6" pipe and into the basement were cut flush with the top of the foam board insulation. I started installing the PEX loops.
Day 4 consisted of finishing all of the Snowmelt loops for the heated driveway. Total there are 13 loops of 5/8" PEX, at approximately 225' each. I also installed conduit to bring power to the opposite side of the driveway for any future needs, as well as the Tekmar sensor socket for future automation of the system if desired. In the basement, I connected all 13 loops together, and pressurized the entire system to 80 psi.
Day 5 was pour day. To start I checked the pressure gauge from overnight. It did not loose even 1 psi. The pressure was reduced to 60 psi for the pour. Mark and his crew laid down several sheets of 3/4" plywood over the pex, to prevent the motorized power buggies from damaging it. Throughout the pour, I continuously checked the pressure gauge. It did not move the entire time, and in fact, the pressure slightly increased AFTER the pour, as the heat form the concrete curing raised the psi slightly. The concrete is 5" thick above the Foam board, and 7" thick along the outride edges. The small pieces of foam seen in the video between the forms were spacers to prevent the foam from shifting, and were removed as the concrete was poured. The concrete included fiber mesh, and the expansion joints were hand tooled in rather than saw cut, to prevent accidentally hitting a lifted PEX pipe. A 12" border was stamped with a slate pattern from the sidewalk back.
Day 6 (not recorded). The 12" stamped border was antiqued gray, and the entire driveway was sealed.
Subscribe for future videos including the snowmelt in action! Thanks for watching!
Видео Driveway Replacement & Radiant Snowmelt Install Time Lapse канала Christopher Decker
Показать
Комментарии отсутствуют
Информация о видео
Другие видео канала
 Radiant heating in a concrete slab. Let us show you how easy it can be to install radiant heat!
 NJ family tosses out shovels, melts snow with AMAZING eco-friendly system
 Indiana Warm Floors, Heated Driveway / Snow-melt ~ CLP Marketing, Angola
 Heated Paver Walkway Construction Timelapse
 SNOWMELTING.ca Promotional Video
 Heated Driveway and Sidewalk System Installed by Patterned Concrete Ontario Inc.
 Heated Driveway Installation
 Installing a Heated Driveway | This Old House
 Hydronic Radiant Heating - Concrete Application
 Asphalt Heated Driveway Installation
 Snowmelt, Building A System - Driveway & Sidewalk
 Prevent Ice buildup on stairs (Life Hack)
 Radiant Heat Install | Part 1 of 5
 Massive Concrete Driveway Pour (Part 2)
 Let It Snow: follow-up on the Brooklyn Snow Melting System installation
 Radiant Heat Install | Concrete Slab
 Massive Concrete Driveway Demo & Setup (Part 1)
 Electric Snow Melting system installed in an Asphalt Driveway
 HOW DOES HEATED DRIVEWAY WORKS??
 Geothermal Energy Keeps New Jersey Driveway Free of Snow