Dual Extrusion: 3D Design & 3D Printing
Hello and thanks for tuning in.
This is our extended video showing how to 3D Design a backpack tag that will ultimately be 3D printed using a dual extrusion / filament printer. These backpack/lunch-bag tags inexpensive to make, very durable, and even great to give to friends as gifts for their kids. While we are showing the steps to 3D Design a tag for printing on a dual extrusion printer, most of the steps can be followed to print using a single extrusion 3D printer.
If you already have your project in mind you can skip ahead to the part where we prepare the 3D print file for export in Tinkercad, our 3D Design program, and pick the video back up where we show how to prepare the file in our slicer, Flashprint. For 3D printing with a single extruder just export the tag as a single .STL file and import into your slicer (i.e., no need to create two .STL files).
We'll be publishing a shorter version soon showing just the necessary steps to prepare the .STL files and .GX files for printing (i.e., without the steps to create the backpack tag)
In the meantime, thanks for watching and we appreciate comments, likes, shares, and of course subscribers.
Видео Dual Extrusion: 3D Design & 3D Printing канала EnvisionRobotics
Показать
Комментарии отсутствуют
Информация о видео
Другие видео канала
 Good Vibrations - Our LEGO Mindstorms EV3 Robot
 VLog - our VEX IQ BattleBot for our Summer Camp (July 5-9) next week!
 SUSPENSION design for LEGO Mindstorms EV3 robot - design inspired by NASA’s Rocker Bogie system
 VLOG - Notice of our upcoming Advanced Scratch Coding Class.
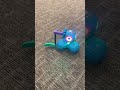 3D Printed Attachment for Wonder Workshop Dash robot!
 Kids love our VEX Robotics BattleBot STEM Camp
 SHORT - LEGO Mindstorms EV3 Lift Robot!
 Lego WeDo 2.0 Alligator Robot
 Meet Petoi Bittle X - the newest robot to join our STEM Studio!!
 VLOG - LEGO Mindstorms EV3 - Crawling Robot
 VLOG - Merry Go ‘Round / Carrousel Robot
 Gweike RF Laser - Cutting and Engraving 3 mm Red Acrylic
 DJI / Ryze Tello Drone with 3D Printed Laser Pointer Holder! #dji
 Envision Robotics Summer STEM Camp - UGOT Robot
 LEGO- Mindstorms EV3 Ball Launcher Robot in slow motion
 LEGO Mindstorms EV3 Simple Hammer Robot
 PREVIEW of our Roblox Ultimate Obby which uses Constraints and Attachments.
 VLog - New 3D Printed Mary Poppins Flexi Model for Download on Thingiverse
 DJI RoboMaster EP Core Robot - great example of coding to pick up an object with the arm and claw!
 EASY FIX for your DJI RoboMaster S1 Battery Release Button