the one with the pantry (003) | How to IKEA hack your dream pantry
Hi, I'm Natania and I'm usually over on my instagram account @thenatmaison chatting about interiors, home, music and food. I'm a born and bred Black Londoner and I've made this account to share and document my experience of buying my first home - SOLO!
Please feel free to drop your comments and thoughts about this video or follow me on Instagram and subscribe to this channel!
_________________________________________________________________________
A few tips for this IKEA hack:
This was done using the IKEA IVAR system and contains the following pieces:
The frame is 1 x Small IVAR unit (42cm x 30cm x 179cm) and 1 x Large IVAR unit (89cm x 50 cm x 179cm)
1 set of IVAR rattan doors
1 IVAR cabinet (80 cm x 50 cm x 83cm)
5 Small shelves - (42cm x 30cm)
3 Large shelves - (83cm x 50cm) (one inside the cabinet, one in the frame, and one to make the drawers!)
3 bottle racks (42 x 30cm)
1 IVAR hooks for side unit
2 Observator cross braces (to secure the back)
Finishes for the pantry:
Osmo 3166 Wood Wax Finish Transparent Walnut
Farrow & Ball Inchyra Blue for Interior Wood & Metal (Modern Eggshell finish - slight sheen and hardwearing!)
For refitting the doors - there are three steps:
Cut down the doors from two to one rattan panels reducing the height
Reduce the width of the doors so they can sit inside the frame
Move hinges so that the doors will sit inside the frame
You will need the following tools: Hack saw, Wood saw, Drill, Standard drill bits, Hinge cutter, Wood glue, Pin nails, Wood filler, Sand paper/rasp, Stanley knife, Table/work bench, Clamp
STEP ONE: Cut down the doors from two to one rattan panels reducing the height
- Remove rattan panels and hinges
- Measure/mark where to cut to reduce the high
- I cut on the bottom of middle horizon frame piece
- This left a ‘complete’ looking door and surround to the rattan panel
- Neatly cut through the vertical frame pieces to reduce the height of the door
- Rasp and sand the cut ends to make them smooth
STEP TWO: Reduce the width of the doors so they can sit inside the frame
- Remove rattan panels and hinges
- Measure and mark how much you want to reduce the width
(Note - the door I used the frame was put together with lap joints joining the horizonal and vertical parts of the door)
- Cut between the join on the lap joint and ‘break’ frame apart (for this I used the hack saw because it was a thin blade, so would minimize damage to the frame, and also has no issues cutting through the metal staple they had used when putting together the frame)
- Measure and mark on the horizonal to resize the width correctly
- Ensure the lap joint is accounted for in the measuring
- Cut horizontal of the frame to reduce width
- Cut in the lap joint
- Rasp and sand both end of the lap joint – vertical and horizontal
- Glue, clamp and pin nail the frame back together
- Allow to dry, then sand so it looks smooth
- Measure and cut down the rattan panel (be careful as the material is quite fragile/brittle and depending on how the rattan is, you may need to add a think strip of wood/material to ensure the cut ends do not fray/unravel)
- Replace rattan panel
As a tip: if you make a mistake on the lap joint, and leave a small gap, you can use wood filler to ‘fill’ in the gap, over fill slightly, let dry and then sand smooth
STEP THREE: Move hinges so that the doors will sit inside the frame
- Measure and mark where you want to place the door and hinges
- Hinges are made up of two parts: One part on the door and One part on the frame
- I added some ‘tabs’ of wood onto the frame to allow us to mount the doors
- Cut a triangle of wood and glued and screw it to the bottom of the shelf and top of the cupboard to create tabs to mount the frame part of the top and bottom hinges. Triangles were used as they were aesthetically pleasing and could be "hidden"
- Counter sink the screws so they were all hidden from view
- Mount the hinge to the ‘tabs’ on the frame
- Measure, mark, check, measure again! the hinge on the door
- Use the hinge cutter, drill and screws to mount the hinge to the door frame
- Mount the door by fixing the hinge together
- Adjust/level the door by adjusting the hinge – see IKEA instructions on how to do this (basically you play with the screws on the hinge to move the door small amounts up/down/across)
DONE!
Видео the one with the pantry (003) | How to IKEA hack your dream pantry канала thenatmaison
Показать
Комментарии отсутствуют
Информация о видео
Другие видео канала
 【租房改造】自然风小客厅 | 宜家IVAR系列完美应用
 DIY IKEA HACK - *EASY BUILD* Custom Mid-Century Modern Sideboard/ Desk (with storage + shelving!)
 10坪の小さな家|壁一面にIKEAのIVAR「折り畳みテーブル付き収納棚」を作る【築50年戸建てDIY】#23
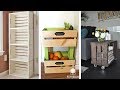 25 Wood Crate Storage Ideas
 Walk In Closet DIY Makeover | Master Closet Organization | Ikea Algot Closet Transformation
 Ikea Ivar Hack & DIY Garderobe aus Akustik Paneel - Room Makeover | EASY ALEX
 IKEA HACK! | DIYing the IVAR Cabinet system!
 Bathroom Remodel Time-Lapse - DIY Renovation Start to Finish
 FURNITURE FLIP PROJECTS // Trash To Treasure // Flipping Facebook Marketplace and Thrifted Finds!!
 IKEA PANTRY HACK - TIPS & TRICKS
 Ivar Shoe Cabinet (IKEA Hack) - I Can Do That!
 Earthy Neutral Office Makeover With Tons of Plants | Ikea Ivar Storage Hack
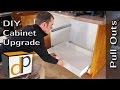 How to Build & Install Pull Out Shelves - DIY Guide
 IKEA Ivar Cabinet Assembly-The right way!
 20 Smart DIY Hidden Storage Ideas that Keep Clutter in Check
 IKEA IVAR Shelf Assembly and Review | Clueless Dad
 20 BEST IKEA IVAR CABINET HACKS
 IKEA KITCHEN UPDATE | DIY Kitchen Cabinets 3 YEARS After Installation | How They've Held Up + More!
 DOLLAR TREE KITCHENS ORGANIZATION DIYS $1 PROJECTS THAT WILL BLOW YOUR MIND
 INSANE KITCHEN TRANSFORMATION | KITCHEN ORGANIZATION | HOW TO ORGANIZE YOUR KITCHEN 2021