Round Leather Bicycle Bag DIY
Making a simple leather tool bag for my bicycle that mounts under the saddle. Easy and relaxing project I was able to make in my apartment with limited tools in this lockdown period. Leatherworking is always fun and enojoyable to me! I decided to limit punched holes to minimum so I don't bother neighbours and got a decent result with drilling with 1.5mm bit and enlarging with thick needle/awl on the hand held drill. I used thick and un-finished leather for the side caps because it holds the shape way better than the thinner one I used for the rest of the bag.
If you are doing something like this you need to figure out a mount solution as most likely the way I did this is not applicable to all saddle.
For those asking where to find tools:
I bought mine some years ago when I was starting to make leather sheaths. I went for the cheapest I was able to find. Have been working great so far! Can't find exactly the one I have but I listed some in my amazon storefront that are pretty much the same and any similar ones will work aswell.
https://www.amazon.com/shop/blackbeardprojects
It's affiliate marketing so if you order something from here you'll help the channel for free! Thank you!
Index of operation and materials:
0:20 For measurements I used width of the saddle and diameter of the bottles I had
0:35 Round corners for the opening
1:00 Mark and cut circle for sides, leaving extra material on the edges
1:40 Wet leather can be formed easily, when dried it will retain the shape
2:30 Beveler tool used to chamfer leather edges
3:20 Two latches are used to secure the bag under the saddle
3:50 Fork punch used to mark position of stitch holes, then drilled and sized with awl
5:20 Cut slots to pass the latches through the bag
5:50 Contact adhesive to secure sides and main piece togheter
6:55 Trim excess leather with Maker Knife
7:30 Bevel inside circle and round all the edge to make it look nicer
8:00 Dark Brown leather dye used to stain un-finished leather and all edges
9:00 Groover used to mark position of stitches
9:20 Fork punch leaves mark to space stitch holes
9:55 Drilled holes are then enlarged and burnished with awl in hand held drill
10:00 Rough side of the hole is sanded down and re-finished with dark brown dye
10:30 Waxed thread, going over the edge externally just for the look of it
12:00 Badge is textured with alchool to remove original finish, then sanded to add texture and re-finished with brown dye
12:35 Branding iron is used to hot stamp my logo
12:50 Matt leather finish applied to seal everything
13:00 Badge is glued with contact adhesive over the latch stiches to reinforce the area
13:30 Two leather strip are cut to lengh and width to be used as bag lock
14:10 Simple buttons hold plenty enough for something like this, I would have liked to try a more unique lock but nothing cool and doable came to mind.
Thanks a lot for watching, I hope you liked the video!
Suggestions and comments are welcome.
Leave a like and share to anyone who might be interested!
★Patreon★
https://www.patreon.com/blackbeardprojects
★Website★
http://blackbeardproject.com/
★Follow me★
Facebook ► https://www.facebook.com/BlackBeardProjects/
Twitter ► https://twitter.com/BlackBeardProje
Instagram ► https://www.instagram.com/black_beard_projects/
Видео Round Leather Bicycle Bag DIY канала Black Beard Projects
Показать
Комментарии отсутствуют
Информация о видео
Другие видео канала
 Simple Leather Bag | Leatherworking
![20 [Leather Craft] Making mini Satchel bag Ver1 / [가죽공예] 미니 사첼백 만들기 Ver1 / Free pattern](https://i.ytimg.com/vi/vmTUoPGNRr0/default.jpg) 20 [Leather Craft] Making mini Satchel bag Ver1 / [가죽공예] 미니 사첼백 만들기 Ver1 / Free pattern
20 [Leather Craft] Making mini Satchel bag Ver1 / [가죽공예] 미니 사첼백 만들기 Ver1 / Free pattern Make an EXPENSIVE Leather Bracelet from Scraps
 Ежедневник/блокнот на кольцах из кожи Краст цвета Коньяк от #wildleathercraft
 Leather Round Tool Box / Round Leather Bicycle Bag for the "Spirit of Collaboration" DIY
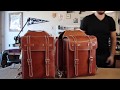 Crafting a Leather Bike Bag
 RED WING 9106 Resole #49
 Epoxy Dovetail Joint Bluetooth Speaker DIY
 Чехол для смарт-ключа/smart key case Mazda 6 GJ из кожи Crazy Horse Whiskey от #wildleathercraft
 MAKING A HANDMADE ENVELOPE STYLE LEATHER IPAD COVER - DIY BUILD ALONG - ASMR
 leather belt pouch | Casing The Leather | Wet Molding | small utility belt pouch
 Restoration of a rare vintage ww2 military watch - nickel and chrome plating - Sanford AS1123
![[Leather Craft] Making a mini barrel bag / PDF pattern](https://i.ytimg.com/vi/0kdRrbK1MEM/default.jpg) [Leather Craft] Making a mini barrel bag / PDF pattern
[Leather Craft] Making a mini barrel bag / PDF pattern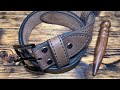 Ремень поясной/брючный из кожи Чепрак от #wildleathercraft
 We Made a $5,000 Hermes Wallet for $70!
 How to Make Armour - Leather Vambraces
 Leather And Cork Round Bag | Leatherworking
 How I make a pair of leather flip flops
 handmade leather wallet | best leather wallet | leather craft | DIY | ASMR