How to sew pants: Elastic waist wide-leg style | Sewing Tutorial with Angela Wolf
A wide-leg pant with no side seam is an easy garment to sew! Add extra comfort with an elastic waist and your favorite fabric. Shop this pattern here --- http://craftsy.me/1UyaQur
Get this linen fabric --- http://craftsy.me/1Yutghc
Want to give sewing jeans a try? --- http://craftsy.me/21oPksu
Or, get a simple pj pant tutorial --- http://craftsy.me/21oOo7v
In this video
------------------------------
Taper and Wide Leg Pant pattern from Christine Jonson Patterns
These pants are super-easy because there's only one pattern piece to work with! Take a look at the grainline on the pattern piece, I've lined this up with the grainline on the fabric - the grainline is typically parallel to the selvage. This will mean the drape of your pants will look its best.
Here's the pattern piece all cut out with the notches and hem markings transferred. These will help us match the pieces up later on.
You can see on the pattern that this is the inseam, and there is no outside leg seam.
Something to remember - if you're using a woven fabric that has no stretch like I am, choose a waist size that's large enough to get over your hips otherwise it's going to be a real struggle to pull them on!
We're going to start with the inseam. With right sides of the fabric together, line up the notches and pin the front leg to the back leg.
Line up the seam allowance with the 5/8” marking, back stitch and stitch all the way from the crotch to the hem. I'm using a contrasting thread, but you'd choose a matching color.
Finish the seam allowances: I am going to trim the seam allowances with pinking sheers. You could use an overlock stitch, zigzag stitch, or a serger. Whatever you prefer.
Look for the triple notches on the crotch seam - this is the back of the pants. Press the seam allowance in this direction.
OK - one leg down - one to go! Just follow the same steps again for the second leg. Once you've done that, you'll join the two legs together at the crotch seam.
Have one pant leg with the wrong side facing out in one pant leg with the right side facing out. Insert the leg with the right side facing out into this pant leg - line up both inseams and pin. You can see both of these sides are wrong sides now.
Line up the notches - one notch refers to the front of the pant, place a pin and these triple notches refer to the back. Pin all the way round this crotch seam. Next, you'll stitch along this entire crotch curve.
Starting at the top edge, back stitch once or twice and stitch all the way around. When you get to the inseam make sure both the seam allowances are facing the back of the pant legs.
"Again, you’ll finish the seam edge just like before and then press the crotch seam to one side. /
A sleeve board or a full size ironing board is perfect for this job."
attach the elastic to the waist line.
Start by measuring the elastic around your waistline to determine how tight you want the elastic.
Cross the elastic pieces, lining up the marking and zigzag stitch back and forth.
Now with fabric marker make marks on the elastic
Line the elastic up along the wrong side of the fabric, matching up the center front seam with the center front marking on the elastic and the center back marking with the center back of the pants.
Stretch the elastic and add a few pins - this will help to ease the elastic in evenly all the way around the waist
Stitch the elastic to the fabric with a zigzag stitch of 1.4 length and 3.5 wide. As you do this, make sure to stretch the elastic to match the length of the fabric.
Finish your edge and then turn under the elastic toward the wrong side of the fabric. Pin at the center back seam and the center front - and lets just add one pin to each of the side seams
Line up the edge of the presser foot with the edge of the elastic and topstitch the bottom edge of the elastic to the fabric with a slightly bigger zigzag of 1.8 long and 4.5 wide. Make sure the elastic butts up to the fold and stretch the elastic to match the length of the fabric.
Stitch over the first stitch just a little and backstitch - and the waist is finished.
The final step is hemming your pants
At the machine check to make sure your needle will just catch the folded hem allowance edge. On the right side of the fabric, topstitch the hem in place with a straight stitch of 3.5. To keep that line of stitching straight use the guidelines on your throat plate.
Give the hem one more pressing and the pants are finished! You have made a great pair of pants in a couple of hours!
Видео How to sew pants: Elastic waist wide-leg style | Sewing Tutorial with Angela Wolf канала Craftsy
Показать
Комментарии отсутствуют
Информация о видео
Другие видео канала
 Very Easy Palazzo Trouser Cutting and Sewing (With Side Pockets) | Tuğba İşler
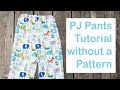 DIY PJ PANTS FOR BEGINNERS
 패턴없이 옷 만들기/여름 와이드 팬츠 만들기/How to make wide pants without pattern
 How to turn your PANTS into a pattern - easy tutorial!
 NO SIDE SEAM TROUSER || Pyjamas pant tutorial || how to sew a lounge trouser
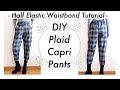 DIY Plaid Capri Pants / Half Elastic Waistband Tutorial / Costura / Sewing Tutorialㅣmadebyaya
 Just 2 measurements, 1 hr and 1 yd of fabric to make this EASY linen top for summer!
 Belted Paperbag Trousers Cutting and Sewing | Tuğba İşler
 How to Take-in Waist on Jeans *Tutorial* (professional results)
 DIY Lounge Pants Tutorial
 DIY joggers with pockets from scratch - incl. DIY pattern - aka getting ready for a second lockdown
 Beginner Sewing Project -- The Seamwork Bo Sew-along
 누구나 편안히 입을수 있는 케쥬얼 바지 예쁘고 쉽고 빠르게 Casual pants that anyone can wear comfortably,pretty and quickly
 DIY HIGH WAISTED PANTS from scratch - Me-made summer collection - Ep 4
 HOW TO MAKE WOMEN TROUSER (WITH POCKET) | PANT PATTERN DRAFTING | DETAILED| FEMALE TROUSER
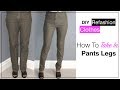 How To Take In Pants Legs The Easy Way
 How to Make Patterns from Your Clothes (CLONE YOUR WARDROBE) | WITHWENDY
 How to trace your clothes and turn them into PATTERNS! @coolirpa
 Learn to Sew a Drawstring Waistband - Jogger Pants Waistband Tutorial
 Learn How To Sew, Easy Sewing Class For Beginners!