Polaris Bracelet - DIY Jewelry Making Tutorial by PotomacBeads
From the January Best Bead Box and Best Bead Box XL, Designer Anna Taylor's Polaris Bracelet is a beadweaving explosion! Throughout the bracelet tutorial, you'll utilize essential skills such as netting, right angle weave, and bezeling, all while using beads from your January subscription box. Like Polaris, more commonly known as the North Star, your bracelet will outshine any other project. Gather all your materials or your subscription box from this month to begin designing one of the brightest bracelet designs in your collection to date!
Subscribe to the Best Bead Box XL:
https://www.potomacbeads.com/Best-Bead-Box-Subscriptions
Click here for complete bead & jewelry-making supply lists:
USA➡️https://www.potomacbeads.com/Polaris-Bracelet-Tutorial-s/7235.htm
EU➡️ https://potomacbeads.eu/collections/beadweaving-1715-polaris-bracelet
Designer's recommended materials and colors for ~7.5-inch (19 cm) wrist:
● Potomac Crystal Cushion 12mm - Crystal, 1 Piece
● Czech Glass Rounds 3mm - Ancient Gold, ~38 Pieces
● Tubelet Beads - White Champagne, ~30 Pieces
● Gemstone Rounds Beads 4mm - Labradorite, ~20 Beads
● Miyuki Seed Beads 11/0 - Sparkle Topaz Lined AB, ~1 Gram
● Miyuki Seed Beads 15/0 - Sparkle Beige Lined Crystal, ~1 Gram
● Cup Button - Lila Gold Luster, 1 Piece
Enjoy using this jewelry-making bead tutorial video to help you become a more creative and happier beader!
-----Contents of this video-------------------------
00:00 - Intro
00:50 - Step 1 - Begin stringing a pattern of beads as the start of a bezel
02:13 - Step 2 - Tie the ends together to make a loop
04:00 - Step 3 - Finish adding in the last of the Czech Glass Rounds, then start adding in 15/0 Seed Beads
05:10 - Step 4 - Continue netting the back of the bezel
07:39 - Step 5 - Bring netting to the front of the bezel
08:51 - Step 6 - Add in a Potomac Crystal Cushion 12mm to the center of the bezel and secure into place with netting
10:48 - Step 7 - Start stringing Tubelet Beads for the side of the bracelet; add a cup button to the end for a clasp
15:38 - Step 8 - Add in a connection point using right angle weave
18:00 - Step 9 - Allie shows connection point using right angle weave again
19:33 - Step 10 - Finish connecting the first side of the bracelet to the bezel, then start the other side
20:28 - Step 11 - Start stringing the other side of the bracelet and in the process make a loop for the cup button to sit-in
22:00 - Step 12 - Finish the second side of the bracelet and connect it to the bezel; tie off thread ends and use a thread burner to burn them off
24:14 - Outro
13:46 - Outro
Видео Polaris Bracelet - DIY Jewelry Making Tutorial by PotomacBeads канала PotomacBeads
Показать
Комментарии отсутствуют
Информация о видео
Другие видео канала

 LIVE Class - The Basics of a Peyote Pattern - DIY Jewelry Making Tutorial by PotomacBeads
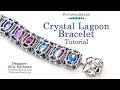 Crystal Lagoon Bracelet - DIY Jewelry Making Tutorial by PotomacBeads
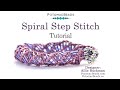 Make Spiral Step Jewelry - DIY Jewelry Making Tutorial by PotomacBeads
 Midas Earrings- DIY Jewelry Making Tutorial by PotomacBeads
 Millions of Beads for just $30.00 Awesome Mercari Bead Haul
 Resin Crafts with Funshowcase Jewelry kit- Tutorial- DIY
 Pretty in Purple Bracelet - DIY Jewelry Making Tutorial by PotomacBeads
 Looking Glass Bracelet- DIY Jewelry Making Tutorial by PotomacBeads
 Wimbledon Bracelet - DIY Jewelry Making Tutorial by PotomacBeads
 Baby Cellini Bracelet
 Easy Flat Spiral Stitch Beaded Bracelet Tutorial - Beginner
 How to Hang a Pendant or Charm - Better Beaders Episode by PotomacBeads
 Super Snake Bracelet - DIY Jewelry Making Tutorial by PotomacBeads
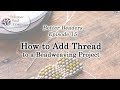 Better Beaders Episode 15 - How to Add Thread to a Beadweaving Project
 Keepsake Bracelet - DIY Jewelry Making Tutorial by PotomacBeads
 DIY Beaded Charm Bracelet with wire, crimp beads, & clasps ♥ | SoCraftastic
 Ottoman Necklace/Pendant- DIY Jewelry Making Tutorial by PotomacBeads
 How to Use Crimp Beads & Covers – DIY Jewelry Making | Hobby Lobby®
 Gemstone Multi Strand Chain Link Necklace- DIY Jewelry Making Tutorial by PotomacBeads