Complete Garage Floor Remodel Using Concrete Overlay | Home Gym & Man Cave
Watch how this garage goes from ordinary to extraordinary! Our hardwood overlay kits changed this place tremendously! Their home gym looks great in their garage now, along with all their equipment!
Create a stunning hardwood look with this kit! Our kits can be installed in interior and exterior spaces. It’s an industrial grade product and an extremely DIY friendly process! Watch the whole process from start to finish!
Recap of what you’ll find in this video 👇
Patching Cracks: 0:30
Taping & Prep: 2:35
Taping Wood Planks: 8:39
Texture Coat: 14:34
Plastic: 25:24
Black Stain: 27:48
Sanding: 33:12
Removing Plastic, Re-Taping: 36:53
Removing Tape: 37:51
WB Urethane Top Coat: 41:46
Final Look: 49:42
You can order your Hardwood Overlay kit here: https://leggari.com/floors/order-flooring/#hardwood-overlay-kits
When you purchase a kit! 👇
Once your order is placed you receive exclusive step by step tutorials sent to your email. These tutorials will walk you through the entire process. Beginning to end, we’re with you every step of the way. Showing you exactly what to do, how to mix and apply products. If you have further questions you can always email us at customerservice@leggari.com
Product Details:
Leggari Hardwood Overlay kits are show stoppers every time! You’ll have all the materials you’ll need to complete an industrial-Grade Concrete Overlay Hardwood technique that will never wear off. It’s thin so it won’t complicate door thresholds or create tripping hazards. It will follow the contours of your concrete so there’s no need to make the floor perfect before installing. It can also go vertical. No more grout to clean! Imagine beautiful hardwood in your garage, or around a pool!
Choose between 4mm (about 1/8″) tape, or for more accentuated lines, 6mm (about 1/4″) tape. The tape size you choose will determine the width of the gap between each wood plank you make; these can also be called ‘grout lines’, although they’re not filled with grout. The color and look of the grout lines between each wood plank will be the look of the concrete you’re going over. Each Hardwood Overlay Kit comes with enough tape to do 4″-12″ wide wood planks (or larger). The larger your planks the less tape you’ll use.
These floors are incredibly durable and mimic traditional Hardwood floors. Leggari’s Hardwood Overlay System is cost-effective and easy to install. They are 100% UV stable and can be installed inside or out. Now you can put hardwood in your garage to park on, or even around your pool! Our Hardwood Overlay Kits go right over your existing interior or exterior concrete. They’re easy to install and easy to maintain.
This kit includes Concrete Overlay, Liquid Polymer, Stain, Grout Line Tape, and a Top Coat. This kit does not allow for different colored grout lines in between the wood planks, the grout lines with be the color of your concrete
About Us:
Leggari is a coating based channel (metallic epoxy & concrete overlay) that will show you how you can use our products as amazing DIY projects to transform your existing surfaces! You can renovate things like kitchens, bathrooms, basements, patios & more! With Leggari you can renovate in no time, imitating real stone or creating a designer concrete look!
You can watch hundreds of videos that show you the step by step process of resurfacing your existing surfaces!
– Tim Krumland and Tylor Svangren, Leggari Founders
#leggari #LeggariNation #garagefloor
FIND US ON SOCIAL MEDIA
Our Social Media is filled with projects done by customers around the world and we also give sneak peeks of projects we're working on, stay up to date and follow us!
Instagram: https://www.instagram.com/leggari/
Facebook: https://business.facebook.com/leggari
Pinterest: https://www.pinterest.com/leggari/
Twitter: https://twitter.com/leggari
Видео Complete Garage Floor Remodel Using Concrete Overlay | Home Gym & Man Cave канала Leggari Products
Показать
Комментарии отсутствуют
Информация о видео
Другие видео канала
 How To Install Epoxy Floors In A 2000 sq ft Home | Step By step Explained | PART 2
 How To Install A Leggari Stone Kit Over Old Kitchen Laminate Countertops | DIY Friendly Step By Step
 Renovating my ugly garage for under $500
![Building a Showroom Style Garage [COMPLETE TRANSFORMATION]](https://i.ytimg.com/vi/8LZV640Ndyw/default.jpg) Building a Showroom Style Garage [COMPLETE TRANSFORMATION]
Building a Showroom Style Garage [COMPLETE TRANSFORMATION] DIY Ideas That Will Take Your Home To The Next Level ▶2
 New Garage Floors for $100 dollars Eagle Gloss Sealer
 Bathroom Remodel Time-Lapse - DIY Renovation Start to Finish
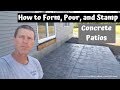 How To Form, Pour, And Stamp A Concrete Patio Slab
 Installing Swisstrax In My Dad's Garage
 How To Repair Old Concrete| Project From Beginning To End | DIY Concrete Resurfacing Repair Tutorial
 Faux Black Wood Planks In A Garage Giving It A Complete Transformation Coated Using Concrete Overlay
 HOW TO EPOXY GARAGE FLOOR // DIY Epoxy Flooring Tutorial
 Ultimate Dream Garage Makeover
 8 BRILLIANT TOOLS FOR YOUR GARAGE THAT YOU CAN BUY RIGHT NOW
 Building a Showroom Style Garage
 Install a Vinyl Garage Floor
 How to do Epoxy Floors - STEP BY STEP GUIDE - S3E3
 New Garage Floor Epoxy + SAVED $5,000 BY DOING IT MYSELF || Concrete Slab House Reno (Ep.3)
 Garage Reno Pt.11 - Rust-Oleum Epoxy Professional Version Install! DIY!
 How To Resurface A Badly Damaged Concrete Walkway