How to Assemble Wire Shelving Racks
Before you get started, make sure you have all of your parts. Standard units come with 4 posts, 4 leveling feet, shelves, and 4 plastic clips per shelf. Got all of that? Perfect, let's get to it!
To assemble:
1. Screw the leveling feet into the bottom of your posts (If you're going to install wheels, switch them out at the end).
2. Snap clips onto the posts where you want your bottom shelf to be. Count the notches in the post to make sure the clips are level.
3. Turn your bottom shelf on its side. Insert the posts through the corners of the shelf from the bottom. The clips will be wedged into place, creating a solid base.
4. Flip the shelf upright and give it a quick tap in the corners to make sure it's snug.
5. Add clips where you want your next shelf, then lower it into place. (If you have a large shelf or tall posts, it's easier to construct with a friend).
6. Repeat step 5 until all of your shelves are where you want them.
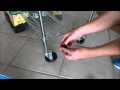
7. If you want to add casters, lay your shelving kit on it's side and unscrew the leveling feet. Insert your wheels, then stand the unit back up.
This video is meant to serve as an instructional guide on how to assemble wire shelving and racks from The Shelving Store. Our products are packaged using corner guards as an added safeguard against damage during shipping. With a storage capacity of up to 800 lbs per tier, these heavy duty racks really make it easy to get organized in any room.
Видео How to Assemble Wire Shelving Racks канала TheShelvingStoreMI
To assemble:
1. Screw the leveling feet into the bottom of your posts (If you're going to install wheels, switch them out at the end).
2. Snap clips onto the posts where you want your bottom shelf to be. Count the notches in the post to make sure the clips are level.
3. Turn your bottom shelf on its side. Insert the posts through the corners of the shelf from the bottom. The clips will be wedged into place, creating a solid base.
4. Flip the shelf upright and give it a quick tap in the corners to make sure it's snug.
5. Add clips where you want your next shelf, then lower it into place. (If you have a large shelf or tall posts, it's easier to construct with a friend).
6. Repeat step 5 until all of your shelves are where you want them.
7. If you want to add casters, lay your shelving kit on it's side and unscrew the leveling feet. Insert your wheels, then stand the unit back up.
This video is meant to serve as an instructional guide on how to assemble wire shelving and racks from The Shelving Store. Our products are packaged using corner guards as an added safeguard against damage during shipping. With a storage capacity of up to 800 lbs per tier, these heavy duty racks really make it easy to get organized in any room.
Видео How to Assemble Wire Shelving Racks канала TheShelvingStoreMI
Показать
Комментарии отсутствуют
Информация о видео
Другие видео канала
 Wire Shelving Rack Assembly
 Heavy Duty Wire Shelving Assembly — Bunzl Processor Division
 How to Disassemble Your Wire Shelving
 how to assemble shelving racks with no tools required: Hyper tough unboxing 5 shelf storage rack.
 Part 1 of 3 20200527 Wire shelf ASSEMBLY
 Assembly Video - Metro Wire Shelving
 Wire Shelving Caster & Wheel Installation Tutorial - Fits All Major Brands of Wire Racks
 Whitmor Supreme 5 Tier Shelving, Chrome (unboxing & installation)
 How to Disassemble Wire Shelving
 Pristine heavy duty clothes rail with shelves assembly video
 Open Pantry Organization
 Assembling Shelfing Units
 How to: Assemble a Whalen 5 Shelf Rack
 TRINITY EcoStorage™ 6-Tier NSF Wire Shelving Rack | TBFZ-0945
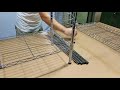 Callas 4-Tier Home & Kitchen Shelf Assembly Video
 تشكيلات واسعة من وحدات التخزين المتنقلة متوفرة في ساكو وباسعار تناسب الجميع
 Estantería de Alambre Uline
 Why I Hate Wire shelves & How to Replace them
 Assembling an Amazon Basics Shelf
 How to assemble Sams Member Mark 6 shelf storage rack by yourself Model 016055-1 Item 645658