Scenes in OBS Studio (Free Graphics Included) | Tutorial 8/13
Learn how to make different scenes, set hotkeys, add filters, and much more in OBS Studio. All graphics are available in the free download link.
Next Video .....► https://goo.gl/wTgkUM
Previous Video .....► https://goo.gl/epxFCi
~
FREE DOWNLOADS
Get the files used in our videos here .....► http://goo.gl/Fl4Isp
Overlay Maker .....► http://goo.gl/5R7UTt
~
OBS Studio Download Link: https://goo.gl/71XhD7
View the guide on our website: Coming Soon
Ending Track: https://goo.gl/UKpjkB
~
Support me at https://www.patreon.com/nerdordie
Check out http://NerdOrDie.com
Follow Nerd or Die on Twitter https://twitter.com/nerdspwn
Watch the Nerd or Die Live Stream http://www.twitch.tv/nerdordie
-----
TRANSCRIPT EXCERPT
Hey everyone, in this video we’re going to set up scenes in OBS Studio. I’ll also show you how to customize our graphical assets directly inside of OBS Studio, as well as setup hot keys to make switching between our scenes quick and easy.
Let’s get right into it.
For this video, make sure to check out the link to NerdOrDie.com that will provide you with all of the graphics we’ll be using in our scenes. They’re all completely free. If you enjoy using them, sharing the site or this video on Twitter, Reddit, Facebook., or whatever you use would mean a lot!
Anyways, if you followed the series so far, you’ll have a very strong understanding of how to work with OBS Studio. Scenes will be our collection of different sources - each scene will have a different purpose during our broadcast.
To start, I’m going to download the graphic assets from NerdOrDie.com - the overlay image files are in a .zip, so you’ll need to extract them. I’ll put everything on my desktop. Feel free to save yours anywhere. The files contain a generic overlay - but if you need to further customize your overlay - you can use our Overlay maker, link will be found in the description as well. Let’s first start with an “Intro” scene. Broadcasters generally use this to give time for any viewers to filter in before they start their show. I do want to mention that my base canvas size is 1920x1080 pixels… if yours isn’t you may need to adjust some of the graphics with scaling and positioning.
The first thing I’m going to do is rename our default scene to intro - now, let’s add in our looping background video. Add a media source and name it Background. We’ll leave local file checked, and then browse to find our video background file. Select loop, as we want this file to continuously play in this scene. If you’d like, you can uncheck Restart playback when the source becomes active, but this isn’t necessary with such a small file. This option would help reduce some memory usage, if you’re concerned about that. Hit okay.
Now let’s add in a text source, and name it “Header”. Hit select font and choose any font that you’d like to use, and any styles here as well. I’m going to set the size to 72, hit okay to go back to the font properties. I’m going to type “The Stream Will Begin Shortly” in all caps. Next, I’m going to select my font color. You can choose whatever you like, but I’m going to leave color 1, or the top part of our text o n white, and color 2 which is the bottom part of the text as white as well - hit okay once you’re done with these options. I’m going to then hit Ctrl+D to center this text on my screen. You can also right click the source, go to transform, and then hit “center to screen” here as well.
We have a nice header message, in our scene, but let’s add something about our social media or a general message quickly. Create another text source, call it sub header, but this time make the font a bit smaller, in my version I’ll select 48 - I’ll also choose the same font I was using before. After I have those options selected, I’ll just type in something like “Don’t Forget To Follow!” and then hit Okay. Again, I’ll use Ctrl+D to center my source to the screen. We need to shift this source down in its vertical position. While we could do this by clicking and dragging, let’s do this a more precise way. Right click the source, and go to Transform, Edit Transform. Here we have all sorts of way to preposition our source. I’m going to increase the value of the 2nd input for position, as this is the vertical positioning. This will allow us to keep the text perfectly centered horizontally. Remember, you can type in a value here to go a bit faster, or just click inside and use arrow key up to go a bit faster. Close this box when done.
Видео Scenes in OBS Studio (Free Graphics Included) | Tutorial 8/13 канала NerdOrDie
Показать
Комментарии отсутствуют
Информация о видео
Другие видео канала
 OBS Studio Tutorial (Make Your Streams Look Pro)
 OBS For Brand New Streamers (Creating Scenes, Adding Custom Widgets, and MORE)
 HOW TO MAKE LOWER THIRDS FOR YOUR LIVE STREAM - Using Canva | FULL TUTORIAL
 OBS Countdown Timer
 (UPDATED VIDEO IN DESCRIPTION) How To Green Screen & Record Screen FREE — OBS Studio or ManyCam?
 OBS Studio: Ultimate Presentation Guide (OBS Studio Tutorial for PowerPoint Presentations)
 How To Make ANIMATED Overlays For Free! (inc. Downloads/Templates)
 OBS Scene Switcher | Leverage The Power of Automation
 What Twitch Alert System Should You Use? | Tutorial 9/13
 OBS Green Screen Tutorial 2020
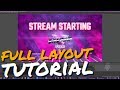 How to build a complete live stream layout: Start to Finish (COMPLETE GUIDE)
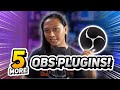 5 OBS Studio Plugins To Make Your Stream Pro!
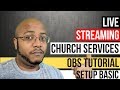 Live Streaming Church Services - OBS Tutorial - Setup Basics
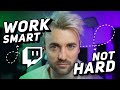 TOP 5 Streaming Things I WISH I Knew When I Started
 How To Setup Scenes in OBS Studio
 Obs Live Stream Tutorial - Add a guest to your Live Stream!
 Make Your Streaming Camera Look Pro! (A Guide for Lighting and Color Correction)
 5 ADVANCED Features You SHOULD Be Using in OBS Studio