How To Screen Print Using Your Cricut
Hey everyone!
My name is Stephanie and I’ve been screen printing for over a year now and I was asked how I screen print using my Cricut so I made this video to try to explain how it’s done.
First make sure you have all the tools you need to begin:
You may purchase these though my affiliate links. It will cost you nothing but will get me some money to continue with my crafting addictions.
A Cricut (or any cutting machine to make your stencil)- https://amzn.to/2Tcr9Ek
Transfer tape- https://amzn.to/2tJETr3
Oracle 651- https://amzn.to/2Uerxic
Chiffon Fabric (I get mine from Hobby Lobby and use the 40% coupon)- https://amzn.to/2T7AddH
Staple gun and staples- https://amzn.to/2Es4nOq
Wooden Frame (Picture frames and Canvas frames work great or you can make your own)
Masking tape- https://amzn.to/2ErCtCd
Scissors- https://amzn.to/2Vz4SgR
Squeegee- https://amzn.to/2SD4Imt
Ink- https://amzn.to/2HbvsZf
Knife (To take ink out of container)- https://amzn.to/2EH7cg0
Weeding tool- https://amzn.to/2H6LbsN
Here we go!
Step 1: Make your screen. Be sure to pull before you staple to get a tight screen. Try not to get it really tight because you can rip it while doing your design.
Step 2: Make your design and send it to your cutter.
Step 3: Weed the INSIDE of your design so you can create a stencil.
Step 4: Apply your transfer tape and burnish it. Cut off the extra transfer tape.
Step 5: Put the stencil on the inside of your screen. You can tell it’s the inside by seeing the staples at the top and the wood is exposed on the sides.
Step 6: Pull off the transfer tape. This is really hard to do so take your time and hold the stencil so it doesn’t lift as you take off the transfer tape. If you pull sideways it’s easier to remove the transfer tape. Be careful that you don’t lift the stencil because the ink will leak through any lifted parts. If a part of a letter comes off just be sure to stick it where it belongs and burnish it again.
Step 7: Tape off the sides of the stencil so you don’t get ink on your project.
Step 8: Put your project under your screen and center it where you want it to go.
Step 9: Add ink to the top of your design (a little goes a long way)
Step 10: Using your squeegee apply pressure and pull the ink down. Repeat a few times with the ink that’s on your squeegee so you know you got the entire design.
Step 11: Pull the screen off your project. (I like to lift it at an angle while I hold the shirt)
Step 12: Wash your screen and tools
Step 13: Allow your ink to air dry (Or blow dry it if you can’t wait which is what I do)
Step 14: Heat set your design. (I use my Easy Press at 310 degrees for 15 seconds) Before I had my heat press I would wait for them to dry and then stick them in the clothes dryer.
You now have completed your screen printing!
Видео How To Screen Print Using Your Cricut канала Stephanie
Показать
Комментарии отсутствуют
Информация о видео
Другие видео канала
 How To Screen Print Multiple Colors with Cricut
 How to Start a T-Shirt Business | Stahls' TV
 Using Oracal 651 as a Stencil for Screen printing Leggings with the Cricut Vinyl Cutter Machine
 Make Your Own Screen Printing Screens EASY
 How To Make Reusable Stencils With Cricut
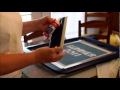 How to screen print with the Yudu Machine By ScrappinCricut!
 SCREEN PRINTING 2017
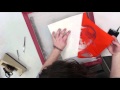 Screen Printing with the Vinyl Cutter
 How to Screen Print Multiple Colors using a Vinyl Cutter
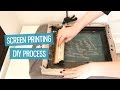 How to screen print t-shirts at home (DIY method) | CharliMarieTV
 How To Screen Print Multiple Colors With Cricut
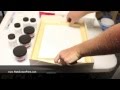 BEST SPEEDBALL Screen Printing COMPLETE Guide!
 How to Screen Print Your Own T-Shirts - Easy DIY Screen Printing Projects
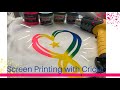 HOW TO SCREEN PRINT WITH YOUR CRICUT | Tam’s Sweet life
 How to Screen Print using Vinyl
 Screen Printing: A Step by Step guide in Printing...
 Using Oracal 651 Vinyl as a Stencil For Screen Printing T-Shirts with the Cricut Cutting Machine
 Screen Printing with a vinyl stencil
 How to Screen Print Using Your Cricut and Vinyl | Screen Printing for Beginners
 How To Make Your Own Screens For Screen Printing