Better Way to Mount Flexible Solar Panels on RV (2019)
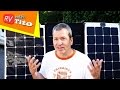
Learn how to mount a semi flexible solar panel on an RV so it’s easily REMOVABLE, has an AIR GAP for cooling, and requires NO DRILLING into the roof. UPDATE: Watch the 1 Year Follow Up https://youtu.be/enEHXnfUyhI.
Download my FREE RV SOLAR PANEL GUIDE
https://www.rvwithtito.com/solar-panel-guide
GET 10% OFF SUNPOWER Branded Flexible Solar Panels (US Based)
Use "RVWITHTITO" coupon code at http://www.SunPoweredYachts.com
110W Sunpower Flex Panel: https://www.sunpoweredyachts.com/product-page/sunpower-e-flex-110watt-panel
170W SunPower Flex Panel: https://www.sunpoweredyachts.com/product-page/sunpower-e-flex-170watt-panel
RV SOLAR PANELS AND EQUIPMENT I USE
https://rvwithtito.com/parts/rv-solar-power
PARTS YOU'LL NEED FOR THIS PROJECT
- Corrugated Plastic Sheet (size of panel)
- 6 x 1” Stainless Steel Carriage Bolts (¼ - 20)
- 6 x ¼” x 1” Stainless Steel Washer
- 6 (or 12) ¼” - 20 Stainless Steel Bolts (double for locking)
- 6 x ¼” - 20 Stainless Steel Wingnuts (optional if using bolts)
- 4 x ¼” Lock washers
- Aluminum transition strip (for front edge)
- Lock Tight (optional)
- 3M VHB Tape (https://amzn.to/2FzZK6D)
- 4" Eternabond Tape (https://amzn.to/2JfezN0)
HOW TO MAKE THE SOLAR PANEL MOUNT
(1) Cut insulator plastic sheet to fit solar panel
(2) Drill ¼” holes through grommets
(3) Cutout bottom of pla7stic insulator under each hole with utility knife deep enough for carriage bolts to be flush with surface (don’t cut all the way through)
(4) Cut six 2” sections of aluminum transition as anchors for the bolts (one for each hole)
(5) Round edges and remove sharp edges of aluminum anchor pieces
(6) Cut 2” x ¼” notches by each hole for each aluminum anchor
(7) Cut front-edge lift cover to the width of the solar panel (smooth edges)
(8) Drill ¼” holes in all anchors
(9) Pre-assemble insulator, bolts and anchors (leave solar panel off for now)
NOTE: Holes are not necessary for the front lift cover. The bolts will not go through the lift cover so that it can be easily lifted off. The lift cover will be held in place by the large washers under each front edge mounting point. Cut grooves if desired around the bolts.
INSTALLATION INSTRUCTIONS
(1) Clean roof surface with rubbing alcohol
(2) Position pre-assembled plastic insulator on roof
(3) Secure edges with VHB tape (A couple pieces near each anchor point on each side should do)
(4) Position solar panel over mount aligning the bolts through the grommets
(5) Cut a section of Eternabond Tape to cover each anchor point
(6) Cut a small hole through each piece of tape for the bolt to go through
(7) Remove the tape backing for each secure the tape over each mounting point
(8) Position the front-edge lift cover over the front edge and secure front with Eternabond
NOTE: The Eternabond tape should function as a hinge to allow the front-cover to be easily lifted off.
(9) Install the washers and bolts on each anchor point
NOTE: If you use wingnuts, consider adding some Lock Tight on the threads. You can also double up the bolts for added security.
#rvwithtito #rvsolardiy #diy #rvlife #vanlife #solar #offgrid #doityourself #howto #boondocking #ideas
This video also covers these topics:
Flexible solar panel air gap, Sunpower flexible solar panels, semi flexible solar panels, Flexible solar panels for rv, flexible solar panels for motorhome, Flexible solar panel for rv roof, flexible 12v solar panels, do flexible solar panels get hot, 100w flexible solar panel, problems with flexible solar panels
DISCLAIMER
The opinions expressed in our videos are our own or from a contributor. Before taking on any project or making a large purchase, we recommend you do your own research and consult a professional for advice. We are NOT liable for any damage to your RV or injury incurred as a result of following our tips, advice or instructions. We are not RV professionals or certified technicians. We are simply RV owners who work on our own RVs and have a desire to share what we learn with others. Be responsible and know your limits.
AFFILIATE DISCLAIMER
This video may include links to merchants with affilliate programs who pay us a commission on purchases made or actions taken after clicking the link. We are a participant in the Amazon Services LLC Associates Program. As an Amazon Associate we earn from qualifying purchases.
Видео Better Way to Mount Flexible Solar Panels on RV (2019) канала RV with Tito DIY
Показать
Комментарии отсутствуют
Информация о видео
Другие видео канала
 Flexible Solar Panels - What To Look For
 How To Remove Eternabond Tape
 7 DIY RV Upgrades That Had The BIGGEST IMPACT
 (Update) One Year Later - Flexible Solar Panel Installation on RV
 Van Conversion Ideas | Lee's Incredible Van Build 2 *FULL TOUR*
 Mono vs Poly vs Flexible Solar Panel + Series vs Parallel Wiring
 LiFePO4 Battery Buyers Guide! Battleborn vs. Renogy vs. DIY vs. Simpliphi and more!
 Flexible Solar Panels: What I Learned
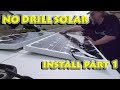 Solar Install Pt 1: No Drill Solar Panel Install On Fiberglass RV Camper Van Roof Using 3M VHB Tape
 Flexible Solar Panel FAILED after THREE YEARS on my RV
 How to Install SunPower Flexible Solar Panels
 Camper Solar Setup Tutorial - How to Solar Power your RV, Camper Van, & Truck Camper
 BOONDOCKING with LITHIUM vs AGM - Which is Better?
 Was It WORTH IT?? - All Our RV Upgrades Review - Solar, Toilet, Booster & More
 Electricity Explained: Volts, Amps, Watts, Fuse Sizing, Wire Gauge, AC/DC, Solar Power and more!
 110 Watt SUNPOWER Flexible Solar Panel vs HQST and RENOGY (Testing and Review)
 How To Connect RV Solar Panels - Parallel vs Series - MPPT vs PWM
 12 Volt DC System Rebuild for RVs
 Cheap VS Expensive Solar Panels | 12v Touring | Project Cyan
 Flexible Solar Panel Output Test: Sunpower Cells After A Year vs. Traditional Mono Flex Panel