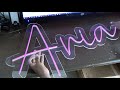
How to Make a Neon Sign LED Part 2 (feat. CNC Cut Back Panel)
Here a sign maker with over 30 years experience in the field and 12 years experience selling and developing LED products for the signage industry explains how you can create a custom made LED neon sign using LED Neon Flex.
You'll need the following items:
Acrylic panel (between 5mm and 10mm thick) with your design cut out using a CNC, approximately 3.5mm deep and 6mm wide.
LED Neon Flex - we've used 6mm white neon flex with a 10mm cut point: https://www.ledsignsandlighting.co.uk/winged-neon-flex
Tinning Cable:
https://www.ledsignsandlighting.co.uk/Pre-soldered-cable
Rapid, super strength adhesive. We use MitreBond:
https://www.ledsignsandlighting.co.uk/mitrebond-single
End caps to seal the ends of the neon flex (https://www.ledsignsandlighting.co.uk/end-caps)
Free form neon flex:
https://www.ledsignsandlighting.co.uk/free-form-neon-5mm
https://www.ledsignsandlighting.co.uk/free-form-neon-8mm
https://www.ledsignsandlighting.co.uk/free-form-neon-stand-offs
See Part 1 of our tutorial here https://youtu.be/kPG_N9BZHQQ
Thanks for watching!
Spectron LED Ltd
Видео How to Make a Neon Sign LED Part 2 (feat. CNC Cut Back Panel) канала Spectron LED
Показать
Комментарии отсутствуют
Информация о видео
Другие видео канала
 LED neon Sign with clear acrylic backer
 how to make neon sign complete art solutions maaz Ranchi
 DIY Neon LED sign NO Soldering
 How To Make a Neon Sign
 How To Make a Custom Neon LED Sign!
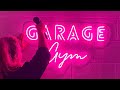 DIY Neon LED Rope Sign for just £70! | DIY with Oh Abode | DIY For Beginners
 Building a neon last name sign for a wedding
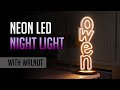 Making a NEON LED Night Light with Walnut
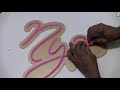 NY....Pink led neon Sign on a white Acrylic Backer
 ✔️Cómo HACER un Letrero de Neon Flex ⚡
 Reitersign tell you how to make led flex neon sign
 "Scarlett" Pink LED neon Sign with clear acrylic backer
 How to make led Neon sign
 Neon Led Sign Making | Acrylic Neon Led Light Sign Board | Flame Productions
 Como hacer Letrero Led paso a paso. 🏪🧰
 How to Make an LED Neon Sign In Personalized Handwriting
 How Neon Signs Are Made for Restaurants — How to Make It
 TUTORIAL MERAKIT NEON FLEX DARI AWAL SAMPAI PASANG COCOK UNTUK PEMULA
 How I made DIY Neon LED sign with a Cricut and no soldering.
 Belajar Membuat Neon Sign Keren VLOG318