etrailer | Rear View Safety Blind Spot Sensor System Installation - 2018 Toyota Avalon
Click for more info and reviews of this Rear View Safety Backup Camera:
https://www.etrailer.com/Backup-Camera/Rear-View-Safety/RVS-BES02.html
Check out some similar Backup Camera options:
https://www.etrailer.com/dept-pg-Backup_Camera-sf-Alerts_and_Sensors.aspx
Search for other popular Toyota Avalon parts and accessories:
https://www.etrailer.com/vehicle/2018/Toyota/Avalon
https://www.etrailer.com
Don’t forget to subscribe!
https://www.youtube.com/user/etrailertv
Full transcript: https://www.etrailer.com/tv-install-rear-view-safety-blind-spot-sensor-system-2018-toyota-avalon-rvs-bes02.aspx
Speaker 1: Today on this 2018 Toyota Avalon, we'll be having a look at and showing you how to install the Rear View Safety Blind Spont Sensor System, part number RVS-BES02.Here's what our blind spot detection system look like installed on the rear of our vehicle. Keep in mind, it's going to look identical on the other side. We'll have one sensor for each side of the vehicle. Here's what it looks like inside of the vehicle. We'll have two indicator lights like this one, which typically you'll mount on your A pillar so you can see them easily while you're driving. The one on the driver side will be for your driver side blind spont, and the one on the passenger side will be for your passenger side blind spot.Now, the reason you're going to want this system is if you have a vehicle that's not factory equipped with blind spot indication, this does make it a lot safer when you're trying to drive down the highway and change lanes.
You don't want to accidentally merge into somebody or change lanes into them if they're in your blind spot. This will alert you to their presence. Now we'll give you a brief example of how it's going to work on the driver side of the vehicle. Passenger side's the same way.I'm going to walk towards our blind spot zone, and you'll see the light come on. You'll notice the light comes on when someone's in the blind spot area.
Now, if we turn on our driver side turn signal and we go towards our blind spot area, we'll get an audible beep to go along to alert us to their presence. Now we have a dash-mounted speaker to alert us with a beeping noise when something is in our blind spot when the turn signal is on. We can disable this by sliding a switch on it to the off position, and we have a low volume level and a high volume level.Now, what sets this apart from other options out there on the market is that this is a very simple install. It provides a very clean and factory-like appearance, and we don't have to worry about finding a place to mount cameras or display screen, so we have a very uncluttered dash. It also involves a lot less wiring than some other systems out there.
It's a very cost-effective solution for you.To begin our install, we went ahead and made a mark on the back bumper where we're going to need to drill a hole to mount our sensor. We made sure we made the mark according to the instructions, and we've already verified that there's nothing that's going to interfere with the sensor behind the bumper cover of this area. Now keep in mind, everything you do on one side you're going to repeat on the other side. Now we're going to take our larger diameter hole saw, line it up with the mark that we made, and drill our hole.Now we'll get our sensor oriented for installation. We'll first start off by taking our wiring harness here and plugging in the back of a sensor.
It only goes in one way. Now we'll take our grommet here, the flat side will face against the sensor here and just wrap around it like that. This is ready to be installed now.Our mount for the sensor, there's an arrow. This needs to face up in the vehicle. This will go into the bumper like this, be on the outside of it, and then our sensor only goes in one way. It'll go in like this and lock in place into here. Now our arrow's facing straight up. We'll take our bracket and just push it until it snaps into our bumper, like so. Now we'll take our sensor, go up from underneath our bumper cover, and lock it into the bracket. Just push it until it snaps into place. Snapped in, we're good to go.Now we need to determine where we're going to mount our indicator lights inside the vehicle. Now typically, you'll want to have these on the A pillar. We're going to mount ours on this flat surface here, in this general area. Now, in order to do this, we're going to have to remove the A pillar from the vehicle and we'll show you how to do that now. We're going to grab our weather stripping on our door and pull it away from our A pillar. Now we can grab the A pillar and we'll pull it away from the vehicle.Now, we have this tether here. This holds the A pillar in place in case our side impact air bag ever has to deploy. That way, this doesn't come and injure us as this air bag comes down. We'll have to remove this tether. It's actually pretty simple to do. We can just grab the end of it, and we'll twist it 90 degree
Видео etrailer | Rear View Safety Blind Spot Sensor System Installation - 2018 Toyota Avalon канала etrailer.com
Показать
Комментарии отсутствуют
Информация о видео
Другие видео канала
 etrailer | Stealth Hitches Hidden Towing Kit Trailer Hitch Installation - 2022 Hyundai Palisade
 etrailer | Kuat Hitch Bike Racks Review - 2023 Hyundai Santa Fe
 etrailer | Rhino-Rack Camper Shell Heavy-Duty Bar Roof Rack Review
 etrailer | Thule T2 Pro XTR Bike Rack Review
 etrailer Radius End 4-Leaf Slipper Spring Installation
 etrailer | Hollywood Racks Hitch Bike Racks Review - 2022 Tesla Model Y HR4000
 etrailer | Curt Hitch Receiver Reducer Sleeve Review
 etrailer | Review of ARB Tow Hooks - Recovery Point For Toyota Tacoma - ARB45YR
 etrailer | Yakima SkyBox NX 18 Rooftop Cargo Box Review
 Air Lift LoadLifter 5000 Ultimate Rear Air Helper Springs Installation - 2021 Chevrolet Silverado 35
 Review of ASA Electronics RV Air Conditioners - Advent Air White Low Profile System - ASA49YR
 etrailer | B and W Companion OEM 5th Wheel Trailer Hitch Installation - 2020 Ford F-250 Super Duty
 etrailer | WeatherTech Front Auto Floor Mat Review - 2021 Chevrolet Silverado 1500
 etrailer | Titan Chain Diamond Alloy Snow Tire Chains Installation - 2019 Subaru Outback Wagon
 etrailer | Inno Shadow 16 Rooftop Cargo Box Review - 2022 Subaru Outback Wagon
 Review of B and W Replacement Clamping Bar For Biker Bar Harley Davidson Touring - BWMC2301B
 etrailer RV Bumper Cargo Carrier Review e96ZR
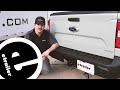 etrailer | Curt Class III Trailer Hitch Installation - 2022 Ford Maverick
 etrailer | Curt A20 5th Wheel Trailer Hitch Installation - 2022 Ram 2500
 etrailer | Curt Ball and Safety Chain Loops Kit Installation- 2019 Ram 3500
 etrailer Trailer Hitch Installation - 2020 Acura MDX